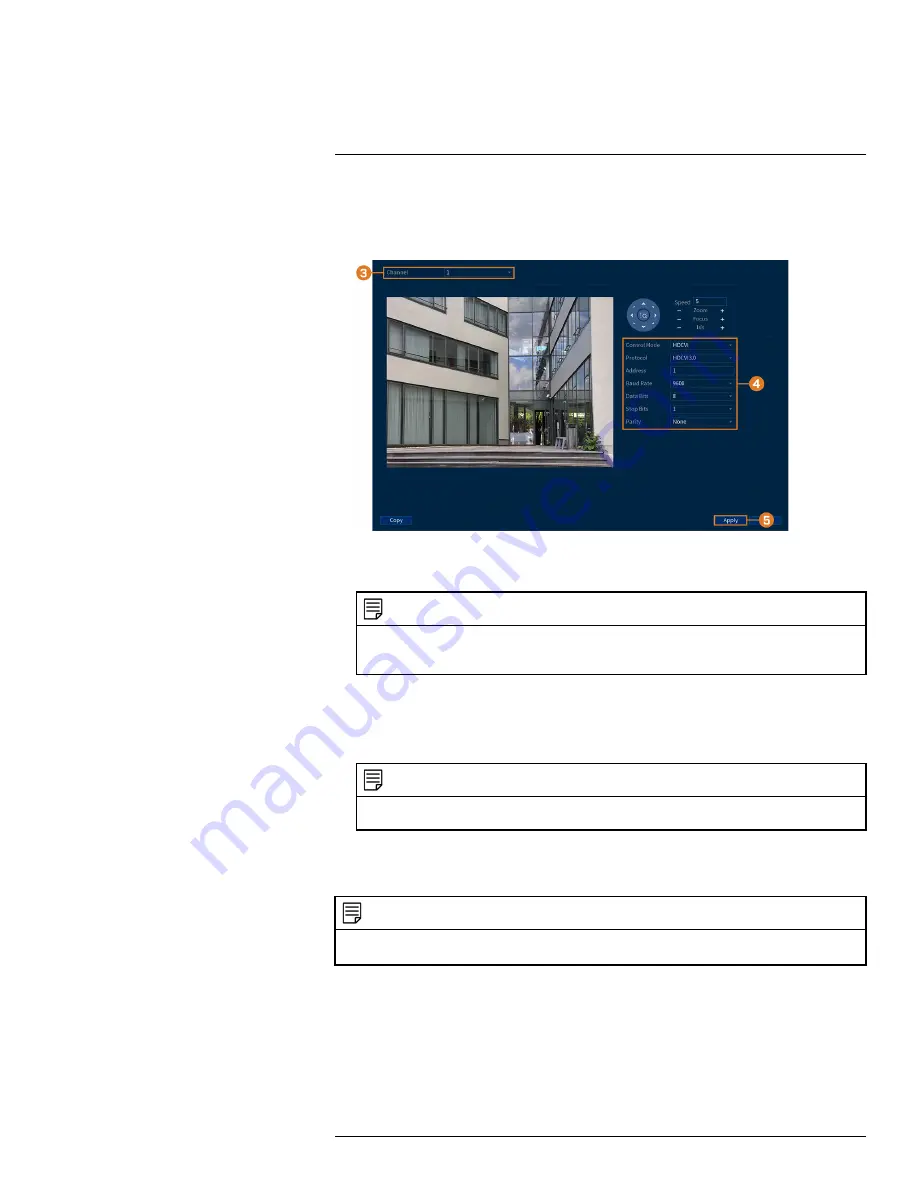
STEP 2: Camera configuration
1. From the Live View display, right-click to open the Quick Menu, then click
Main Menu
.
2. Click
CAMERA
, then click the
IMAGE SETTINGS
tab.
3. Select the channel you want to configure.
4. Configure the highlighted fields as needed.
NOTE
For Lorex HD PTZ cameras, there is no need for configuration — leave all fields at their default values. For
third-party PTZ cameras, select
Serial
next to
Control Mode
. For the correct settings to use in the remaining
fields, please reference your camera documentation.
5. Click
Apply
.
6.
(OPTIONAL)
Click
Copy
to apply the settings for the current channel to one or more other
channels (see 14.11
Copying Settings to Another Channel
, page 79 for full instructions on us-
ing the copy function).
NOTE
If you copy settings over to connect multiple PTZ cameras, please note that each camera requires a unique ad-
dress. You cannot use the same address for 2 different cameras.
17.2
Basic PTZ Controls
Controlling PTZ cameras.
NOTE
Ensure you have completed initial setup of your PTZ camera in order to control the camera using the recorder. See
17.1
Connecting PTZ Cameras to the Recorder
for more details.
To access the PTZ controls:
•
Open the Live View screen for your PTZ camera in single-channel view (fullscreen). Right-
click to open the Quick Menu, then click
Pan/Tilt/Zoom
.
•
Right-click again to close PTZ controls.
To use the PTZ controls:
#LX400111; r. 1.0/55872/56018; en-US
83
Содержание D841 Series
Страница 1: ...User Manual D841 Series...
Страница 2: ......
Страница 3: ...User Manual D841 Series LX400111 r 1 0 55872 56018 en US iii...
Страница 30: ...Recording 8 4 Click Apply LX400111 r 1 0 55872 56018 en US 22...
Страница 46: ...Motion Detection 11 LX400111 r 1 0 55872 56018 en US 38...
Страница 113: ......


