5. Choose how the system will react when the selected event occurs:
•
Show Message:
Error message will appear on the recorder’s display.
•
Record Channel:
For
Net Disconnection
events only. Select the numbered tiles next to
this option to record video from the corresponding channels. Set the length of recording
following a network disconnection event in the
Post_REC
field.
•
Buzzer:
The recorder will sound an audible alarm.
•
Send Email:
Send an email notification with details on the event (requires email configura-
tion — see 14.6.3
6. Click
Apply
.
14.3
Backup
See chapter 10
14.4
Display
Set the system’s monitor resolution, configure Sequence mode, and other display settings.
14.4.1
Setting the Recorder’s Output Resolution
The first time you power up the system and complete the Lorex Setup Wizard, the system will au-
tomatically match the resolution of the connected monitor. You can set the recorder to a different
output resolution at any time.
CAUTION
If you need to switch the monitor used with the system, make sure you set the recorder to an output resolution sup-
ported by the new monitor before switching.
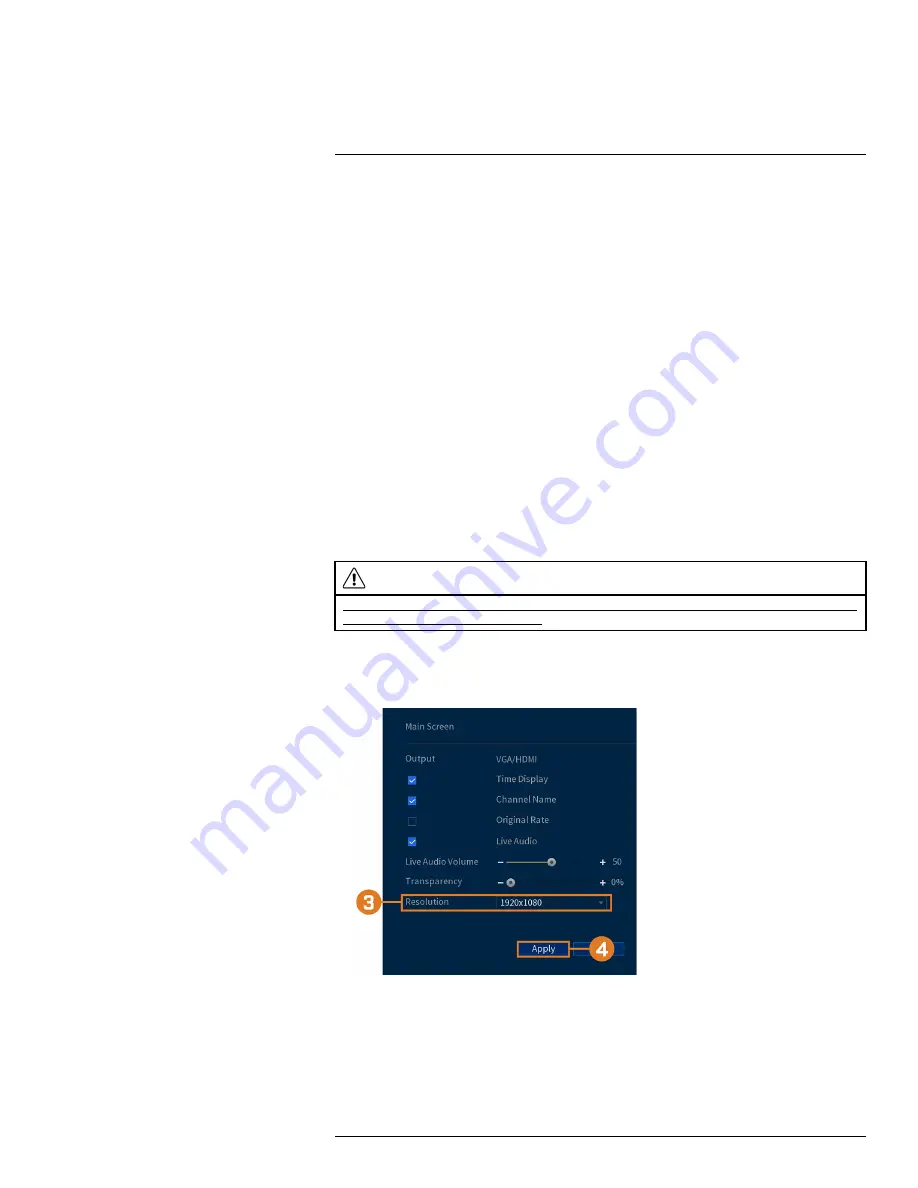
To change the output resolution:
1. From the Live View display, right-click to open the Quick Menu, then click
Main Menu
.
2. Click
DISPLAY
, then click the
DISPLAY
tab.
3. Set the resolution to match the highest resolution supported by your monitor. For example, se-
lect
3840×2160
for 4K monitors, or
1920×1080
for 1080p.
4. Click
Apply
. The recorder will restart before changes take effect.
14.4.2
Listen–In Audio
Enable and set volume for camera audio feeds in the Live View display.
#LX400111; r. 1.0/55872/56018; en-US
52
Содержание D841 Series
Страница 1: ...User Manual D841 Series...
Страница 2: ......
Страница 3: ...User Manual D841 Series LX400111 r 1 0 55872 56018 en US iii...
Страница 30: ...Recording 8 4 Click Apply LX400111 r 1 0 55872 56018 en US 22...
Страница 46: ...Motion Detection 11 LX400111 r 1 0 55872 56018 en US 38...
Страница 113: ......


