


Chapter
2
Product
Description
2
2
2
P
P
r
r
o
o
d
d
u
u
c
c
t
t
D
D
e
e
s
s
c
c
r
r
i
i
p
p
t
t
i
i
o
o
n
n
This
chapter
describes
the
phone
features
and
other
accessories
to
familiarize
yourself
with
the
functions
of
your
WiFi
phone.
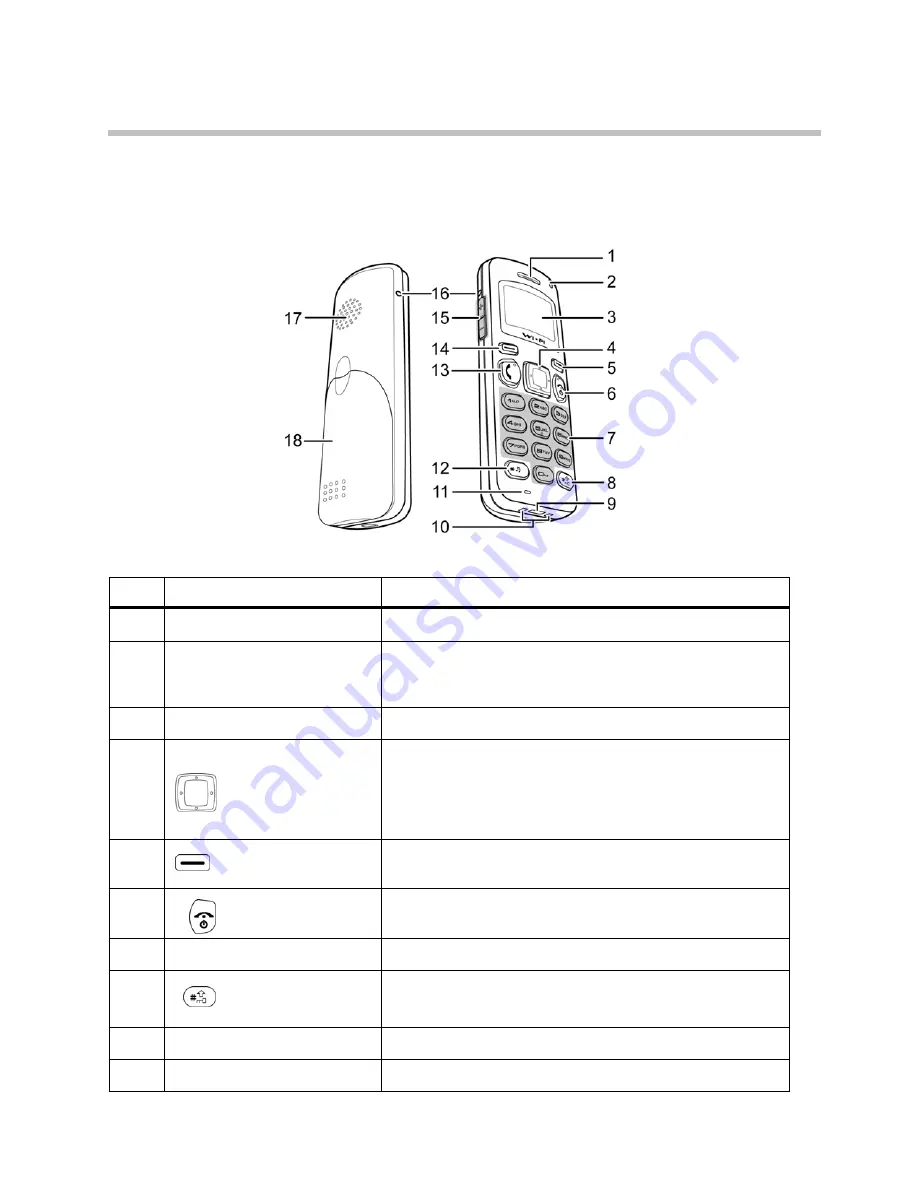
No.
Item
Description
1
Receiver
Transmits
voice
output
2
Charge
Status
Indicates
charge
status:
Off—charger
off
Red—charger
on
3
LED
Display
112
x
64
pixel
monochrome
graphics
display
with
LED
backlight
4
Navigation
Keys
Navigates
through
menus
Left—
select
Profile;
decrease
the
speaker
volume
during
a
call
Right—
call
log;
increase
the
speaker
volume
during
a
call
Up—show
dialed
numbers
Down—Phonebook
5
Right
Soft
Key
Displays
the
Phonebook
Clears
input
/
cancel
or
Mute
during
a
call
6
Power/End
Key
Power
on
or
power
off
End
conversation;
exit
(back)
7
Numeric
Key
Enter
numbers
and
text
8
Pound
Key
Change
text
output
in
text
mode.
For
example:
AB,
ab,
12,
Ab.
Press
and
hold
to
enable
key
lock
9
USB
Jack
Connects
mini
USB
/
charger
jack
10
Charging
Pad
Contacts
to
the
charging
cradle
Содержание LHVF133
Страница 1: ...WiFi Phone User Manual V 0 2...


