background image

14

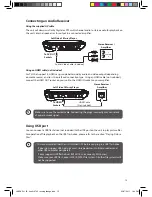
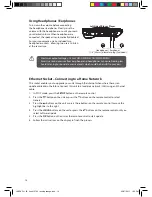
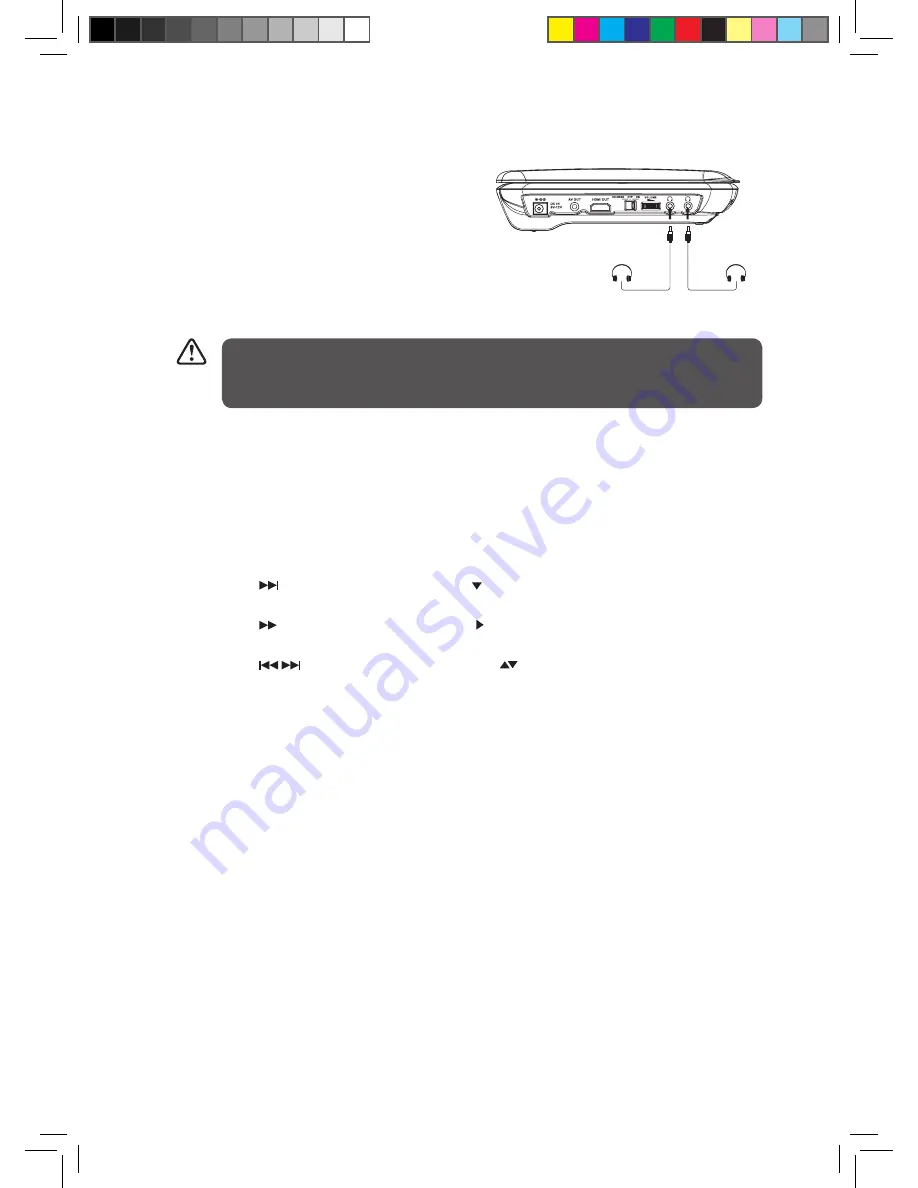
Using Headphones / Earphones

Turn down the volume before connecting 

the headphones/earphones. Slowly raise the 

volume with the headphones on until you reach 

your desired volume. When headphones are 

connected, the speaker is automatically disabled.
For your convenience, we’ve included two 

headphone sockets - allowing two users to listen 

at the same time.

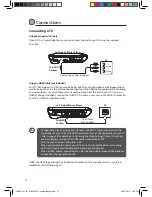
Ethernet Socket – Connecting to a Home Network

This socket enables you to upgrade your unit through the internet when where there is an 

update available in the future. Connect this unit to a local area network (LAN) using an Ethernet 

cable.
1.  In STOP mode, press the SETUP button on the remote control.
2.  Press the 

 button on the unit or press the   buttons on the remote control to select 

General.

3.  Press the 

 buttons on the unit or press the   buttons on the remote control to move the 

highlight bar to the right.

4.  Press the 


 buttons on the unit or press the 

 buttons on the remote control until you 

select Software Update.

5.  Press the OK button on the unit or the remote control to start update.
6.  Follow the instructions on the display to finish the process.

•  Maximum output voltage ≤ 150mV HEADPHONE VOLUME WARNING
•  Excessive sound pressure from earphones and headphones can cause hearing loss. 

Avoid listening to sound at excessive levels which could be harmful to your ears.

Left Side of Blu-ray Player

Headphones / Earphones

[1/8” (3.5mm) diameter plug] (Included)

L9BDVD11_IB_final110705_running change.indd   14

05/07/2011   1:43 PM

Содержание L9BDVD11

Страница 1: ...Portable Blu ray Player Instruction Manual L9BDVD11 L9BDVD11_IB_final110705_running change indd 1 05 07 2011 1 43 PM ...

Страница 2: ...L9BDVD11_IB_final110705_running change indd 2 05 07 2011 1 43 PM ...

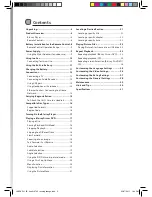
Страница 3: ...18 Stopping Playback 18 Skipping to a Different Track 18 Slow Forward 18 Zooming into an image 18 Fast Forward Fast Reverse 18 Audio Selection 19 Subtitle Selection 19 Angle Selection 19 Using the PiP Picture in picture mode 20 Using a Disc Pop Up Menu 20 Menu Function 20 Displaying Disc Information 21 Using the Picture Menu 21 Locating a Desired Section 21 Locating a specific title 21 Locating a ...

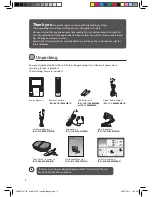
Страница 4: ...to local regulations The following items are included OK PUSH OPEN 2 0 Digital Out Thank you for purchasing your new Logik Portable Blu ray Player These operating instructions will help you use it properly and safely We recommend that you spend some time reading this instruction manual in order that you fully understand all the operational features it offers You will also find some hints and tips ...

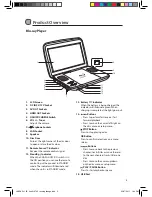
Страница 5: ...is in STANDBY mode 13 Battery Indicator When the battery is being charged the indicator will illuminate green When charging is completed the light goes out 14 Buttons Press to perform fast reverse fast forward playback Press to move the cursor left right on the disc menu or setup menu STOP Button Press to stop playing a disc OK Button Press to confirm selections on a menu screen Buttons Press to m...

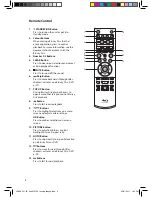
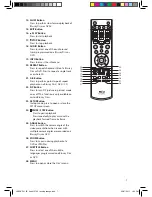
Страница 6: ...POP UP Button During Blu ray Disc playback press to open a menu that lets you control Blu ray Disc playback 8 Button Press to fast reverse playback 9 Buttons Press to highlight selections on a menu screen and adjust certain settings OK Button Press to confirm selections on a menu screen 10 PICTURE Button Press to adjust brightness contrast backlight Screen aspect ratio 11 GOTO Button Press to skip...

Страница 7: ...cture in picture mode on or off This function is only available on certain Blu ray Discs 23 SETUP Button In stop mode press to open or close the SETUP menu screen 24 PAUSE STEP Button Press to pause playback Press repeatedly to play or move the playback forward frame by frame 25 ANGLE Button Press to switch the camera angle of the video presentation when scenes with multiple camera angles are reco...

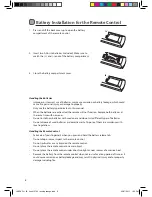
Страница 8: ... not install new batteries with used ones and do not mix different types of batteries Do not dispose of used batteries as domestic waste Dispose of them in accordance with local regulations Handling the Remote Control Take care of your fingernails when you press and hold the battery release tab Do not drop or cause impact to the remote control Do not spill water or any liquid on the remote control...

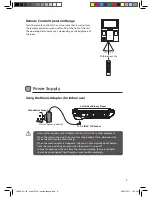
Страница 9: ...ugged in the unit is not completely disconnected from the main power supply even when the power is turned off In order to disconnect the unit from the mains completely the mains adapter should be disconnected from the mains socket outlet completely Remote Control Operation Range Point the remote control at the unit no more than 2 metres from the remote control sensor and within 40 of the front of ...

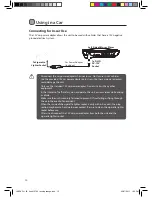
Страница 10: ...ly use the included 12V car power adapter Do not use it with any other equipment In the interest of traffic safety do not operate this unit or view videos while driving a vehicle Make sure the unit is securely fastened to prevent it from falling or flying through the air in the event of an accident When the inside of the cigarette lighter socket is dirty with ash or dust the plug section may becom...

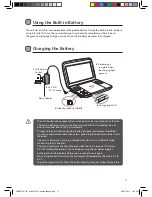
Страница 11: ...t be considered and local rules or laws governing the disposal must be strictly followed The built in battery can only be recharged when the unit is in CHARGE mode while using the AC adapter The built in battery cannot be recharged when the unit is in power ON mode Do NOT recharge the battery in the vehicle by using the car power adapter Recharge the built in battery before you are ready to use it...

Страница 12: ...ect the HDMI OUT socket on your unit to the HDMI IN socket on your TV or HDMI compatible display Configure the Video Setup options found in the SETUP menu to best match the capabilities of your TV Set the HDMI resolution to match the capabilities of your TV refer to page 26 for details on Customising the Video Settings Note this setting can be selected only when the HDMI cable is connected to a TV...

Страница 13: ...B hard disk mass storage devices multi card readers and other USB computer peripherals It only supports USB flash drives FAT32 16 max capacity 32G bytes Make sure your USB flash drive is FAT16 FAT32 file system All other file systems will not be supported Make sure to use the correct cable Connecting the plugs incorrectly may cause lack of signal or weak signal Using an HDMI cable not included For...

Страница 14: ...he remote control 2 Press the button on the unit or press the buttons on the remote control to select General 3 Press the buttons on the unit or press the buttons on the remote control to move the highlight bar to the right 4 Press the buttons on the unit or press the buttons on the remote control until you select Software Update 5 Press the OK button on the unit or the remote control to start upd...

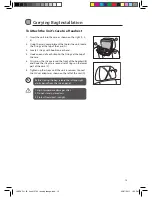
Страница 15: ...adrest B and hook the straps to a second set of rings on the lower part of the case C 6 Tighten up the straps until the unit is secured Connect the 12V car adapter as shown on the left of the unit D 1 High temperature damages discs 2 Do not store in closed cars 3 Protect from direct sunlight Before closing the bag release the left and right elastic bands from the screen panel 2 3 1 Carrying Bag In...

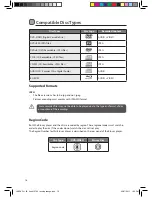
Страница 16: ...be jpg and not jpeg Pictures encoding must comply with JPEG ISO format Region Code Both the Blu ray player and the discs are coded by region These regional codes must match in order to play the disc If the codes do not match the disc will not play The Region Number for this Blu ray player is described on the rear panel of the Blu ray player Disc Type DVD VIDEO Blu ray Disc Region code Some recorde...

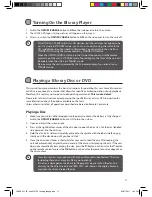
Страница 17: ...g up Gently push the disc down until you hear a click 5 Close the disc door It takes a short while for your unit to load the disc After loading the unit will automatically display the main menu of the disc or start playing the disc If the unit does not automatically start playing the disc press the button on the unit or the button on the remote control or press the OK button on the unit or the rem...

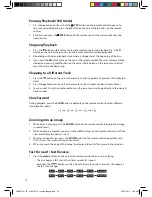
Страница 18: ... the unit or the remote control to advance titles chapters tracks 3 For an audio CD use the number buttons on the remote control to go directly to the desired track number Slow Forward During playback press the SLOW button repeatedly on the remote control to select different slow playback speeds 1 x 32 1 x 16 1 x 8 1 x 4 1 x 2 Zooming into an image 1 While a disc is playing press the ZOOM button o...

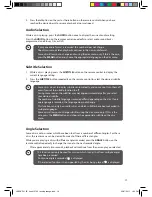
Страница 19: ...nge This function can only be used for discs on which subtitles have been recorded in multiple languages Some discs allow you to change subtitles using the disc menu only If this is the case press the MENU button and choose the appropriate subtitle on the disc menu Subtitle Selection 1 While a disc is playing press the SUBTITLE button on the remote control to display the current language setting 2...

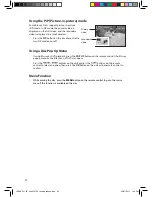
Страница 20: ...or DVD playback press the POP UP button on the remote control the Blu ray popup menu or the title menu of DVD disc opens Press the buttons on the unit or press the buttons on the remote control to select an option then press the OK button on the unit or the remote control to confirm Menu Function While playing the disc press the MENU button on the remote control to go to the mains menu if the func...

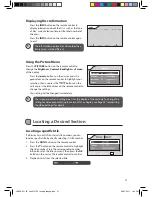
Страница 21: ...it The information displayed for discs other than Blu ray Discs will be different The screen aspect ratio setting here is for the display of the unit only To change the setting for video output setting for external TVs or display see Page 26 Customising the Video Settings for details Using the Picture Menu Press the PICTURE button on the remote control to change the Brightness Contrast Backlight a...

Страница 22: ...fic time You can move to a specific location by entering its corresponding time hours minutes seconds 1 Press the GOTO button on the remote control 2 Press the button on the remote control to select Time 3 Press the button on the remote control to highlight time 4 Enter the corresponding number 0 9 buttons for the setting point you want then press the OK button on the unit or the remote control to...

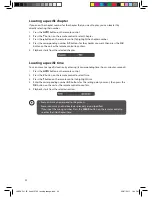
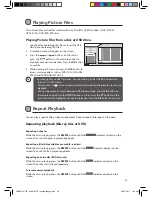
Страница 23: ...d disc mode press the R button on the remote control then the buttons on the unit or the buttons on the remote control to highlight your desired selection Press the OK button to confirm Repeat Playback You can play a specific title or chapter repeatedly Chapter repeat title repeat A B repeat Repeating playback Blu ray Disc or DVD Repeating a chapter While the disc is playing press the REPEAT butto...

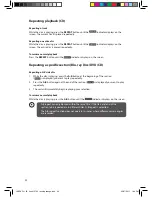
Страница 24: ... While the disc is playing press the A B button at the beginning of the section is displayed you want to play repeatedly 2 Press the A B button again at the end of the section is displayed you want to play repeatedly 3 The unit will immediately begin replaying your selection To resume normal playback While the disc is playing press the A B button until the indicator displays on the screen A B repe...

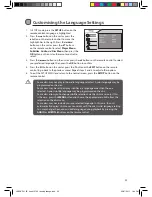
Страница 25: ...d 3 to adjust other options 5 To exit the SETUP MENU and return to the normal screen press the SETUP button on the remote control Some discs may not play in the audio language selected A prior language may be programmed on the disc Some discs may be set to display subtitles in a language other than the one selected A prior subtitle language may be programmed on the disc Some discs allow you to cha...

Страница 26: ...able picture size is determined by the disc Therefore the playback picture of some discs may not conform to the picture size you select View Mode Selecting options if you are connecting the unit to an external TV Fill Pillarbox Letterbox modes are available for your choice 4 3 Fill mode This selection will allow you to adjust the video vertically in linear proportion to fill the entire screen Pan ...

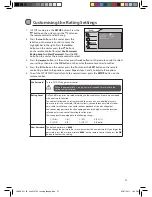
Страница 27: ... button on the remote control Use Password To turn ON OFF the parental control When the parental lock is on a password is needed for every time the rating setting is altered Rating Level DVDs and Blu ray discs are rated according to their content and some are equipped with a password function The contents allowed by a rating level and the way a disc is controlled may vary from disc to disc For exa...

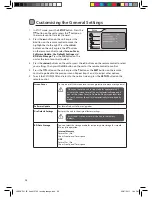
Страница 28: ...the previous menu Repeat steps 2 and 3 to adjust other options 5 To exit the SETUP MENU and return to the normal screen press the SETUP button on the remote control Screen Saver To turn on or off the screen saver screen protection to prevent image burn When you leave the unit in stop mode for approximately 5 minutes the screen saver of the unit automatically appears if you set the Screen Saver to ...

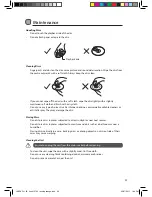
Страница 29: ...rs or antistatic spray They may damage the disc Storing Discs Do not store discs in places subjected to direct sunlight or near heat sources Do not store discs in places subjected to moisture and dust such as a bathroom or near a humidifier Storing discs vertically in a case stacking discs or placing objects on discs outside of their cases may cause warping Cleaning the Unit Ensure to unplug the u...

Страница 30: ...ry adjusting this No picture The region number of the disc doesn t match the region number of this unit For Blu ray disc The picture is not clear The disc is dirty Gently clean the disc The disc is scratched Please adjust the display s brightness contrast backlight and screen aspect ratio using the Picture button on the remote control Loud hum or noise is heard The plug and sockets are dirty Wipe ...

Страница 31: ...le 1 1 BD Live not supported Signal System PAL Frequency Response 20Hz to 20 kHz Signal to Noise Ratio More than 75 dB ANALOG OUT connectors only Dynamic Range More than 75 dB DVD CD Battery Parameters Battery Specifications Output 7 4V Charge Discharge Time Standard charge time 4hr 5hr Features and specifications are subject to change without notice If the unit is not working properly Turn it off...

Страница 32: ...vents Do not install or place this unit in a bookcase built in cabinet or in another confined space Ensure the unit is well ventilated Safety Always disconnect the unit from the mains supply before connecting disconnecting other devices or moving the unit Unplug the unit from the mains socket during a lightning storm Mains Adapter Cable Make sure the unit is not resting on top of the mains adapter...

Страница 33: ...in the unit s enclosure that may be of sufficient magnitude to constitute a risk of electric shock The exclamation point within an equilateral triangle is intended to alert the user to the presence of important operating and maintenance servicing instructions in the manual accompanying the unit Service To reduce the risk of electric shock do not remove screws The unit does not contain any user ser...

Страница 34: ...1W121 DSG Retail Ltd Maylands Avenue Hemel Hempstead Herts HP2 7TG England This symbol on the product or in the instructions means that your electrical and electronic equipment should be disposed at the end of its life separately from your household waste There are separate collection systems for recycling in the EU For more information please contact the local authority or your retailer where you...

Страница 35: ...L9BDVD11_IB_final110705_running change indd 35 05 07 2011 1 44 PM ...

Страница 36: ...L9BDVD11_IB_final110705_running change indd 36 05 07 2011 1 44 PM ...

Отзывы: