7
12
the default and custom configuration
options for the multi z
professional instrument preamp
The following describes where the blue jumpers inside the PIP must be set
in order for it to function, either in its default mode or other custom modes
to suit your needs. To gain access to the PIP jumpers you need to remove
the rear panel and the top cover. In order to do this you need a 1/16” Allen
hex tool to remove the two rear panel cap screws and the 2 xlr cap screws.
The rear panel and the plastic frame should come right off. A service loop
is provided to keep the power connector attached.
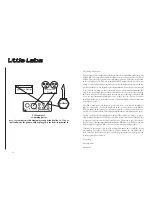
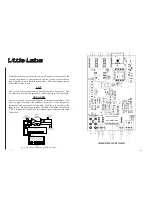
Jumpers #30,#31,#35 and #75 all determine the functionality of the
instrument input (jack 8) and Instrument thru (jack 1). Please Note:
These jumpers and the default has changed on Revision 2
The default function for these jacks is as follows:
Whatever is plugged into the instrument input (jack 8) will appear at the
Instrument thru (jack 1). Useful when you would like to use the PIP as a
traditional DI with the instrument “Yed” feeding the instrument input (jack
8) and instrument amp at the same time. With nothing plugged in the instru-
ment input (jack 8), the input to the PIP is shorted and the outputs will be
quiet, useful when you are leaving the PIP connected to a console or amp.
#30 and #31 jumper 2& 3 / on #35 jumper removed on #35X jumper
installed / on #75 jumper 2&3 (see jumper locations on the following
page).
Non default option 1A
Whatever is plugged into the Instrument thru (jack 1) is interrupted by what
is plugged into the instrument input (jack 8). With nothing plugged in the
Instrument thru (jack 1), or the instrument input (jack 8), the input to the
PIP is shorted and the outputs will be quiet, useful when you are leaving
the PIP connected to a console or amp. #30 and #31 jumper 1 & 3 / on
#35 jumper installed on #35X jumper removed/ on #75 jumper 2&3.
(see jumper locations on the following page).
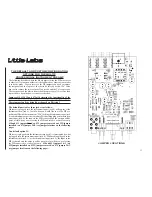
JUMPER LOCATIONS

