background image

Instrument in (jack 8) ............................................................7

Instrument thru (jack 1) .................................................7&11

Jumper locations ...................................................................8

Centerfold PIP info

Front and rear panel description ....................................9&10

Internal Block Diagram ..................................................9&10

Default and custom PIP configurations (cont.)

Buffered out (jack 3) ....................................................11&13

Jumper locations .................................................................12

loz & level control impedance  ...........................................13

Main output xlr (jack 7) ......................................................13

Jumper locations .................................................................14

Main Output transformer options .................................15&17

Jumper locations .................................................................16

Disassembly & Assembly

Disassembly Steps 1-11 ......................................................18

Assembly Steps 1-7.............................................................19

Assembly Steps 8-11 ...........................................................20

PIP examples

Re-amping guitar ................................................................21

Splitting to two amps with ground isolation .......................22

er .washers. If you are replacing the input select switch assembly you 

will pull the two ribbon jumpers out of the 20 pin socket. You could at 

this point, if you really want to go all the way,unsolder the power sup-
ply leads. You are now stripped down to bare stuffed circuit board. 

ASSEMBLY

I have made the assembly instructions a little more detailed, just in case 

you went gung ho on the disassembly.  Hopefully you  didn’t  lose any 

parts down the crack of your couch. I recommend reading the instructions 

fully before starting. 
1. Install spacer washers which consist of a lock washer (which comes 

with the switch), a metal cup washer & a 3/8” fiber shoulder washer, onto 

the center switch assembly switch bushing . Attach switch assembly to 

utility (not screened) panel with the black plastic frame around it. Note 

orientation of round hole cutouts for toggle switches. Carefully attach the 

nut to switch bushing with a 14mm nut driver.  The shaft is plastic and 

care must be taken not to strip it. 
2. On the front phone plug bushing  and potentiometer bushing install 

spacer washers consisting of a 3/8” fiber shoulder washer on the phone 

plug bushing and a 3/8” fiber shoulder washer as well as a metal cup 

washer on the pad bushing. Slide utility panel with black plastic frame 

and switch assembly attached, onto the phone plug and potentiometer 

bushings.  This will slightly push the switch assembly on to the circuit 

board, which is normal. 
3. Attach nut to phone jack  firmly with a 1/2” nut driver.
4. Attach nut to pad assembly loosely with a 7/16” nut driver.
5. Place screened decorative front panel on top of utility panel, slide 

circuit board into base extrusion and screw in the two allen button head 

screws with 1/16” allen hex driver.

19

Содержание multi z pip rev.b

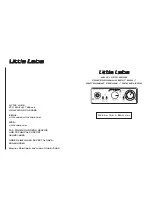
Страница 1: ... 6 0 4 2 8 SUPER HIZ OPTIMIZED FET MONOLITHIC AMPLIFIER DIFFERENTIAL INPUT MID Z OPTIMIZED FET MONOLITHIC AMPLIFIER 6dB 8 SPEAKER LEVEL ATTENUATOR spkr lo z mid z 26dB ol out re amp level LITTLE LABS HEAVY IRON CORE CUSTOM WOUND AUDIO TRANSFORMER LITTLE LABS CUSTOM WOUND VINTAGE PICK UP EMULATION TRANSFORMER overload in ol in hi z input circuit select overload out Main instrument in T mounted appl...

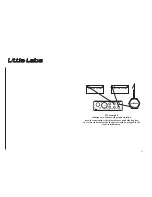
Страница 2: ...ss pedals key boards etc The PIP can be used as a mini hi fidelity mixer Buffered output Internal user configurable jumpers can set this output to be fed from either pre or post the level pot pre is the default setting OR this output can be configured as a trs volume tip send ring return expression pedal jack pre or post level pot OR this output can be an extra summing amp input Balanced only expa...

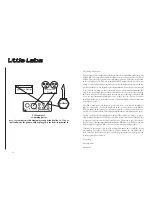
Страница 3: ... pre main out balanced insert and others 4 5 1 2 6 3 7 re amp out ol out ol in input circuit select hi z spkr lo z mid z attach level earth lift multi z pip 3 0 0 2 4 6 16 14 18 20 12 8 10 4 3 2 1 16 DIFFERENTIAL FET MONOLITHIC SUMMING AMPLIFIER 9dB FRONT PANEL EARTH LIFT SWITCH 7 5 14 18 MALE XLR 2 6 FRONT PANEL EARTH LIFT SWITCH 47V 0 8 ol out re amp level LITTLE LABS HEAVY IRON CORE CUSTOM WOUN...

Страница 4: ...efault and custom PIP configurations 6 The front of the direct box is now one piece 7 With the 7 16 nut driver tighten the pad assembly nut A 7 16 nut driveroftheexcelitebrand aswellasmostothers hasanoutsidediameter which will center the pad in the decorative panel properly 8 Tuck power supply wires inside then slide black textured cover onto extrusion base Be careful to slide it all the way in an...

Страница 5: ...ing the instructions fully before starting 1 Install spacer washers which consist of a lock washer which comes with the switch a metal cup washer a 3 8 fiber shoulder washer onto the center switch assembly switch bushing Attach switch assembly to utility not screened panel with the black plastic frame around it Note orientation of round hole cutouts for toggle switches Carefully attach the nut to ...

Страница 6: ... traces up There you have it but please read on for more information and tips that should help the inexperienced and experienced engineer alike in obtain ing the highest performance out of the Little Labs Multi Z Professional Instrument Preamplifier read this before using the little labs multi z pip 1 With a 1 16 Allen hex remove the two rear panel capscrews and the 2 xlr cap screws 2 The rear pan...

Страница 7: ...ernal battery powered preamp This preamp can be internally bypassed with a female mini plug to 1 4 plug adaptor Running the Piezo pickups directly to the Multi Z bypassing the Ovation preamp will drastically improve the sound of this instrument MID Z Mid Z use for an active instrument on board preamp or keyboard The main advantage of the Mid Z position on the Multi Z Di is the ability to isolate t...

Страница 8: ...board rack cue mixer to be isolated from each other Thus eliminating a source of possible ground loops LO Z Lo Z use on active instruments on board preamp or keyboards The Lo Z position has the least amount of active circuitry in the signal path SPEAKER Speaker in use on the speaker output of an instrument amplifier or on any very high level output instrument or keyboard I can t imagine an instrum...

Страница 9: ...e output stage The seperate re amp section will drop the balanced signal feeding it by a minimum of 15dB adjustable with the rear re amp level trim Note the re amp in jack 6 is normaled to the balanced only expansion output so pro level gear can be inserted after the balanced only expansion out jack 4 and returned into the re amp in jack effecting only what is feeding the instrument level hi z mai...

Страница 10: ...ellowing effect of the guitar amplifiers limited range speaker cabinets Once on tape the performance in which the artist utilized the musical instrument amplifier as an integral part is captured with the amp settings preserved This signal can now be utilized to feed any low distor tion monitor type amp back out to a guitar speaker which could be put in any room and recaptured at a later date You m...

Страница 11: ...njunction with The DI section for gain make up to use vintage pedals on an insert Re amplifier level is set by a 10 turn trim pot located on the rear of the PIP The re amplifier out is also the main guitar level impedance transformer isolated ground liftable output for the Multi Z Professional Instrument Preamp Balanced main XLR output This ouput is available with three options Line level transfor...

Страница 12: ...lugged into the instrument input jack 8 will appear at the Instrument thru jack 1 Useful when you would like to use the PIP as a traditional DI with the instrument Yed feeding the instrument input jack 8 and instrument amp at the same time With nothing plugged in the instru ment input jack 8 the input to the PIP is shorted and the outputs will be quiet useful when you are leaving the PIP connected...

Страница 13: ... well as your other occasional instruments to feed the instrument amp with the PIPs instrument level hi Z main output and the balanced main output to hit the mixer seems tidy and saves you the expense of extra DIs and more mic cables Besides all that the summing quality is super hi fidel ity 30 remove jumper and 31 jumper 3 4 jumper installed on 35 and on 35X on 75 jumper 1 3 Jumpers 112 128 and 1...

Страница 14: ... this input to sum with the main input devices such as bass pedals key boards etc The PIP can be used as a mini hi fidelity mixer Buffered output Internal user configurable jumpers can set this output to be fed from either pre or post the level pot pre is the default setting OR this output can be configured as a trs volume tip send ring return expression pedal jack pre or post level pot OR this ou...

Отзывы: