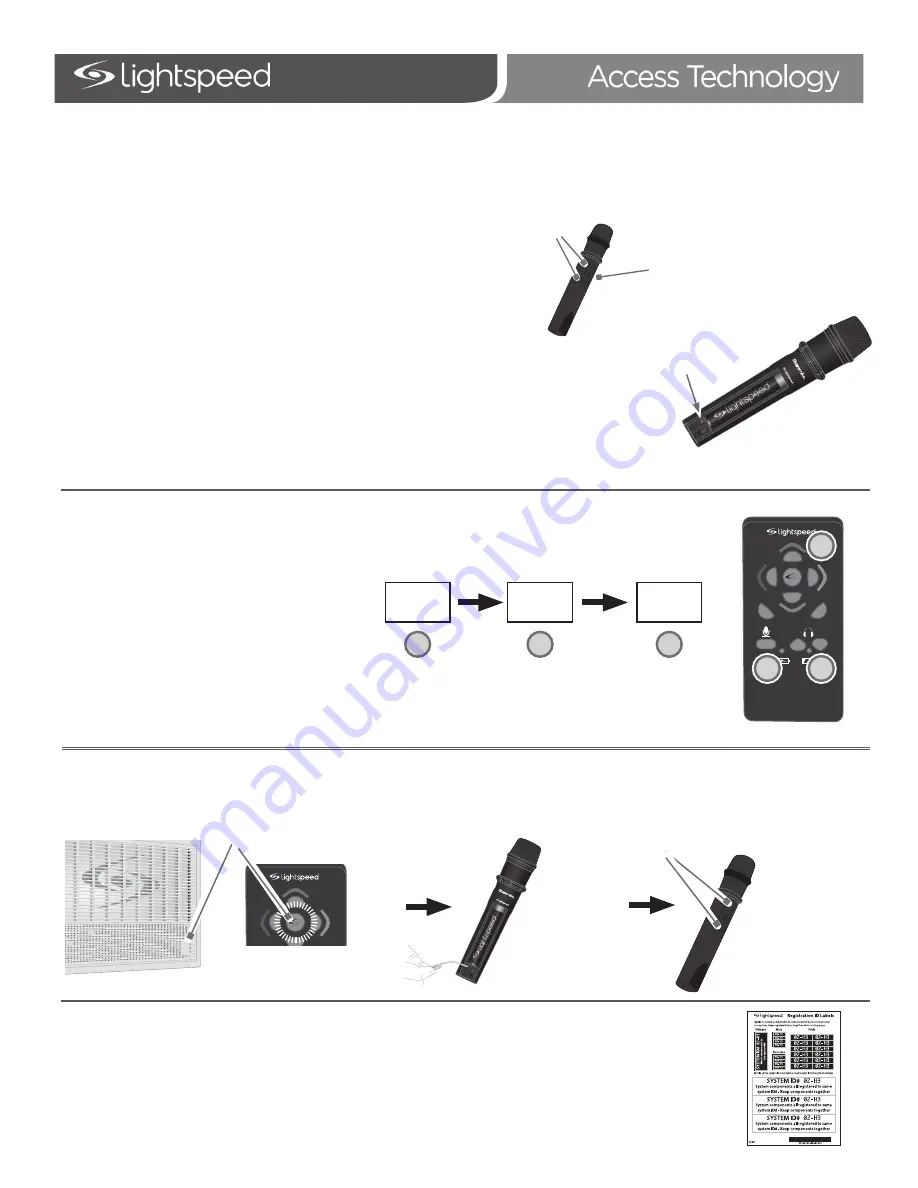
REMOTE REGISTRATION FOR SHAREMIKE
ADDING OR REPLACING A SHAREMIKE USING THE REMOTE
4.
Determine what number microphone you wish to
register 1 or 2:
1.
If replacing a Sharemike, make sure the malfunctioning unit is
powered off.
2.
Power on the new Sharemike. Both microphone 1 and 2 blue lights
should be blinking.
3.
Slide open the Sharemike battery compartment. The
registration button is located below the battery on the
left side, marked REG.
•
If replacing a microphone, match the # of the bad microphone
•
If adding a microphone, the new microphone would be #2
5.
On the remote, in rapid succession, press:
6.
The center button on the remote will begin blinking and the #1 light on the Topcat will begin blinking.
7.
Using a paperclip, briefly press the registration button on the Sharemike. The 1 and 2 lights will be blinking alternately.
8.
After several seconds, the #1 light on the Topcat will turn solid and the Sharemike will have just one light blinking (1 or
2 depending on which microphone is being replaced) and then turn solid.
9.
The registration is complete. Press the center button on the remote and begin speaking into the Sharemike to verify
there is audio.
10. Place system ID number (located in back of Topcat User Manual) on the new Sharemike.
Vol
Vol
Mute
6
5
1
3
2
4
UP
DN
A
B
C
Volume
Down
Mute
#1 or #2
A
B
C
Vol
Vol
Mute
6
5
1
3
2
4
UP
DN
Blinking lights
Blinking lights
Registration
Button
Power On
Blinking lights
Sharemike


