STANDARD REGISTRATION
REPLACING A FLEXMIKE (NO OTHER REGISTRED COPONENTS IN PLACE)
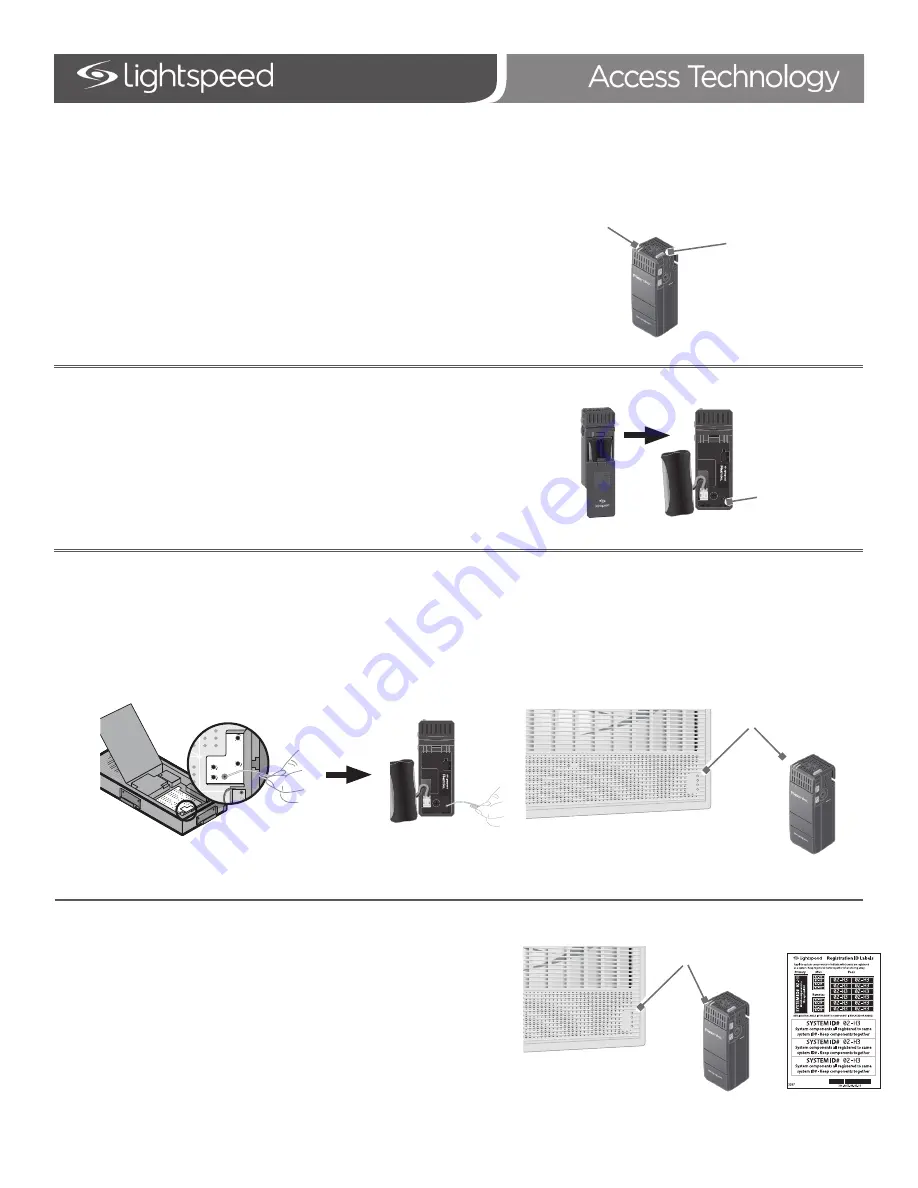
For users replacing a lost or malfunctioning Flexmike.
1.
If replacing a Flexmike, make sure the malfunctioning unit is powered off.
2.
Power on the new Flexmike. Both microphone 1 and 2 blue lights should
start blinking.
3.
Open the Flexmike battery compartmentand pull the battery out
(leaving it plugged) to reveal the registration button.
7.
After several seconds, the #1 light on the Topcat will turn solid and the #1
light on Flexmike will remain blinking, then turn solid.
8.
The registration is complete. You can begin speaking into the new
Flexmike to verify there is audio.
Power On
Blinking lights
(NEW Flexmike)
4.
Open the speaker panel of the Topcat (see Topcat Install Guide for instructions on how to open the panel). The Topcat can remain
installed for this process.
5.
Using a paperclip, briefly press the registration button on the inside of the Topcat. The 1 and 2 lights will begin blinking on the
Topcat.
6.
Briefly press the registration button on the Flexmike. The 1 and 2 lights will start blinking alternately.
9.
Place system ID number (located in back of Topcat User Manual) on the new
Flexmike.
NOTE: if at any point, the
Topcat
or Flexmike lights begin blinking rapidly. that
indicates registration error. Turn the new Sharemike off and repeat steps 4-9.
REGISTER
MICROPHONE
MIN
MAX
AUDIO IN
MIN
MAX
PAGEFIRST
SENSITIVITY
MIN
MAX
TONE
TREBLE
BASS
Registration
Button
Blinking lights
Solid lights


