19
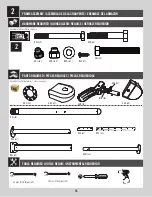
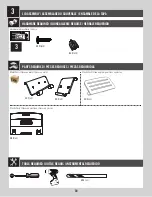
TOOLS AND HARDWARE REQUIRED /
OUTILS ET QUINCAILLERIE REQUIS
/
INSTRUMENTAL Y HERRAJE REQUERIDOS
X
SECTION 2 (CONTINUED) /
SECTION 2 (SUITE)
/
SECCIÓN 2 (CONTINUACIÓN)
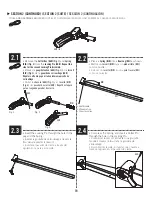
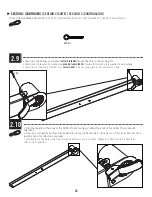
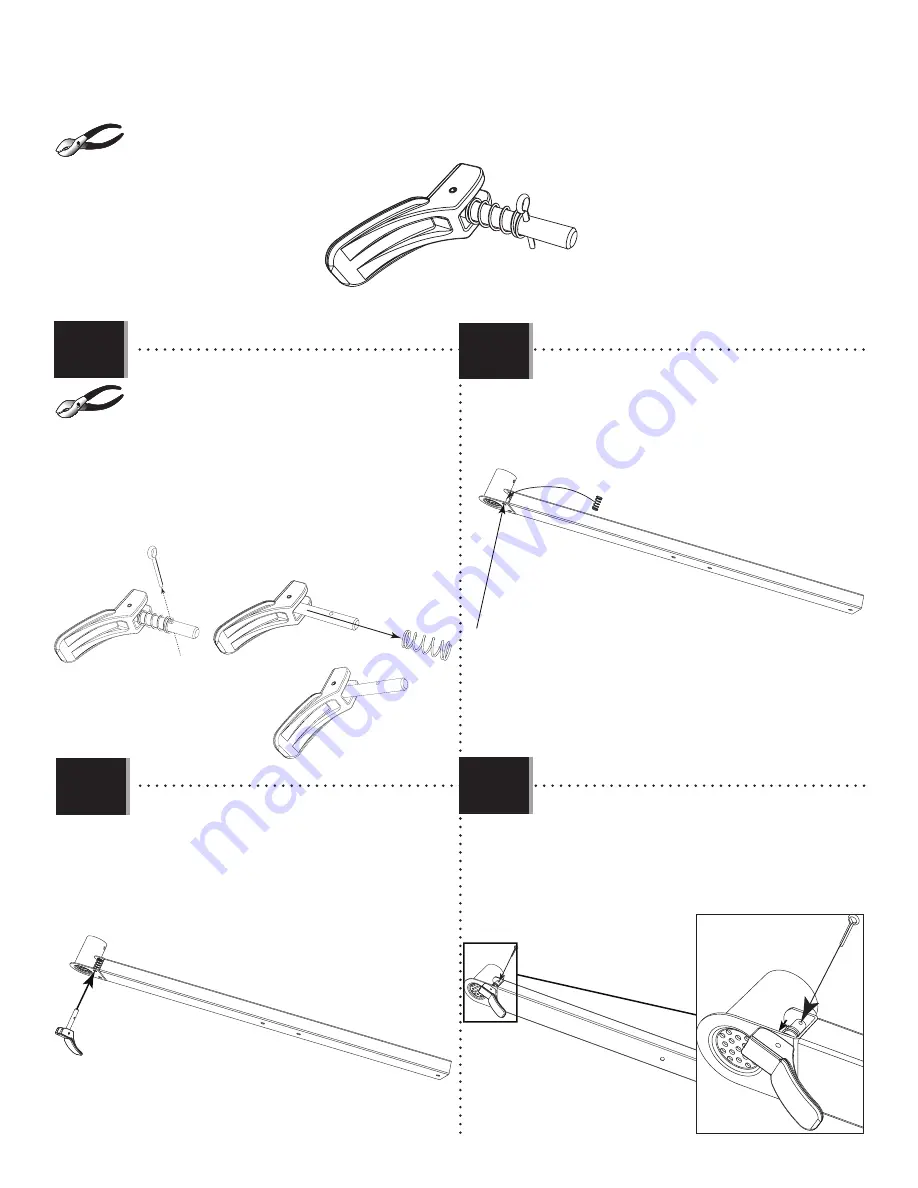
• Remove the
Cotter Key (AAH)
(Fig. 1)
and
Spring
(BIN)
(Fig. 2)
from the
Locking Pin (EHR)
.
Repeat this
step for the second Locking Pin Assembly.
• Enlever la
goupille fendue (AAH) (Fig. 1)
et le
ressort
(BIN) (Fig. 2)
de la
goupille de verrouillage (EHR)
.
Répéter cette étape pour la deuxième manivelle de
verrouillage.
• Quitar la
chaveta (AAH)
(Fig. 1)
y el
resorte (BIN)
(Fig. 2)
del
pasador de cierre (EHR)
.
Repetir este paso
para el segundo pasador de cierre.
Fig. 1
Fig. 2
Fig. 3
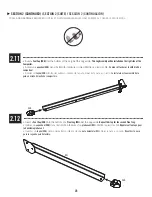
• Place a
Spring (BIN)
into a
Rear Leg (DEI)
as shown.
• Mettre un
ressort (BIN)
dans un
pied arrière (DEI)
comme illustré.
• Colocar un
resorte (BIN)
en una
pata trasera (DEI)
como se muestra.
• Use this hole.
• Utilisez ce trou.
• Use este agujero.
2.1
2.2
2.3
2.4
BIN
DEI
BIN
EHR
AAH
EHR (x2)
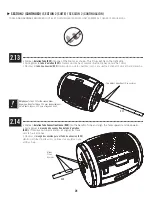
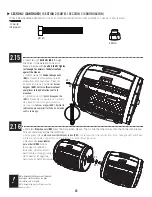
• Insert the Locking Pin through the hole in the
Leg and the Spring.
• Insérer la goupille de verrouillage à travers le
trou dans le pied et le ressort.
• Insertar el pasador de cierre a través del
agujero en la pata y el resorte.
• Compress the Spring, and insert a Cotter Pin
through the hole in the Locking Pin.
• Comprimer le ressort, et insérer une goupille
fendue à travers le trou dans la goupille de
verrouillage.
• Comprimir el resorte, e insertar una chaveta a
través el agujero en el pasador de cierre.
AAH
Содержание 60309
Страница 35: ...35 NOTES REMARQUES NOTAS ...
Страница 36: ...36 NOTES REMARQUES NOTAS ...
Страница 37: ...37 NOTES REMARQUES NOTAS ...


