Using the FTG Configuration Application
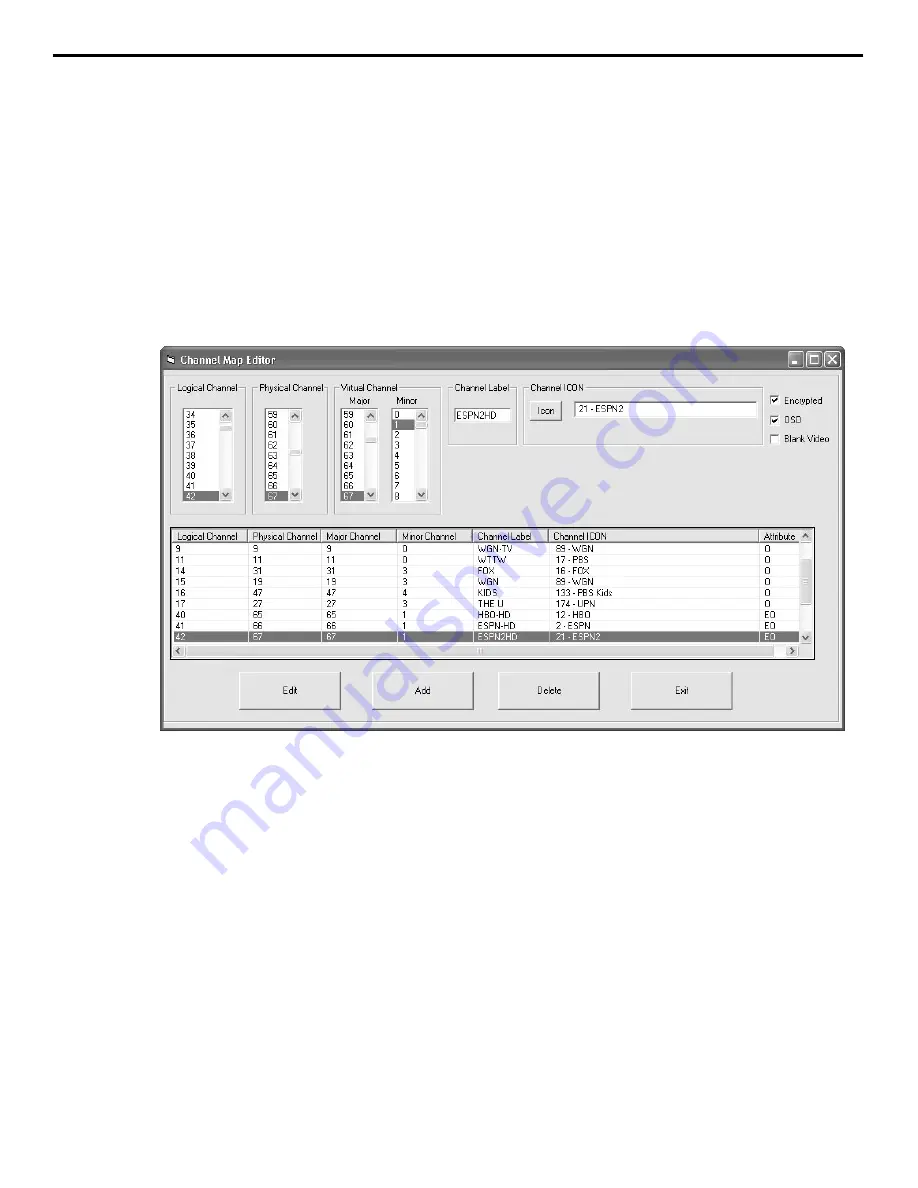
The FTG Channel Map data stored in a FTG card provides the TV/STB with a list of channels available to tune. The FTG
Channel Map also allows an easy method for adding a label and/or icon to be displayed when a channel is tuned. If channels
with Pro:Idiom encrypted content are part of the channel lineup, define the channel(s) and set the
‘Encrypted’
Attribute to
enable an LG/Zenith Pro:Idiom TV/STB to decrypt the content. A FTG Channel Map can be created or edited by clicking the
‘Edit/Add Map’
button.
Channel Map Editor
Item Range
Description
Logical Channel
0 - 1000
Channels tuned by user, defined by system operator
Physical Channel* 1 - 137
RF channels designated at headend
Major Channel
1 - 255
Same as Physical Channel unless: Installer Menu item 103 is set to ’0’ (zero) virtual
Minor Channel
0 - 255
‘0’ if channel is an analog source. 1 - 255 if the channel is a digital source
*Physical Channel number 254 tells the system to tune the Aux set by Installer Menu item
‘46 Start Aux Source’
.
Create a Channel Map
A FTG Channel Map may include up to 141 channel entries (Logical Channels). Choose a Logical Channel number from
0 to 1000 and define the channel by setting its Physical and Virtual Channel Numbers. A Channel Label may be entered
and/or Channel Icon selected. The Channel Label allows up to 7 characters to be entered. To select a Channel Icon, click the
‘Icon’
button, the icons are listed alphabetically. The channel Attributes may also need to be set. Select
‘Encrypted’
if
Pro:Idiom encrypted content will be provided on that channel. Select
‘OSD’
to display the channel’s Logical Channel number
as well as any Channel Label and/or Channel Icon, entered. Select
‘Blank Video’
when defining audio only channels to dis-
play a blank screen. Once a channel has been defined, click the
‘Add’
button and it will appear in the bottom panel of the
Channel Map Editor. Continue adding channels to build the FTG Channel Map.
Edit a Channel Map
To edit a channel, click on the channel in the bottom panel. Its defining elements will be shown above, ready for editing.
Make any and all changes then click the
‘Edit’
button to save the changes and update its bottom panel listing. If it is neces-
sary to remove a channel, click on the channel in the bottom panel then click the
‘Delete’
button. When Channel Map edit-
ing is complete, click the
‘Exit’
button to close the Editor window and return to the main application window.
Channel Map Editor
7


