background image

25

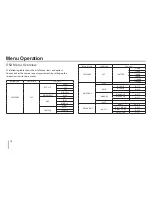
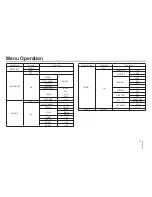
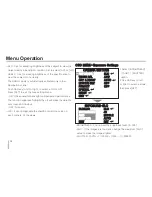
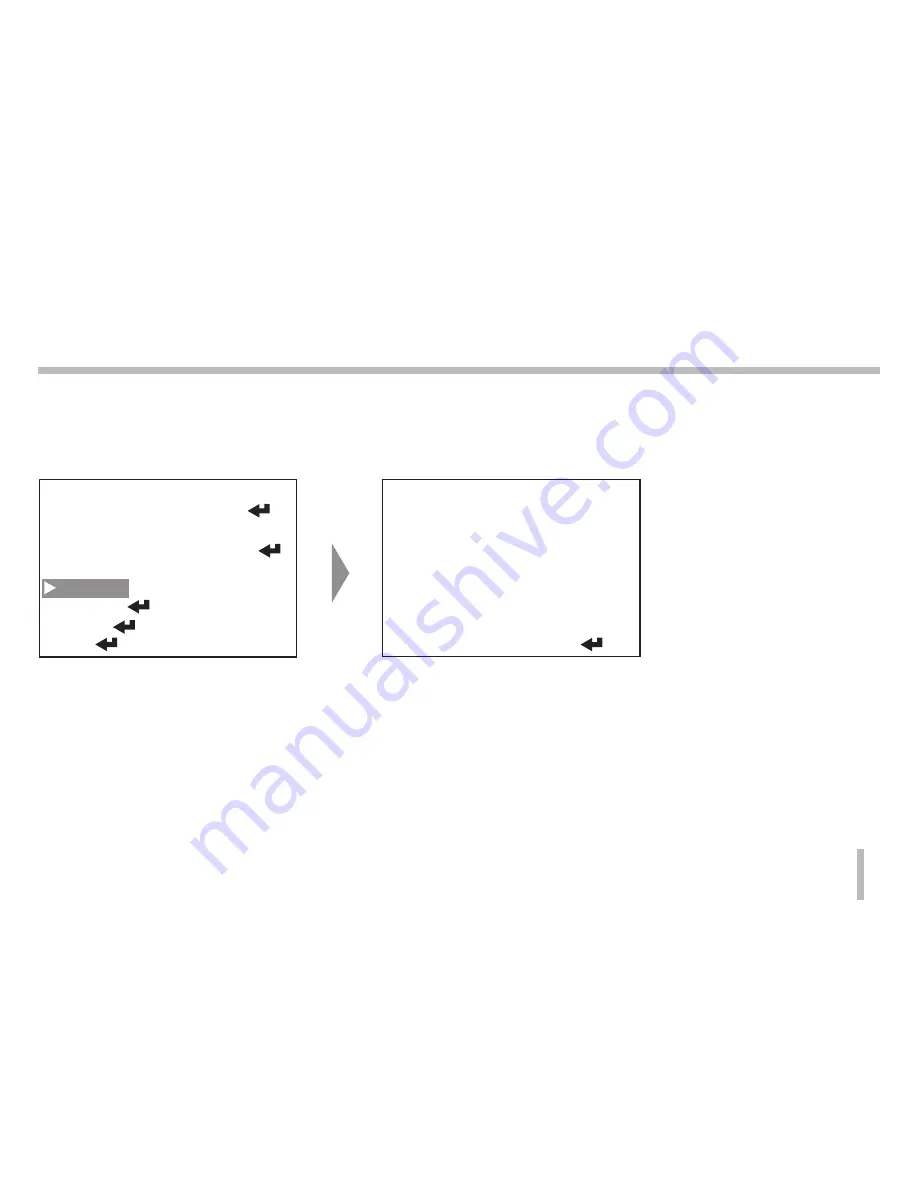
CAMERA SETTING

EXPOSURE
WHITE BAL
DAY & NIGHT
MOTION DET

PRIVACY

SPECIAL
RESET
EXIT

ELC
ATW
AUTO
OFF
OFF

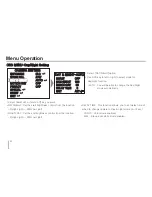
PRIVACY

MASK NUMBER
DISPLAY
COLOR
HEIGHT
WIDTH
MOVE Y
MOVE X
EXIT

1

OFF
GRAY

33
22
27
22

RET

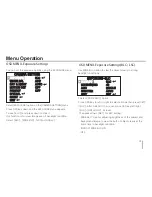
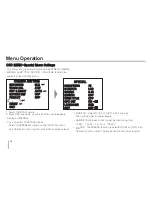
OSD MENU-Privacy Setting

This function is aiming at the protection of personal privacy,

selecting a screen part black not to be displayed in the screen.

Up to 4 zones can be registered.

1. Select PRIVACY [ON] and the menu appears.

2. Select [MASK NUMBER] one of 1, 2, 3, 4 This number

starts from the left top area with clockwise.

3. If you'd like the mask appears on the monitor, select

[DISPLAY] [on] to move OSD key to left or right.

4. Select one of[GRAY]↔[WHITE]↔[BLACK]for the mask

color in [COLOR]

5. You can make the area dimension to move OSD key for the

level of [DEPTH] & [WIDTH].

6. Also you can move the position of privacy area to X axis or

Y axis as you want.

After setting all information, please exit this menu.

Menu Operation

Содержание L6104-DN

Страница 1: ...L6104 DN L6104 DP ...

Страница 2: ...ful interference unless the modifica tions are expressly approved in the instruction manual The user could lose the authority to operate this equipment if an unauthorized change or modification is made Regulatory Notices For U S A This equipment has been tested and found to comply with the limits for a Class A digital device pursuant to Part 15 of the FCC Rules These limits are designed to provide...

Страница 3: ... with the National Electric Code ANSI NFPA 70 Warning This is a class A product In a domestic environment this product may cause radio interference in which case the user may be required to take adequate meas ures Warning To reduce a risk of fire or electric shock do not expose this product to rain or moisture Caution This installation should be made by a qualified service person and should confor...

Страница 4: ... your old appli ance will help prevent potential negative consequences for the environment and human health 4 For more detailed information about disposal of your old appliance please con tact your city office waste disposal service or the shop where you purchased the product LG Electronics hereby declares that this these product s is are in compliance with the essential requirements and other rel...

Страница 5: ...to your outlet consult an electrician for replacement of the obsolete outlet 10 Protect the power cord from being walked on or pinched particularly at plugs convenience receptacles and the point where they exit from the apparatus 11 Only use attachments accessories specified by the manufacturer 12 Use only with the cart stand tripod bracket or table specified by the manufacturer or sold with the a...

Страница 6: ... dampened with a small quantity of neutral detergent then wipe dry Avoid the use of volatile solvents such as thinners alcohol benzene and insecticides They may damage the surface nish and or impair the oper ation of the camera Operating and storage location Avoid viewing a very bright object such as light ttings dur ing an extended period Avoid operating or storing the unit in the following locat...

Страница 7: ...Operation 18 19 Exposure Settings BRIGHTNESS setting 20 AGC Automatic Gain Control setting 21 SHUTTER Shutter Speed setting 21 White Balance settings 22 19 Day Night Setting 24 Privacy Setting 25 Special Menu Settings 26 26 26 26 26 Setting the SHARPNESS 31 32 BLC LSC setting Setting the MONITOR Setting the GAMMA effect Setting MIRROR effect Setting USER TITLE DPC Setting LANGUAGE Setting Reset Se...

Страница 8: ...al contains instructions on how to install and man age the Color Video Camera in your video surveillance system Should you require any technical assistance please contact authorized service center Accessories DOME CAMERA SCREW L Wrench TEMPLATE INSTALLATION MANUAL Features OPTION WIRED REMOTE CONTROLLER ...

Страница 9: ...9 Part Names and Functions ...

Страница 10: ...10 OPTIONAL WIRED REMOTE CONTROLLER FOR OSD OSD Adjustment OSD controller is optional item Please use OSD wired remote controller if you need camera configuration Connections ...

Страница 11: ...to the mounting surface and Along to the inside circle line please drill a hole Secure the camera mounting bracket to the position where the camera should be mounted with the supplied screws The bottom case is in the ceiling Please leave a good position of cable not to interrupt the surveillance area with it when installing ...

Страница 12: ... ar e the area t ea to be monit o be monitor ored and fix the ed and fix the main body and the dome c main body and the dome co ov ver er LG logo at upper body case It s subject to change depending on the direction of your installation Installation by rotating to clockwise ...

Страница 13: ... 360 Rotate angle 360 Panning angle 360 Tilting angle 60 Viewable operation tilt angle 60 at the middle Viewable operation tilt angle 60 at the middle Installation You can adjust the angle of ball mount to put it down a little ...

Страница 14: ...14 Lens Focus Adjustment The lens is focused far from 1M when ex factory Therefore please keep the lens focus as is Installation ...

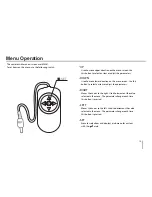
Страница 15: ... lower direction on the menu screen Use this button to select an item or adjust the parameters RIGHT Moves the cursor to the right Used to increment the value selected in the menu The parameter changes each time this button is pressed LEFT Moves the cursor to the left Used to decrement the value selected in the menu The parameter changes each time this button is pressed SET Executes selections and...

Страница 16: ...nu Contents EXPOSURE ELC ELC ATW AWB MANUAL PUSH AUTO SHUTTER R Y GAIN B Y GAIN MANUAL R MANUAL B BURST DAY NIGHT NIGHT DAY DELAYTIME BLC LSC HSBLC LSC BLC WIDE BLC BRIGHTNESS AGC SHUTTER 0 99 OFF LOW MIDDLE HIGH AUTO 1 120FLK 1 250 1 500 1 1000 1 2000 1 4000 1 10000 1 100000 0 255 0 255 0 255 0 255 ON OFF 0 255 0 255 3 12 Main M enu Sub Menu Contents EXPOSURE WHITE BAL DAY NIGHT Menu Operation ...

Страница 17: ...RACE HOLD TIME 1 15 OFF MASK NUMBER 1 4 DISPLAY ON OFF GRAY BLACK WHITE HEIGHT 1 99 WIDTH 1 99 MOVE Y 1 99 MOVE X 1 99 MOTION DET ON ALARM TRACE PRIVACY ON COLOR OFF SHARPNESS 1 49 CRT LCD USER 0 45 0 6 1 ON OFF ON OFF WHITE THR LUMA LIMIT ENG 한국어 RESET FACTORY DPC SET LANGUAGE SPECIAL ON MONITOR GAMMA MIRROR USER TITLE Menu Operation ON OFF ...

Страница 18: ...ubmenu appears on the monitor 3 Press OSD key to upside or downside to select a Submenu option 4 Use OSD key to left or right to select a value 5 Select EXIT and click the OSD key Then OSD is setup RET Return to the previous menu TOP Return to the CAMERA SETTING menu screen END Exit the setup menu CAMERA SETTING EXPOSURE WHITE BAL DAY NIGHT MOTION DET PRIVACY SPECIAL RESET EXIT ELC ATW AUTO OFF OF...

Страница 19: ...function is for clear image even if backlight condition Select BLC WIDE BLC LSC or HSBLC OSD MENU Exposure Settings BLC LSC CAMERA SETTING EXPOSURE WHITE BAL DAY NIGHT MOTION DET PRIVACY SPECIAL RESET EXIT ELC ATW AUTO OFF OFF EXPOSURE ELC BLC LSC BRIGHTNESS AGC SHUTTER EXIT BLC 40 MIDDLE AUTO RET BLC After click BLC you can move OSD key left right BLC ON or OFF its level Then press down RET for B...

Страница 20: ...ess highlight then it will make the objects very clean and obvious OFF Not used LSC It can compensate the shading correction curve on each corners of the views CAMERA SETTING EXPOSURE WHITE BAL DAY NIGHT MOTION DET PRIVACY SPECIAL RESET EXIT ELC ATW AUTO OFF OFF EXPOSURE ELC BLC LSC BRIGHTNESS AGC SHUTTER EXIT BLC 40 MIDDLE AUTO RET 1 Select BRIGHTNESS AGC SHUTTER option 2 Use OSD key to left or r...

Страница 21: ...he scene contains mostly high color temperature objects such as a blue sky or sunset 1 Select WHITE BAL option 2 Use OSD key to left or right to select a mode thenpress SET ATW AWB MANUAL PUSH WHITE BAL MANUAL MANUAL R MANUAR B EXIT 125 125 END WHITE BAL MANUAL R Y GAIN B Y GAIN EXIT AWB Auto White Balance AWB detects while color balance on the screen and based on sensor white balance functions au...

Страница 22: ...automatically DAY NIGHT AUTO BUAST DAY NIGHT NIGHT DAY DELAY TIME EXIT OFF 188 98 5 AET Select Burst on or Burst off as you want DAY NIGHT Set the start brightness control from the location 0 High Light 255 Low Light NIGHT DAY Set the end brightness control from the location 0 High Light 255 Low Light DELAY TIME This function allows you to set delay time of when to change camera to Day night mode ...

Страница 23: ...ET WINDOW ALL SET ALL CLEAR SENSITIVITY TRACE HOLD TIME EXIT OFF 100 ICON 3 RET 1 Select MOTION DET option 2 Use OSD key to left or right to select a ON and press SET SET WINDOW Use OSD key to left or right to select some windows and click them as you want One more click it set off Note In order to get back to previous menu move to the edge of left or right and push the KEY down one second or more...

Страница 24: ...RM SET WINDOW ALL SET ALL CLEAR SENSITIVITY TRACE HOLD TIME EXIT OFF 100 ICON 3 RET OSD MENU MOTION DETECTION Setting ALL SET it s to select all windows ALL CLEAR it s to clear all windows left or right and push the KEY down one second or more SENSITIVITY Obtain the optimum detection level 0 200 TRACE ICON TRACE OFF ICON it appears a icon when set some areas and set ICON TRACE no icon but set trac...

Страница 25: ...Up to 4 zones can be registered 1 Select PRIVACY ON and the menu appears 2 Select MASK NUMBER one of 1 2 3 4 This number starts from the left top area with clockwise 3 If you d like the mask appears on the monitor select DISPLAY on to move OSD key to left or right 4 Select one of GRAY WHITE BLACK for the mask color in COLOR 5 You can make the area dimension to move OSD key for the level of DEPTH W...

Страница 26: ...ion by yourself in the SPECIAL menu 1 Select SPECIAL option 2 Press OSD key down and the SPECIAL menu appears MONITOR Select LCD or CRT which you use Then you can get a clearer image GAMMA Brightness control could be functioning from 0 45 0 6 1 0 USER MIRROR The MIRROR function is selected ON or OFF with OSD key to left or right The image can be Left right reversal Setting SHARPNESS You can select...

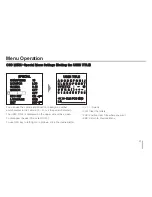
Страница 27: ...o use OSD key to left right or up down click the desired letter SPECIAL SHARPNESS MONITOR GAMMA MIRROR USER TITLE DPC SET LANGUAGE EXIT 15 LCD 0 45 OFF OFF ON ENG RET OSD MENU Special Menu Settings Setting the USER TITLE A B C D E F G H I J K L M N O P Q R S T UVWXYZ 0 1 2 3 4 5 6 7 8 9 CLR POS END LG_______________ Space CLR Clear the letters POS Position User Title where you want END Return to P...

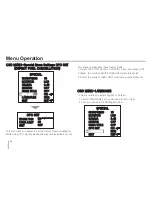
Страница 28: ...te defect threshold 3 Adjust the value of LUMA LIMIT Luminance value limitation This menu compensate these defect pixels OSD MENU Special Menu Settings DPC SET DEFECT PIXEL CANCELLATION OSD MENU LANGUAGE WHITE THR LUMA LIMIT EXIT 80 20 RET This menu lets you select English or Korean 1 Select LANGUAGE move OSD key to left or right 2 Then you can select ENG English Now This menu lets you adjust to s...

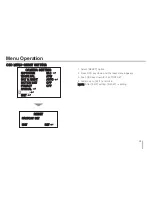
Страница 29: ...L RESET EXIT ELC ATW AUTO OFF OFF RESET 1 Select RESET option 2 Press OSD key down and the reset menu appears 3 Push OSD key down for FACTORY SET 4 And move to EXIT and click NOTE After EXIT setting RESET is setting OSD MENU RESET SETTING FACTORY SET EXIT RET Menu Operation ...

Страница 30: ... Lens Sync System Scanning Frequency H V Horizontal Resolution S N Ratio Minimum Illumination Control Method Video Output Signal Day Night 470K 440K 410K 380K 1 3 CCD ICS638 639BK 3 6mm Fixed Lens Internal 15 625 KHz 50Hz 15 734 KHz 60 Hz 540 TVL 48 dB OSD key button 1Vp p Composite 75Ω 0 1 Lux F1 2 Auto Color B W ...

Страница 31: ...or DPC Set Power Consumption Operation Temp Humidity Storage Temp Humidity Weight Dimension øx H Accessory CRT LCD ON OFF WIDE BLC BLC HSBLC LSC OFF LOW MIDDLE HIGH AUTO 1 120FLK 1 250 1 100000 ATW AWB MANUAL PUSH Set Window All Set 4 Masks ON OFF DC 12V 1 5W 10 ºC 50 ºC 0 RH 80 RH 20 ºC 60 ºC 0 RH 85 RH 430g ø 60 92 X 65mm Template ...

Страница 32: ...P N ...
Отзывы: