


53
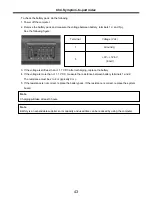
Indeterminate problems
· You are here because the diagnostic tests did not identify which adapter or device failed, wrong devices
are installed, a short circuit is suspected, or the system is inoperative.
Follow these procedures to isolate the failing FRU (do not isolate FRUs that have no defects).
· Verify that all attached devices are supported by the computer.
· Verify that the power supply being used at the time of the failure is operating correctly.
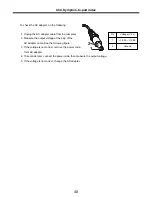
1. Power off the computer
2. Visually check each FRU for damage. Replace any damaged FRU.
3. Remove or disconnected all of the following devices :
a. Non-LG devices.
b. Printer, mouse, and other external devices.
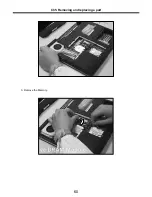
c. Battery pack.
d. PC cards.
e. ODD (CD-ROM, Combo) drive or FDD drive in the Bay.
f. Hard-disk drive.
Note
Use the other memory card because it needs when operating computer.
4. Power on the computer.
5. Determine whether the problem has changed.
6. If the problem does not recur, reconnect the removed devices one at a time until you find the failing FRU.
7. If the problem remains, replace the following FRUs one at a time.
(do not replace a non-defective FRU)
a. LCD assembly (Check external monitor whether the same problem recurs or not).
b. Keyboard.
c. Keydeck (TouchPad and Scroll Button assembly).
d. System board.
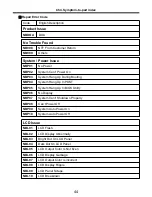
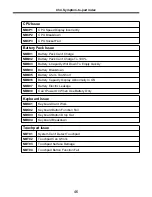
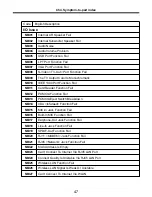
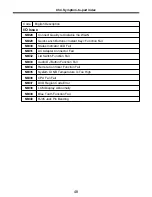
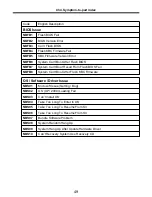
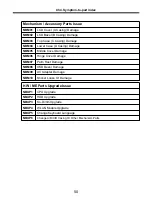
Ch4. Symptom-to-part index
Содержание K1
Страница 1: ...0 Service Manual K1 LG Electronics ...
Страница 18: ...17 System Block Diagram Ch3 System information ...
Страница 25: ...24 Ch3 System information c Select File Format as Image Files iso d Open Image File iso which is sent from LGE ...
Страница 26: ...25 Ch3 System information e Tab Next then burning will be started f Burn process completed as below and tab OK ...
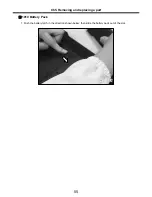
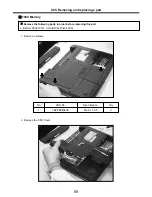
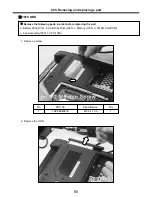
Страница 58: ...57 3 Remove HDD using a tag Ch5 Removing and replacing a part ...
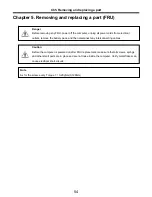
Страница 59: ...58 Ch5 Removing and replacing a part ...
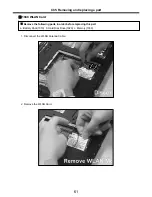
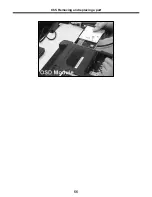
Страница 61: ...60 3 Remove the Memory Ch5 Removing and replacing a part ...
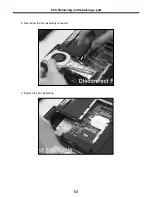
Страница 64: ...63 2 Disconnect the Fan Assembly connector 3 Remove the Fan Assembly Ch5 Removing and replacing a part ...
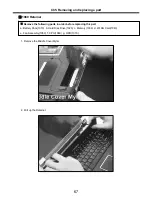
Страница 67: ...66 Ch5 Removing and replacing a part ...
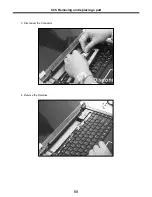
Страница 69: ...68 3 Disconnect the Connector 4 Remove the Retainer Ch5 Removing and replacing a part ...
Страница 71: ...70 3 Disconnect the Keyboard Connector then remove the Keyboard Ch5 Removing and replacing a part ...
Страница 73: ...72 2 Disconnect the LVDS Inverter Cable Ch5 Removing and replacing a part ...
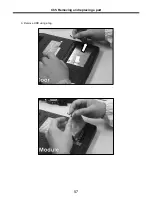
Страница 74: ...73 3 Remove the Display Module Ch5 Removing and replacing a part ...
Страница 77: ...76 4 Remove the Keydeck 5 Disconnect the Touchpad Connector Ch5 Removing and replacing a part ...
Страница 78: ...77 6 Disconnect the Power Cable then remove the Keydeck Ch5 Removing and replacing a part ...
Страница 80: ...79 2 Remove the Main Board 3 Disconnect the DC In LAN USB Cable Ch5 Removing and replacing a part ...
Страница 81: ...80 4 Disconnect the MDC Cable Ch5 Removing and replacing a part ...
Страница 83: ...82 7 Remove the USB Board Ch5 Removing and replacing a part ...
Страница 90: ...K1 Buffalo EXPLODED VIEW 2 NHDDB NCVRH NSCRF NSCRF NSCRF NSCRF NBRKB ...


