background image

9

0

ENG

ENGLISH

SPECIFICATIONS

3D supported mode

Signal

Resolution

Horizontal

Frequency (kHz)

Vertical 

Frequency (Hz)

Playable 3D video format

HDMI Input

720p

1280x720

45

60

Top & Bottom, Side by Side

89.9/90

59.94/60

HDMI (

V. 1.4 with 3D

),

Frame Packing

37.5

50

Top & Bottom, Side by Side

75

HDMI (

V. 1.4 with 3D

),

Frame Packing

1080i

1920X1080

33.75

60

Top & Bottom, Side by Side

28.125

50

1080p

1920X1080

67.50

60

Top & Bottom, Side by Side, 

Checker Board,

Single Frame Sequential

56.250

50

Top & Bottom, Side by Side

27

24

Top & Bottom, Side by Side, 

Checker Board

53.95/54

23.98/24

HDMI (

V. 1.4 with 3D

),

Frame Packing

33.75

30

Top & Bottom, Side by Side,

Checker Board

USB Input

1080p

1920X1080

33.75

30

Top & Bottom, Side by Side,

Checker Board

, MPO(Photo)

24

Top & Bottom, Side by Side,

MPO(Photo)

Signal

Playable 3D video format

DTV

720p, 1080i

Top & Bottom, Side by Side

Содержание 32LW5500

Страница 1: ...1108 REV00 Printed in China 32LW5500 42LW5500 47LW5500 OWNER S MANUAL LED LCD TV Please read manual careful before operating your set and reain if for future reference ...

Страница 2: ...ys DivX video Visit www divx com for more information and software tools to convert your files into DivX video ABOUT DIVX VIDEO ON DEMAND This DivX Certified device must be regis tered in order to play purchased DivX Video on Demand VOD movies To obtain your registration code locate the DivX VOD section in your device setup menu Go to vod divx com for more information on how to complete your regis...

Страница 3: ...etwork 23 Connecting the wired network 24 Connecting the wireless network 26 When a security code is already set 28 Network Status 29 Premium card function 31 My Media Card Function 31 Connecting USB storage devices 32 DLNA DMP Digital Living Network Alli ance Digital Media Player 35 DLNA DMR Digital Living Network Alli ance Digital Media Renderer 36 Browsing files 37 Viewing videos 40 DivX regist...

Страница 4: ...s 68 AUDIO Settings 71 TIME Settings 72 LOCK Settings 73 OPTION Settings 76 NETWORK Settings 77 SUPPORT Settings 78 MAKING CONNECTIONS 78 External Equipment Setup 79 Making Connections 80 Connecting to a equipment wirelessly 80 SIMPLINK connection 81 Activating and Using the SIMPLINK menus 82 MAINTENANCE 82 Updating the TV firmware 83 Cleaning your TV 83 Cabinet and stand 83 Power cord 84 Preventi...

Страница 5: ...aler where you purchased your product The illustrations in this manual may differ from the actual product and item and item Component gender cable gender cable x 1 Screw for assembly 3D Glasses x 1 AV M4 X 12 x 8 x 4 Screw for fixing Only 32LW5500 Remote control and batteries AAA Nero MediaHome 4 Essentials CD Owner s manual card Polishing cloth ...

Страница 6: ...d DLNA Adaptor AN WF100 M Rmote Dongle Use with theMagic Motion Remote Control Magic Motion Remote Control Magic motion Remote Control Dongle Batteries AA HDMI OUT WIRELESS CONTROL Do not use any pirated items to ensure the safety and product life span Any damages or injuries by using pirated items are not covered by the warranty CAUTION Model VESA A x B Standard screw Number of screws Wall mount ...

Страница 7: ...ff INPUT Changes the input source HOME Accesses the Home menu or saves your input and exits the menus OK Selects the highlighted menu option or confirms an input Adjusts the volume level P Scrolls through the saved programmes Rear Connection panel FRONT PANEL BACK PANEL AUDIO VIDEO L MONO R RS 232C IN CONTROL SERVICE LAN RGB IN PC OPTICALDIGITAL AUDIOOUT AUDIO IN RGB DVI CABLE IN CONTROL AV IN 1 A...

Страница 8: ... prevent the TV from tilting forward Do not over tighten CAUTION 2 Assemble the parts of the Stand Body with the Stand Base of the TV 4 3 Secure the TV and the stand with screws M4 x 12 Stand Base DESKTOP PEDESTAL INSTALLATION 1 Lift and tilt the TV into its upright position on a table Stand Body M4 x 12 Do not place the TV near or on sources of heat as this may result in fire or other damage CAUT...

Страница 9: ...k Installing screw type and length depends on the wall mount used Further information refer to the instructions included with the mount LG is not liable for any accidents or damage to property or TV due to incorrect installation Where a non compliant VESA wall mount is used Inorrect fastening of screws to surface which may cause TV to fall and cause personal in jury Not following the recommended I...

Страница 10: ...product When moving the TV undo the cords first Use a platform or cabinet strong and large en ough to support the size and weight of the TV To use the TV safely make sure that the height of the bracket on the wall and on the TV is the same This feature is not available for all models Image shown may differ from your TV The TV is equipped with a Kensington Security Syst em connector on the back pan...

Страница 11: ...cesses the saved programme list Returns to the previously viewed programme POWER Turns the TV on or off Adjusts the brightness of the screen to reduce energy consumption Selects an AV mode Changes the input source Turns the TV on Selects Radio TV and DTV programme Adjusts the volume level Selects a menu or option Accesses your favourite programme list Switches between Letter and Number input modes...

Страница 12: ... reverse Magic Motion Remote Control Functions Make sure to point the remote control to the remote control sensor on the TV Do not mix old and new batteries as this may damage the remote control Magic Motion Remote Control need to seprate purchase by yourself and use it with the M Rmote Dongle CAUTION POWER Turns the TV on or off MUTE Mutes all sounds Navigation buttons up down left right Scrolls ...

Страница 13: ...ght up or down If the pointer does not work properly after click ing the OK button leave the remote control for 10 seconds then use it again Precautions to Take when Using the Magic Motion Remote Control Use the remote control within the maximum communication distance 10 m Using the remote control beyond this distance or with an object obstructing it may cause a com munication failure A communicat...

Страница 14: ...ult settings of Store Demo in 5 minutes NOTE Turning the TV on for the first time When you turn the TV on for the first time the Initial setting screen appears Select a language and customize the basic settings 1 Connect the power cord to a power outlet 2 In Standby mode press POWER to turn the TV on The Initial setting screen appears if you turn the TV on for the first time 3 Follow the on screen...

Страница 15: ... Apps Web Browser Media Link My Apps Sat jan 1 2011 12 00 i INPUT SETUP CUIDE Sign In Exit Smart share Premium tvb com RTHK 香港電臺 bbtv MUSIC ITV YAHOO新聞 雅虎香港 Close Coming Soon i Conner a USB or DLNA device to eajoy various types of contents on you your TV Notes click the Quick Apps icon jump out the Coming Soon window this implies the fact that the Quick Apps is under the development process it wil...

Страница 16: ...gramme you will be prompted to enter your password to keep the programme scanned I PAL I II U K Ireland Hong Kong South Africa DK PAL D K East Europe China Africa CIS NTSC M USA Korea Philippines To store another channel repeat steps 5 to 10 Manually setting up programme In analogue mode Manual Tuning lets you manually tune and arrange the stations in whatever order you desire 1 Press HOME to acce...

Страница 17: ...d press OK 8 Press the Navigation buttons to scroll to Close and press OK 9 Press the Navigation buttons to scroll to Store and press OK When you are finished press EXIT When you return to the previous menu press BACK Fine Tuning Normally fine tuning is only necessary if reception is poor 1 Press HOME to access the Home menu 2 Press the Navigation buttons to scroll to SETUP and press OK 3 4 Press ...

Страница 18: ...buttons or select it in the Programme edit menu This function enables you to skip the stored pro grammes You can change the programme number using Move function if Automatic Numbering is un checked when you start Auto Tuning Selecting a programme on the programme list 1 Press LIST to access the programme list Button Description Selects programme list or recent programme list Scrolls through progra...

Страница 19: ...n Moves to the Programme Edit Green button Register or cancel the selected programme FAV Moves to the Programme List 3 When you are finished press EXIT You can also setup Favourite List in the SETUP menu Programme Edit NOTE Booster In air digital mode If reception is poor select Booster to On When the signal is strong select Off 1 Press HOME to access the Home menu 2 Press the Navigation buttons t...

Страница 20: ...de is available NOTE mode only 16 9 Resizes images to fit the screen width Just Scan Displays video images in the origi nal size without disappearing parts at the edge of the image If you select Just Scan you may see image noises at the edge of the original signal NOTE 4 3 Resizes images at the standard 4 3 with out distortion Full Wide When TV receives the wide screen signal it will lead you to a...

Страница 21: ... correct pro portion To change the ratio of the cinema zoom press and its range is from 1 to 16 To move the zoom focus up or down press v If you enlarge or reduce an image the image may be distorted NOTE Using the input list Selecting an input source 1 Press INPUT to access the input sources The connected device displays on each input source 2 Press the Navigation buttons to scroll to one of the i...

Страница 22: ...p Timer Sets the length of time until the TV to turns off Audio or Audio Language Changes the sound output Energy Saving Reduces the power con sumption by adjusting the screen brightness Auto Off Minimum Medium Maximum Screen Off AV Mode Sets the optimized image and sound settings Off Cinema Game Skip Off On Sets the Skip Off On USB Device Eject a USB device The available menus and options may dif...

Страница 23: ...HOME to access the Home menu 2 Press the Navigation buttons to scroll to SETUP and press OK 3 Press the Navigation buttons to scroll to NET WORK and press OK 4 Press the Navigation buttons to select Net work Setting and press OK 5 If wired and wireless are simultaneously con nected press the Navigation buttons to select Wired and press OK 6 If you already set Network Setting select Resetting The n...

Страница 24: ...h your access point or wireless router for detailed connection steps and network settings Setting up the AP Access Point or the wireless router is required before connecting the TV to the network USB IN 1 HDD IN USB IN 2 Router LAN WAN Cable modem ETHERNET Internet NOTE For enjoying pictures music or video stored in the PC using the router the use of wired port in the router is recommended When th...

Страница 25: ...less routers within range and display them as a list Selecting the wireless network setting type Select the wireless network setting type Setting from the AP list Simple setting WPS button mode Setting Ad hoc network Previous Exit Next 8 Press the Navigation buttons to select an AP Access Point or wireless router on the list If your AP is locked insert the security key of AP and press OK 9 Press t...

Страница 26: ...IP address Subnet Mask and default Gateway can be set with your own discretion i e IP address 192 168 0 1 Sub net Mask 255 255 255 0 default Gateway 192 168 0 10 TV Setting Verify IP address and gateway of PC Input Gateway address of PC to IP Address and IP Address of PC to Gateway and select OK i e IP address 192 168 0 10 Subnet Mask 255 255 255 0 default Gateway 192 168 0 1 6 Press the Navigatio...

Страница 27: ... in this TV or you may be lim ited to the number of devices you can connect at the same time If your ISP limits sub scription to one device this TV may not be allowed to con nect when a PC is already connected The use of a Router may not be allowed or its usage may be limited depending on the policies and restrictions of your ISP For details contact your ISP directly The wireless network operates ...

Страница 28: ...s the Navigation buttons to scroll to NET WORK and press OK 4 Press the Navigation buttons to select Net work Status 5 Press OK to check the network status Option Description Setting Return to the network setting menu or wireless network setting type menu Test Test the current network status after setting the network Close Return to the previous menu ...

Страница 29: ...en depend ing on your broadband speed For service that requires log in join the ap plicable service on the website using the PC and log in through the TV to enjoy various additional functionalities These services are provided by separate Content Provider Please visit the content providers web site for specific information on their service But some content manual maybe not provide depending on Cont...

Страница 30: ...ENESS OF ANY CONTENT OR SERVICE MADE AVAIL ABLE THROUGH THIS DEVICE AND DOES NOT WARRANT THAT THE DEVICE OR SERVICES WILL MEET YOUR REQUIREMENTS OR THAT OPERATION OF THE DEVICE OR SERVICES WILL BE UNINTERRUPTED OR ERROR FREE UNDER NO CIRCUMSTANCES INCLUD ING NEGLIGENCE SHALL LG BE LIABLE WHETHER IN CONTRACT OR TORT FOR ANY DIRECT INDIRECT INCIDENTAL SPECIAL OR CONSEQUENTIAL DAMAGES OR ANY OTHER DA...

Страница 31: ...age device may differ depending on the device Only use a USB storage device which has normal music or image files Use only USB storage devices that are for matted as a FAT 32 or NTFS file system If you format a USB storage device as a NTFS file system you cannot delete the saved files You may need to connect a USB storage device to an external power supply with a power adapter If the TV does not r...

Страница 32: ... Multi Audio and Closed Caption features are not supported When selecting Full Screen in DLNA mode the ratio of the outputted screen may differ from the original When more than one TV is connected to a single server in DLNA mode a file may not play properly depending on the server performance If the play time information is not provided by the server it is displayed as When using Movie List DRM fi...

Страница 33: ...ant to take part in the anonymous col lection of data select the check box and click the Next button 9 Click the Exit button to complete the installa tion Sharing files and folders After installing Nero MediaHome you must add folders you wish to share 1 Double click the Nero MediaHome 4 Essentials icon on the desktop 2 Click Network icon on the left and define your network name in the Network name...

Страница 34: ...s ability Even the files that are not supported can be displayed in photo thumbnail or music thumbnail Movie thumbnail is only supported when DLNA server supports a Movie thumbnail If there is an unplayable music file in the My Media menu the TV will skip the file and play next file The file information indicated on the screen may not always correct for music and movie files in My Media menu This ...

Страница 35: ...er to the mobile phone s user manual to find out how to use it to play a file You can change the name of a connected TV by double clicking the item you want to change in Control Panel Network and Internet View network computers and devices You cannot change the name of a TV while DMR media is playing Change it when playback is stopped 2 To exit press the EXIT button on the remote control During pl...

Страница 36: ...storage devices Type Supported file format Video MPG MPEG DAT TS TRP TP VOD MP4 MOV MKV DivX AVI Motion JPEG AVI MP4 MKV ASF WMV FLV Resolution under 1920 pixel width x 1080 pixel height Frame Rate under 30 frame sec 1920 x 1080 under 60 frame sec 1280 x 720 Max bitrate of playable movie file 20 Mbps Mega bit per second Bit rate of audio format within 32 kbps to 320 kbps MP3 Supported subtitle for...

Страница 37: ...menu screen Play video files on the TV Your TV can display video files from a USB storage device 1 Press HOME to access the Home menu 2 Press the Navigation buttons to scroll to Smart Share and press OK 3 Press the Navigation buttons to scroll to Movie List and press OK 4 Press Navigation buttons to select a folder or file you want and press OK 5 Play a movie by using the following menus but tons ...

Страница 38: ...ded on the specified type and format The TV may not play the files encoded with GMC Global Motion Compensation or quarter pel motion estimation The TV supports the only files saved in AS CII code in subtitles The maximum number of characters dis played on each subtitle line is 250 Korean 500 English and 500 Numbers The TV supports the only 10 000 sync blocks within the subtitle file The TV support...

Страница 39: ...olish Croatian Czech Slovak Slovenian Serbian Hungarian Latin4 Estonian Latvian Lithuanian Cyrillic Bulgarian Macedonian Russian Ukrainian Kazakh Greek Greek Turkish Turkish Sync When the video is not synchronized with the captions it can be adjusted by 0 5 second Position Move the location of the subtitles Size Changes the subtitle font size Repeat Turn on off repeat function of movie playback Wh...

Страница 40: ... you use the DivX registration code of another device you cannot play the rented or purchased DivX file Make sure to use the DivX registration code assigned to your TV The video or audio files that are not con verted by the standard DivX codec may be corrupted or not be played The DivX VOD code allows you to activate up to 6 devices under one account Deactivating the DivX feature Deactivate all of...

Страница 41: ...folder Yellow button Go to upper folder 6 Use the following options while viewing photos Option Description Slideshow Starts or stops a slideshow All photos saved in the current folder display during a slideshow To set a slideshow speed select Op tion BGM Background Music Turns the background music on or off To set the background music folder select Option NOTE e h t p u t e s r o e g n a h c t n ...

Страница 42: ...usic folder for the back ground music Select Repeat or Random option NOTE c i s u m e h t e g n a h c t o n n a c u o Y folder while the background music is playing Set Video Control the menu option Refer to PICTURE Set tings on page 64 Set Audio Control the menu option Refer to AUDIO Set tings on page 68 Option values changed in Photo List do not affect Movie List and Music List Option values cha...

Страница 43: ...y using the following menus but tons Button Description Navigation button Scrolls the file OK Plays the highlighted file P Moves to the previous or next page Red button Change device Changes to a differ ent input Green button Go to root folder Yellow button Go to upper folder Blue button Open music player It is enabled during palying a music Page 1 1 Music List USB2 External Drive1 Page 1 2 Page C...

Страница 44: ...nged in Photo List and Music List are changed likewise in Photo List and Music List excluding Movie List You can listen to the music only within the device currently played NOTE Set Audio Play Select Repeat or Random option Set Audio Control the menu option Refer to AUDIO Set tings on page 68 A copy protected file will not play If the TV is not in use for some time during playback the information ...

Страница 45: ...d or operate properly The TV will display up to 128 characters of a files name Please backup important files because data on USB device may be damaged Data management is consumer s responsibility and as a result the manufacturer does not cover data damage The recommended capacity is 1TB or less for a USB HDD and 40GB or over for USB memory Any device with more than the recommended capacity may not...

Страница 46: ...remove the USB device It may cause error on the TV and the storage device USB device Initialization Initialization completed Ready to record Timeshift Mode On Close i Cancel OK To use LG DVR USB storage device needs to be formatted Do you want to continue NOTE When initialization is completed a popup notice of completion is displayed and the connected USB HDD is available for Timemachine Depending...

Страница 47: ... buttons to scroll to On or Off and press OK 5 When you are finished press EXIT When you return to the previous menu press BACK NOTE Timeshift Mode is available in DTV mode Radio or satellite channels cannot be re corded Menu Description Recorded TV Moves to the Recorded TV Schedule List Moves to the Schedule List Select schedule by date Moves to the Manual Timer Select schedule by programme Set u...

Страница 48: ...essing the Time Machine NOTE In order to save hard disk space nothing is saved when there is no signal Time Machine can be used for maximum of 3 hours You can t do the programme change or input conversion on recording When turning power on it may take up to a maximum of 3 minutes to initialize the HDD Recording or playing the recorded pro gramme may not initiate for a copy protected programme Inst...

Страница 49: ...button for slow motion OK When you move the cursor using the Time Machine button during playback and then press the OK button the screen will directly play at the applicable screen where the cursor is located LIVE TV To view the current live broadcast press the LIVE TV button during playback Use of remote control RECORDING Start Stop record Use this function when you cannot watch the de sired prog...

Страница 50: ...differ slightly from the actual time Manual Timer This function is easy to register to reserved record ing Timer recording is set Record Schedule Timer recording is set Apr 2 2010 15 30 Recorded TV Schedule List Select schedule by date Select schedule by programme Option Exit Recording starts Manual Timer Select the date to schedule Sun 28 29 30 31 Mon Tue Wed Thu Fri Sat 1 2 3 10 17 24 9 16 23 8 ...

Страница 51: ...ing to start and the power of the TV is turned off the TV will turn on the power of the part required for the recording and proceed to the reservation When it is time for the reserved recording to start and the Immediate recording is in progress the recording of the programme currently being recorded will be stopped and saved and then proceed to the reserved recording If the TV is unplugged once o...

Страница 52: ...le List Initialization 5 When you are finished press EXIT When you return to the previous menu press BACK Programme Guide This function is easy to register to reserved record ing Timer recording is set Record Schedule Timer recording is set Apr 2 2010 15 30 Recorded TV Schedule List Select schedule by date Select schedule by programme Option Exit Recording starts 1 After selecting Timeshift Mode O...

Страница 53: ...ace 100GB 79h 03m 31h 37m No Information Playing time 00 02 30 Date 2010 01 01 USB NOTE If there is a bad sector in the disk part or all of the items of the Recording list can be deleted Maximum number of recordings within the Recording list is 200 When the number of recordings in the Recording list is 200 you cannot record any more s i g n i d r o c e r e h t f o n o i t a r u d l l u f e h t n e...

Страница 54: ...to Recorded TV and press OK 4 Press Navigation buttons to recorded programme and press OK 5 Press Navigation buttons to scroll to select play option and press OK 6 When you are finished press EXIT When you return to the previous menu press BACK USB 00 35 00 35 Clip Edit Repeat Option Hide Exit 2 3 1 Button Description Red button Unmark All Change marked recorded programmes to unmarked recorded pro...

Страница 55: ... the recording progress bar at the bottom of the screen Start and end of the Interval clip edit can be set both in forward and reverse direction Interval shorter than 10 seconds cannot be save Blue button Repeat Press the BLUE button at the starting point where you want to set the Interval repeat and press it again at the ending point To cancel the playback for the interval repeat press the BLUE b...

Страница 56: ...TV Programme Displayed with a Radio Programme HE AAC C Displayed with a HE AAC Programme Aspect ratio of broadcasting programme Aspect ratio of broadcasting programme Displayed with a Teletext Programme Displayed with a Subtitle Programme Displayed with a Scramble Programme Displayed with a Dolby Digital Programme Displayed with a Dolby Digital PLUS Pro gramme 576i p 720p 1080i p Resolution of bro...

Страница 57: ...ion INFO The detail information on or off Text Up Down Select Timer Record Remind setting mode GUIDE Switch off EPG EXIT Date Change Mode Button Description Green button Switch off Date setting mode BACK OK Change to the selected date Select a date GUIDE Switch off EPG EXIT 8 Day Guide Mode Button Description Red button Change EPG mode Green button Enter Date setting mode Yellow button Enter Manua...

Страница 58: ...s including flashing lights or images in TV or video games If you or anybody from your family has a history of epilepsy or seizure please consult with your doctor before watching 3D TV Also certain symptoms can occur in unspeci fied conditions without any previous history If you experience any of the following symp toms immediately stop watching the 3D imaging and consult a doctor dizziness or lig...

Страница 59: ...rted images When using 3D Glasses CAUTION Do not use the 3D glasses to replace your corrective glasses sunglasses or protective goggles Do not store the 3D glasses in hot or cold locations Do not drop objects onto the 3D glasses Do not drop or bend the glasses Since the lenses of the 3D glasses are easily scratched make sure to clean only with a soft cloth Shake off any dust before using the cloth...

Страница 60: ...is thumbnail Exit 2D 3D Changed from 2D imaging to 3D imaging Side by Side Top Bottom Checker Board Frame Sequential 4 Press the Navigation buttons to select the 3D mode Viewing 3D imaging If you don t want to watch 3D video Press the 3D button then chose 3D 2D option watch 2D video or chose close 3D mode option watch origi nal video Picture option may difference depend on input source Antenna or ...
Страница 61: ...ma with the AV MODE button on the remote control AV Mode is set as Standard while playing in 3D Energy Saving is disabled while playing in 3D 3D Mode Setting Set Video Control the menu option Refer to PICTURE Settings on page 66 Set Audio Control the menu option Refer to AUDIO Set tings on page 70 Button Description 3D Picture Correction Select Left Right 3D Depth Adjusts the distance between the ...

Страница 62: ...ress the Navigation buttons to scroll to the setting or option you want and press OK 5 When you are finished press EXIT Menu Description SETUP Sets up and edit programmes PICTURE Adjusts the image size quality or effect AUDIO Adjusts the sound quality effect or volume level TIME Sets the time date or timer feature LOCK Locks or unlocks channels and programmes OPTON Customizes the general settings ...

Страница 63: ...return to the previous level press BACK 5 When you are finished press EXIT The available programme settings are described in the following SETUP OK Move Auto Tuning Manual Tuning Programme Edit Booster On Exit Setting Description Auto Tuning Tunes and stores all available programmes through antennas or cable inputs Manual Tuning Tunes and stores the programmes you want manually Programme Edit Adds...

Страница 64: ... quality and calibrates the screen The customized options will be saved as Expert1 in the Picture Mode If you use Picture Wizard the Energy saving feature will turn off automatically To reset changes made by Picture Wizard operate Picture Reset when Picture Mode is on Expert1 In RGB PC HDMI PC DVI PC mode the changed Colour Tint and H V Sharpness values are not applied NOTE Set 3D Video Only 3D mo...

Страница 65: ...s the detailed video image settings for video experts as well as gen eral viewers TruMotion Advance video technology that provides clearer smoother images even during fast action scenes creating a more stable structure for a crisper picture TruMotion works with all inputs except PC mode If you enable TruMotion noise may appear on the screen If this occurs set TruMotion to Off If you select Picture...

Страница 66: ...ess Colour or Tint NOTE Setting Description Dynamic Contrast Adjusts the contrast to keep it at the best level according to the brightness of the screen The picture is improved by making bright parts brighter and dark parts darker Dynamic Colour Adjusts screen colours so that they look livelier richer and clearer This feature enhances hue saturation and luminance so that red blue and green white l...

Страница 67: ... of colours Wide Increase number of colours used Expert Control Displays colour domain of the signal Standard Displays standard set of colours Wide Increase number of colours used EBU Mode to display EBU standard colour area SMPTE Mode to display SMPTE standard colour area BT709 Mode to display BT709 standard colour area xvYCC This is produces richer colours This feature represents rich colours as...

Страница 68: ...er to cope with different user environments NOTE Option Infinite 3D Surround Patents LG proprietary sound processing technology that strives im mersive 5 1 surround sound with just two front speakers Treble Controls the dominant sounds in the output When you turn up the treble it will increase the output to the higher frequency range Bass Controls the softer sounds in the output When you turn up t...

Страница 69: ...n the sound output the TV speaker Some menus in AUDIO are disabled when TV speaker is set to Off NOTE ARC Mode Audio Return Channel When using an external audio device with the Audio Return Channel ARC feature optical SPDIF can be output using only a HDMI cable and SIMPLINK can be enabled Some HDMI cables may not support this mode A High Speed HDMI cable is recommended The ARC mode only works for ...

Страница 70: ...or FM MONO If the stereo signal is weak switch to FM MONO 3 When NICAM dual is received you can select NICAM DUAL I NICAM DUAL II or NICAM DUAL I II or FM MONO In AV Component RGB and HDMI mode you can select output sound for the left and right loudspeakers Select the sound output L R Audio signal from audio L input is sent to the left loudspeaker and audio signal from audio R input is sent to the...

Страница 71: ...andby mode automatically If you set both Off time and On time features to the same time the Off time feature overrides the On time feature NOTE Sleep Timer Sets the length of time until the TV to turns off When you turn the TV off and turn it on again the Sleep timer faature will be set to off TIME Settings 1 Press HOME to access the Home menu 2 Press the Navigation buttons to scroll to SETUP and ...

Страница 72: ... enter the password It is available to use this function in Lock System On Input Block Block the input sources It is available to use this function in Lock System On LOCK Settings 1 Press HOME to access the Home menu 2 Press the Navigation buttons to scroll to SETUP and press OK 3 Press the Navigation buttons to scroll to LOCK and press OK 4 Press the Navigation buttons to scroll to the setting or...

Страница 73: ...e Use Pointer Smart share setting MHEG Guidw On Setting Description Language Selects a language for the display or audio Option Menu Language Select your desired language Audio Language The Audio function allows selection of a preferred language If audio data in a selected language is not broadcast the default lan guage audio will be played Subtitle Language Use the Subtitle function when two or m...

Страница 74: ...l broadcasting circumstances NOTE Hard of Hearing This function is for the blind and provides explanatory audio describing the current situation in a TV programme in addition to the basic audio Power Indicator Sets to turn on or off the indicator light on the TV Option Standby Light Set to turn on or off the indicator light in Standby mode Power Light Set to turn on or off the indicator light when...

Страница 75: ...Demo Selects it for the retail environment Demo Mode Sets to show special features of the TV You can cancel the demo mode by pressing any buttons except the Volume and Mute buttons It is not possible to use Demo Mode in Home Use mode In Store Demo Demo Mode is automatically set to On Once Demo Mode is set to Off in Store Demo Demo Mode does not run and only the screen is reset The screen is reset ...

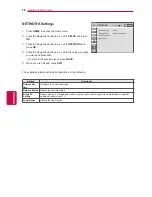
Страница 76: ...he previous level press BACK 5 When you are finished press EXIT The available network settings are described in the following NETWORK OK Move Network Setting Wired Network Status Internet is connected Smart TV Setting Legal Notice Exit Setting Description Network Set ting Configure the network settings Network Status Display the network status Stream movies TV shows and video or get up to the minu...

Страница 77: ...or built in melody sound tests If this test has an error select Yes You can see the product or service information e h t o t r e f e r d n a s e c i v e d l a n r e t x e f o s u t a t s n o i t c e n n o c e h t k c e h c s r o r r e o n s a h t s e t s i h t f I manual of external devices Sound Test Signal Test Views information on the Manufacturer Model Type Serial Number and Software Version P...

Страница 78: ...8 ENG ENGLISH MAKING CONNECTIONS EXTERNAL EQUIPMENT SETUP To avoid damaging any equipment never plug in any power cord until you have finished connecting all equipment Image shown may differ from your TV ...

Страница 79: ...t the output resolution appropriately Check that your HDMI cable is High Speed HDMI Cable If the HDMI cablesare not High Speed HDMI Cable flickering or no screen display can result Please use the High Speed HDMI Cable If cables are installed incorrectly it could case the image to display in black and white or with di storted colour Check to ensure the cable are matched with the corresponding colou...

Страница 80: ...an not be changed change the PC graphic card or consult the manufacturer of the PC graphic card The synchronization input waveform for Horizontal and Vertical frequencies are separate We recommend using 1920x1080 60 Hz for the PC mode this should provide the best picture quality Connect the signal cable from the monitor output port of the PC to the RGB PC port of the TV or the signal cable from th...

Страница 81: ...ontrol the devices and play media without additional settings Select AV device Enables you to select one of the AV devices connected to the TV Disc playback Control connected AV de vices by pressing the Navigation buttons OK and buttons Power off all devices When you power off the TV all connected devices are turned off Switch audio out Offers an easy way to switch audio out Sync Power on When the...

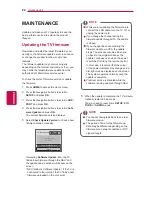
Страница 82: ...irmware through the NSU and the update pop up window will appear on the screen s i V T e h t f I e t a d p U e r a w t f o S k r o w t e N U S N connected to the internet the TV finds a new firmware uploaded on the LG server While you are updating the firmware dis connect the LAN cable turn the TV off or unplug the power cord If you change the channel during the firmware update through OTA the upd...

Страница 83: ...ingernail or a sharp object as this may result in scratches on the screen and image distortions Do not use any chemicals such as waxes benzene alcohol thinners insecticides air fresheners lubricants as these may as these may damage the screen s finish and cause discolorations Cabinet and stand To remove dust or light dirt wipe the cabinet with a dry clean and soft cloth To remove major dirt wipe t...

Страница 84: ... permanent disfigurement on the screen This is image burn or burn in and not covered by the warranty If the aspect ratio of the TV is set to 4 3 for a long period of time image burn may occur on the letterboxed area of the screen Avoid displaying a fixed image on the TV screen for a long period of time 2 or more hours for LCD 1 or more hours for the Plasma TV to prevent image burn ...

Страница 85: ...er control settings The power supply may be interrupted Check if the Auto sleep feature is activated in the Time settings Refer to the Sleep Timer If there is no signal while the TV is on the TV will turn off automatically after 15 minutes of inactivity Problem Resolution Cannot control the TV with the remote control Check the remote control sensor on the product and try again Check if there is an...

Страница 86: ... Signal appears on the screen Check if the signal cable is connected between the TV and products properly Check the selected input source by pressing INPUT Black spots appear on the screen Several pixels in red green white or black may appear on the screen that can attribute to the characteristics of the LCD panel This is normal The display offset is wrong Adjust the position setting in the Pictur...

Страница 87: ...mm x 34 9mm 16 2kg 13 4kg 1012mm x617mm x29 9mm 21 7kg 18 8kg AC 100 240V 50 60Hz Refer to p 89 MODELS Power requirement ITEM ITEM MODELS Environment condition Operating Temperature Operating Humidity Storage Temperature Storage Humidity Supported movie files 0 C to 40 C Less than 80 20 C to 60 C Less than 85 ITEM MODELS The specifications shown above may be changed without prior notice for qualit...

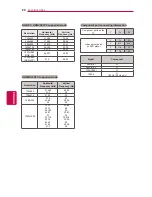
Страница 88: ...x400 31 468 70 08 640x480 31 469 59 94 800x600 37 879 60 31 1024x768 48 363 60 00 1360x768 47 72 59 80 1920x1080 RGB PC 66 587 59 93 1920x1080 HDMI PC 67 5 60 00 Resolution Horizontal Frequency kHz Vertical Frequency Hz 720x480 31 469 31 5 59 94 60 720x576 31 25 50 1280x720 37 5 44 96 45 50 59 94 60 1920x1080 33 72 33 75 28 125 26 97 27 33 716 33 75 56 25 67 43 67 5 59 94 60 50 23 97 24 29 976 30 ...

Страница 89: ...on or quarterpel motion estimation does not sup ported Streams using this syntax are not supported MPEG 4 Part 2 Advanced Simple Profile e g 720p 1080i Audio AAC AAC LC and HE AAC mkv Video H 264 AVC Main Profile Level 4 1 High Profile Level 4 1 e g 720p60 1080i60 1080p30 Most of the MKV content available is encoded by the open source x264 codec Audio AAC AAC LC and HE AAC Dolby Digital ts trp tp ...

Страница 90: ...1080i 1920X1080 33 75 60 Top Bottom Side by Side 28 125 50 1080p 1920X1080 67 50 60 Top Bottom Side by Side Checker Board Single Frame Sequential 56 250 50 Top Bottom Side by Side 27 24 Top Bottom Side by Side Checker Board 53 95 54 23 98 24 HDMI V 1 4 with 3D Frame Packing 33 75 30 Top Bottom Side by Side Checker Board USB Input 1080p 1920X1080 33 75 30 Top Bottom Side by Side Checker Board MPO P...
Страница 91: ...1 translations html This product includes other open source software boost C software developed by http www boost org distributed under the Boost Software License Version 1 0 c ares copyright 1998 by the Massachusetts Institute of Technology expat copyright 1998 1999 2000 Thai Open Source Software Center Ltd and Clark Cooper copyright 2001 2007 Expat maintainers fontconfig copyright 2001 2003 Keit...

Страница 92: ...otect your rights with two steps 1 copyright the software and 2 offer you this license which gives you legal permission to copy distribute and or modify the software Also for each author s protection and ours we want to make certain that everyone understands that there is no war ranty for this free software If the software is modified by someone else and passed on we want its recipients to know th...

Страница 93: ...rk based on the Program the distribution of the whole must be on the terms of this License whose permissions for other licensees extend to the entire whole and thus to each and every part regard less of who wrote it Thus it is not the intent of this section to claim rights or contest your rights to work written entirely by you rather the intent is to exercise the right to control the distribution ...

Страница 94: ...ntirely from distribution of the Program If any portion of this section is held invalid or unenforceable under any particular circumstance the balance of the sec tion is intended to apply and the section as a whole is intended to apply in other circumstances It is not the purpose of this section to induce you to infringe any patents or other property right claims or to contest validity of any such...

Страница 95: ... author This program is free software you can redistribute it and or modify it under the terms of the GNU General Public License as published by the Free Software Foundation either version 2 of the License or at your option any later version This program is distributed in the hope that it will be useful but WITHOUT ANY WARRANTY without even the implied warranty of MERCHANTABILITY or FITNESS FOR A ...

Страница 96: ...nt to make it very clear that there is no warranty for the free library Also if the library is modified by someone else and passed on the recipients should know that what they have is not the original version so that the original author s reputation will not be affected by problems that might be introduced by others Finally software patents pose a constant threat to the existence of any free progr...

Страница 97: ... what the program that uses the Library does 1 You may copy and distribute verbatim copies of the Library s complete source code as you receive it in any medi um provided that you conspicuously and appropriately publish on each copy an appropriate copyright notice and dis claimer of warranty keep intact all the notices that refer to this License and to the absence of any warranty and distrib ute a...

Страница 98: ... from a header file that is part of the Library the object code for the work may be a derivative work of the Library even though the source code is not Whether this is true is especially significant if the work can be linked without the Library or if the work is itself a library The threshold for this to be true is not precisely defined by law If such an object file uses only numerical parameters ...

Страница 99: ...ept this License Therefore by modifying or distributing the Library or any work based on the Library you indicate your acceptance of this License to do so and all its terms and conditions for copying distributing or modifying the Library or works based on it 10 Each time you redistribute the Library or any work based on the Library the recipient automatically receives a license from the original l...

Страница 100: ... CONSEQUENTIAL DAMAGES ARISING OUT OF THE USE OR INABILITY TO USE THE LIBRARY INCLUDING BUT NOT LIMITED TO LOSS OF DATA OR DATA BEING RENDERED INACCURATE OR LOSSES SUSTAINED BY YOU OR THIRD PARTIES OR A FAILURE OF THE LIBRARY TO OPERATE WITH ANY OTHER SOFTWARE EVEN IF SUCH HOLDER OR OTHER PARTY HAS BEEN ADVISED OF THE POSSIBILITY OF SUCH DAMAGES END OF TERMS AND CONDITIONS How to Apply These Terms...

Страница 101: ...is described in the Source Code notice required by Exhibit A as Original Code and which at the time of its release under this License is not already Covered Code governed by this License 1 10 1 Patent Claims means any patent claim s now owned or hereafter acquired including without limitation method process and apparatus claims in any patent Licensable by grantor 1 11 Source Code means the preferr...

Страница 102: ... Source Code version of Covered Code may be distributed only under the terms of this License or a future version of this License released under Section 6 1 and You must include a copy of this License with every copy of the Source Code You distribute You may not offer or impose any terms on any Source Code version that alters or restricts the applicable version of this License or the recipients rig...

Страница 103: ...bute the Executable version of Covered Code or ownership rights under a license of Your choice which may contain terms different from this License provided that You are in compliance with the terms of this License and that the license for the Executable version does not attempt to limit or alter the recipient s rights in the Source Code version from the rights set forth in this License If You dist...

Страница 104: ...f within 60 days after receipt of notice You either i agree in writing to pay Participant a mutually agreeable reasonable royalty for Your past and future use of Modifications made by such Participant or ii withdraw Your litigation claim with respect to the Contributor Version against such Participant If within 60 days of notice a reasonable royalty and payment arrangement are not mutually agreed ...

Страница 105: ...itable basis Nothing herein is intended or shall be deemed to constitute any admission of liability 13 MULTIPLE LICENSED CODE Initial Developer may designate portions of the Covered Code as Multiple Licensed Multiple Licensed means that the Initial Developer permits you to utilize portions of the Covered Code under Your choice of the NPL or the alter native licenses if any specified by the Initial...

Страница 106: ...The model and serial numbers of the TV is located on the back of the TV Record it below should you ever need service MODEL SERIAL ...

Отзывы: