10
4 inches
4 inches
4 inches
4 inches
4 inches
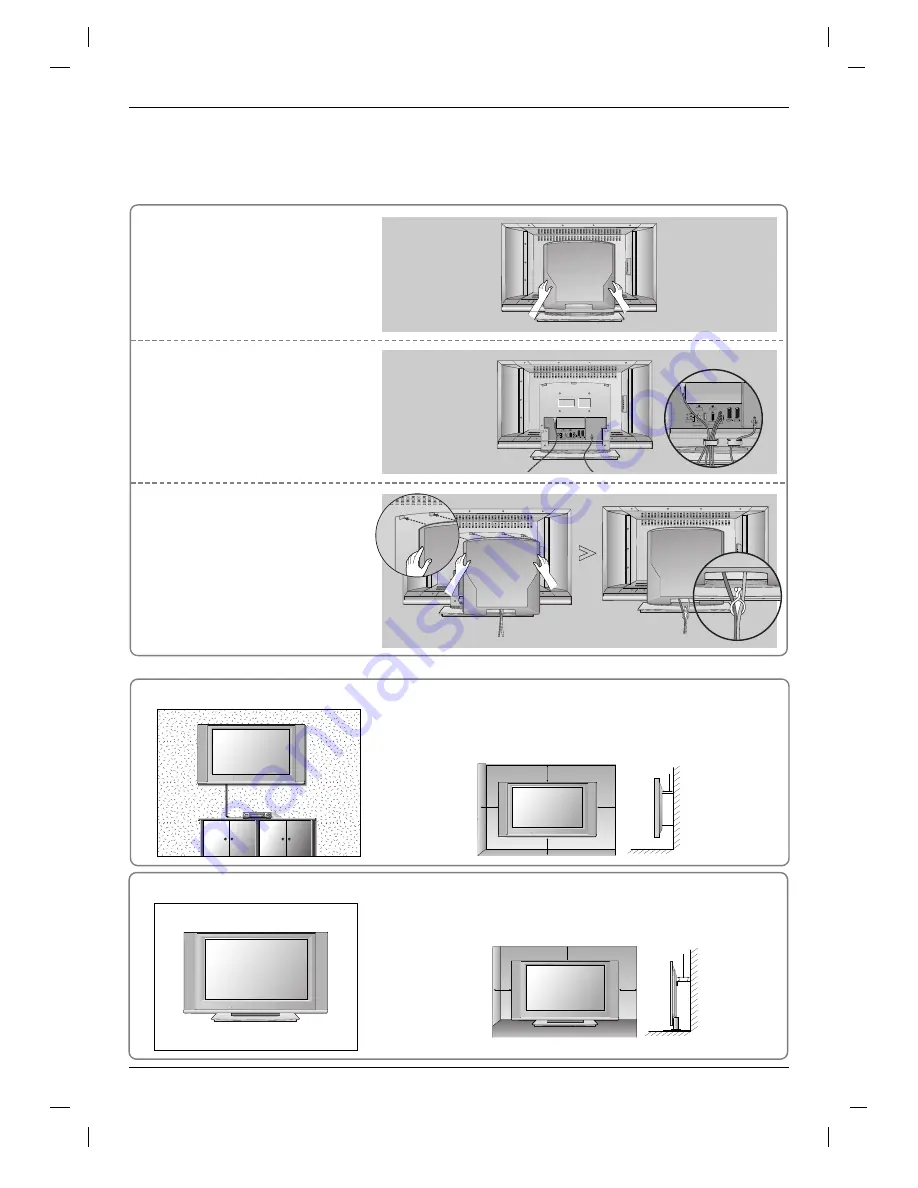
For proper ventilation, allow a clearance of 4" on each side and from
the wall. Detailed installation instructions are available from your
dealer, see the optional Tilt Wall Mounting Bracket Installation and
Setup Guide.
Wall Mount: Horizontal installation
Desktop Pedestal Installation
4 inches
4 inches
4 inches
4 inches
For proper ventilation, allow a clearance of 4" on each side and from
the wall.
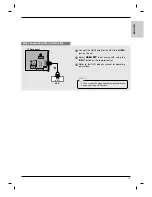
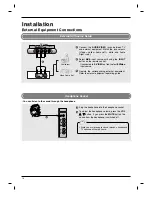
Hold the cover with both hands
and pull it backward.
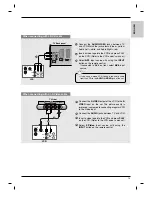
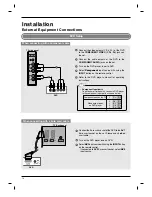
Connect the cables as necessary.
After connecting the cables neatly,
arrange the cables to the Cable
Holder (option).
To connect an additional equipment,
see the
External equipment
Connections
section.
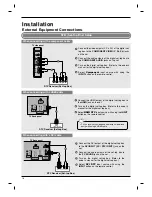
Align the holes on the TV back
panel with the protuberances on
the back cover and insert.
Pull the cables through the hole
on the set and bundle the cables
using the supplied twister holder.
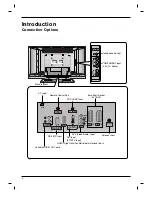
1
2
3
VIDEO
AUDIO
HDMI
AV1
AV2
AV3
PC SOUND
RS-232C INPUT
(CONTROL/SERVICE)
REMOTE
CONTROL
DVI INPUT
(PC/DTV INPUT)
L
R
L
R
VARIABLE
AUDIO OUT
Antenna
Antenna
LOOP THROUGH
UPGRADE
PORT
HDMI
MONITOR
OUT
REMOTE
CONTROL
DVI INPUT
(PC INPUT)
PC SOUND
AV1
AV2
VIDEO
L
AUDIO
R
Antenna
LOOP THROUGH
UPGRADE
PORT
HDMI
MONITOR
OUT
REMOTE
CONTROL
DVI INPUT
(PC INPUT)
PC SOUND
AV1
AV2
VIDEO
L
AUDIO
R
Antenna
LOOP THROUGH
UPGRADE
PORT
HDMI
MONITOR
OUT
REMOTE
CONTROL
DVI INPUT
(PC INPUT)
PC SOUND
AV1
AV2
VIDEO
L
AUDIO
R
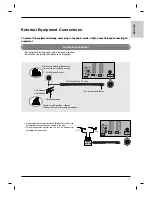
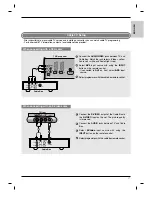
Basic Connection
Basic Connection
Installation
Installation
VIDEO
AUDIO
HDMI
AV1
AV2
AV3
PC SOUND
RS-232C INPUT
(CONTROL/SERVICE)
REMOTE
CONTROL
DVI INPUT
(PC/DTV INPUT)
L
R
L
R
VARIABLE
AUDIO OUT
Antenna
Содержание 32LP1R Series
Страница 63: ...63 ENGLISH ...
Страница 64: ......

