background image

8

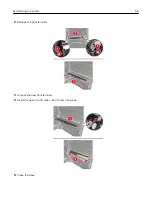
Insert the waste toner bottle, and then close the door.

Maintaining the printer

48

Содержание CS921

Страница 1: ...CS921 CS923 CS927 User s Guide August 2017 www lexmark com Machine type s 5059 Model s 130 530...

Страница 2: ...home screen 18 Using Display Customization 18 Con guring Eco Settings 18 Setting up and using the accessibility features 19 Enabling Magni cation mode 19 Activating Voice Guidance 19 Adjusting the Vo...

Страница 3: ...ard disk memory 30 Con guring printer hard disk encryption 31 Restoring factory default settings 31 Statement of Volatility 31 Maintaining the printer 33 Networking 33 Setting up serial printing Windo...

Страница 4: ...83 Staple jam in the booklet nisher 85 Troubleshooting 87 Network connection problems 87 Hardware options problems 89 Issues with supplies 90 Paper feed problems 91 Printing problems 95 Color quality...

Страница 5: ...II equipment Off Class II equipment with functional earthing Standy Functional earthing Ground earth Protective bonding terminal Electrostatic discharge ESD sensitivity Ground earth Protective earthi...

Страница 6: ...power cord from the electrical outlet before continuing If you have any other devices attached to the printer then turn them off as well and unplug any cables going into the printer CAUTION SHOCK HAZA...

Страница 7: ...e is a danger of explosion if a lithium battery is incorrectly replaced Do not recharge disassemble or incinerate a lithium battery Discard used lithium batteries according to the manufacturer s instr...

Страница 8: ...roblems Information Center Go to http infoserve lexmark com Help Menu Pages Access the guides on the printer rmware or go to http support lexmark com Touch Screen Guide Go to http support lexmark com...

Страница 9: ...exmark com In other countries and regions See the printed warranty that came with the printer Product Information Guide See the documentation that came with the printer or go to http support lexmark c...

Страница 10: ...0 to 30 C 50 to 86 F Storage temperature 10 to 40 C 14 to 104 F Allow the following recommended amount of space around the printer for proper ventilation 1 Top 150 mm 5 9 in 2 Right side 400 mm 15 7 i...

Страница 11: ...model CAUTION TIPPING HAZARD Installing one or more options on your printer or MFP may require a caster base furniture or other feature to prevent instability causing possible injury For more informa...

Страница 12: ...d and properly grounded electrical outlet that is near the product and easily accessible CAUTION POTENTIAL INJURY To avoid the risk of re or electrical shock use only the power cord provided with this...

Страница 13: ...le option 2 Power cord socket Connect the printer to a properly grounded electrical outlet 3 Ethernet port Connect the printer to an Ethernet network 4 USB printer port Connect the printer to a comput...

Страница 14: ...eaker 9 Backspace button Move the cursor backward and delete a character in an input eld Understanding the status of the power button and indicator light Indicator light Printer status Off The printer...

Страница 15: ...Note You can also access this setting by touching the top section of the home screen 3 Change Language Change the language on the printer display 4 Settings Access the printer menus 5 USB Drive View s...

Страница 16: ...PPDS Paper Tray Con guration Media Con guration Bin Con guration Network Ports Network Overview Wireless AirPrint Ethernet TCP IP IPv6 SNMP IPSec LPD Con guration HTTP FTP Settings ThinPrint USB Paral...

Страница 17: ...rk Help Print All Guides Color Quality Guide Connection Guide Information Guide Media Guide Moving Guide Print Quality Guide Supplies Guide Troubleshooting Print Quality Test Pages Advanced Print Qual...

Страница 18: ...want to appear on the home screen 4 Apply the changes Using Display Customization Changing the wallpaper 1 From the home screen touch Change Wallpaper 2 Select an image to use 3 Apply the changes Cre...

Страница 19: ...d then press Enter Notes Voice Guidance is also activated by inserting the headphones into the headphone jack To adjust the volume use the volume buttons at the bottom part of the control panel Adjust...

Страница 20: ...screen Triple tap Zoom in or zoom out text and images Swipe right or swipe down Move to the next item on the screen Swipe left or swipe up Move to the previous item on the screen Pan Access parts of t...

Страница 21: ...Paper Size Type select a paper source 2 Set the size and type of the specialty media Con guring Universal paper settings 1 From the home screen touch Settings Paper Media Con guration Universal Setup...

Страница 22: ...guides to match the size of the paper that you are loading 3 Flex fan and align the paper edges before loading 4 Load the paper When using letterhead do either of the following Loading paper and speci...

Страница 23: ...printing Load pre punched paper with the holes toward the front or left side of the tray Do not slide paper into the tray To avoid paper jams make sure that the stack height is below the maximum pape...

Страница 24: ...e feeder 2 Adjust the guide to match the size of the paper that you are loading 3 Flex fan and align the paper edges before loading 4 Load the paper or specialty media When using letterhead do either...

Страница 25: ...umbers separated by periods such as 123 123 123 123 If you are using a proxy server then temporarily disable it to load the Web page correctly 2 Click Settings Paper 3 Match the paper size and type fo...

Страница 26: ...en an error message appears then the printer ignores the ash drive If you insert the ash drive while the printer is processing other print jobs then Busy appears on the display 2 From the display touc...

Страница 27: ...d 32GB PNY Attach 16GB and 32GB Notes The printer supports high speed USB ash drives with full speed standard USB ash drives must support the File Allocation Table FAT system File types Documents doc...

Страница 28: ...e verify jobs are deleted from the printer memory Note Verify jobs print one copy to check if it is satisfactory before printing the remaining copies Reserve Job Expiration Set the amount of time befo...

Страница 29: ...tting by touching the top section of the home screen 2 Select the job to cancel From the computer 1 Depending on the operating system do either of the following Open the printers folder and then selec...

Страница 30: ...embedded solutions do the following 1 From the home screen touch Settings Device Maintenance Out of Service Erase 2 Select the Sanitize all information on nonvolatile memory check box and then touch E...

Страница 31: ...etwork settings and user data Type of memory Description Volatile memory Your printer uses standard random access memory RAM to temporarily buffer user data during simple print jobs Non volatile memor...

Страница 32: ...or its hard disk is removed from your premises Degaussing Flushes the hard disk with a magnetic eld that erases stored data Crushing Physically compresses the hard disk to break component parts and r...

Страница 33: ...tions that came with the adapter Using the Push Button method 1 From the control panel navigate to Settings Network Ports Wireless Wi Fi Protected Setup Start Push Button Method 2 Follow the instructi...

Страница 34: ...e IP address 5 Apply the changes For Macintosh users 1 From System Preferences in the Apple menu navigate to the list of printers and then select IP 2 Type the IP address in the address eld 3 Apply th...

Страница 35: ...e paper from the standard bin and multipurpose feeder 3 Remove any dust lint and pieces of paper around the printer using a soft brush or vacuum 4 Wipe the outside of the printer with a damp soft lint...

Страница 36: ...Cleaning the printhead lens 1 Open door A 2 Remove the waste toner bottle 3 Using the printhead wiper clean the printhead lens 4 Insert the wiper back into place Maintaining the printer 36...

Страница 37: ...5 Insert the waste toner bottle and then close the door Emptying the hole punch box 1 Open door H Maintaining the printer 37...

Страница 38: ...2 Remove and then empty the hole punch box 3 Insert the hole punch box 4 Close the door Maintaining the printer 38...

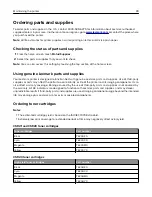
Страница 39: ...rts may affect the performance reliability or life of the printer and its imaging components It can also affect warranty coverage Damage caused by the use of third party parts and supplies is not cove...

Страница 40: ...tem Part number Staple cartridges 25A0013 Ordering maintenance kits CS921 CS923 and CS927 maintenance kits Maintenance kits Part number 200K MPF maintenance kit 41X1977 600K CMY developer maintenance...

Страница 41: ...hen type the printer IP address in the address eld Notes View the printer IP address on the printer home screen The IP address appears as four sets of numbers separated by periods such as 123 123 123...

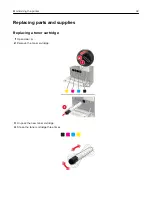
Страница 42: ...Replacing parts and supplies Replacing a toner cartridge 1 Open door A 2 Remove the toner cartridge 3 Unpack the new toner cartridge 4 Shake the toner cartridge three times Maintaining the printer 42...

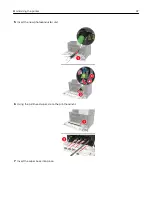
Страница 43: ...5 Insert the new toner cartridge 6 Remove the waste toner bottle Maintaining the printer 43...

Страница 44: ...7 Using the printhead wiper clean the printhead lens 8 Insert the wiper back into place 9 Insert the waste toner bottle and then close the door Maintaining the printer 44...

Страница 45: ...the photoconductor unit Warning Potential Damage Some parts of the printer are easily damaged by static electricity Before touching any parts or components in an area marked with the static sensitive...

Страница 46: ...pose the photoconductor unit to direct light for more than one minute Extended exposure to light may cause print quality problems Warning Potential Damage Do not touch the photoconductor drum Doing so...

Страница 47: ...5 Insert the new photoconductor unit 6 Using the printhead wiper clean the printhead lens 7 Insert the wiper back into place Maintaining the printer 47...

Страница 48: ...8 Insert the waste toner bottle and then close the door Maintaining the printer 48...

Страница 49: ...ste toner bottle 1 Open door A 2 Remove the waste toner bottle 3 Using the printhead wiper clean the printhead lens 4 Insert the wiper back to into place 5 Unpack the new waste toner bottle Maintainin...

Страница 50: ...6 Insert the new waste toner bottle and then close the door Replacing the pick feed and separator rollers 1 Pick roller 2 Feed roller 3 Separator roller Maintaining the printer 50...

Страница 51: ...emove all the trays Standard tray Optional 2500 sheet tray Notes Use the screwdriver stored inside door A To remove the optional 2 x 500 sheet tray follow the procedure in removing the standard tray M...

Страница 52: ...the printer If a 3000 sheet tray is installed then slide the tray to the right to open the door CAUTION HOT SURFACE The inside of the printer might be hot To reduce the risk of injury from a hot comp...

Страница 53: ...door D Notes Door D is only accessible if an optional 2500 or 2 x 500 sheet tray is installed If a 3000 sheet tray is installed then slide the tray to the right to open the door Maintaining the print...

Страница 54: ...ove the rollers 7 Insert the new rollers until they click into place Note Make sure to insert the rollers to their proper places 8 Close doors D and C 9 Insert the trays and then turn on the printer M...

Страница 55: ...hit any cable attached to the printer If a 3000 sheet tray is installed then slide the tray to the right to open the door CAUTION HOT SURFACE The inside of the printer might be hot To reduce the risk...

Страница 56: ...3 Using the screwdriver stored inside door A remove the door stopper 4 Loosen the screws that secure the transfer belt Maintaining the printer 56...

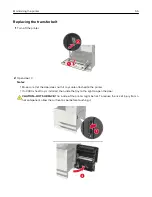
Страница 57: ...transfer belt 7 Unpack the new transfer belt Warning Potential Damage Do not touch the transfer belt Doing so may affect the quality of future print jobs 8 Insert the new transfer belt until it clicks...

Страница 58: ...eplacing the transfer roller 1 Open door C Notes Make sure that the door does not hit any cable attached to the printer If a 3000 sheet tray is installed then slide the tray to the right to open the d...

Страница 59: ...2 Remove the transfer roller 3 Unpack the new transfer roller 4 Insert the new transfer roller until it clicks into place 5 Close the door Maintaining the printer 59...

Страница 60: ...lacing the staple cartridge Replacing the staple cartridge in the staple nisher 1 Slide the staple nisher 2 Remove the empty staple cartridge 3 Unpack the new staple cartridge Maintaining the printer...

Страница 61: ...4 Insert the new staple cartridge until it clicks into place 5 Slide the nisher back into place Replacing the staple cartridge in the staple hole punch nisher 1 Open door H Maintaining the printer 61...

Страница 62: ...2 Remove the staple cartridge 3 Unpack the new staple cartridge 4 Insert the new staple cartridge until it clicks into place 5 Close the door Maintaining the printer 62...

Страница 63: ...Replacing the staple cartridge in the booklet nisher 1 Open door H and then pull out the booklet maker 2 Remove the staple cartridge 3 Unpack the new staple cartridge Maintaining the printer 63...

Страница 64: ...nd trays are closed Turn off the printer and then unplug the power cord from the electrical outlet Disconnect all cords and cables from the printer If the printer has separate oor standing optional tr...

Страница 65: ...Mode 1 From the home screen touch Settings Device Power Management Eco Mode 2 Select a setting Sleep mode 1 From the home screen touch Settings Device Power Management Timeouts Sleep Mode 2 Enter the...

Страница 66: ...savings Lexmark also offers recycling of packaging components in some countries or regions For more information go to www lexmark com recycle and then choose your country or region Information on ava...

Страница 67: ...e stack height is below the maximum paper ll indicator Do not slide paper into the tray Load paper as shown in the illustration Make sure that the paper guides are positioned correctly and are not pre...

Страница 68: ...the paper size and type are set correctly on the computer or printer control panel Store paper according to manufacturer recommendations Identifying jam locations Note When Jam Recovery is set to On...

Страница 69: ...ragments CAUTION HOT SURFACE The inside of the printer might be hot To reduce the risk of injury from a hot component allow the surface to cool before touching it Notes Make sure that the door does no...

Страница 70: ...o cool before touching it Notes Make sure that the door does not hit any cable attached to the printer If a 3000 sheet tray is installed then slide the tray to the right to open the door 2 Remove the...

Страница 71: ...Below the fuser area Duplex area Clearing jams 71...

Страница 72: ...Above the duplex area 3 Open the standard trays and then remove the jammed paper Note Make sure that all paper fragments are removed 4 Close the trays and then close the door Clearing jams 72...

Страница 73: ...eet tray is installed then slide the tray to the right to open the door Open door C to make sure that all paper fragments are removed and then close the door 2 Open the optional tray and then remove t...

Страница 74: ...3 Close the tray and then close the door Paper jam in the 3000 sheet tray 1 Slide the 3000 sheet tray 2 Remove the jammed paper Note Make sure that all paper fragments are removed Clearing jams 74...

Страница 75: ...Make sure that all paper fragments are removed 4 Close the door and then slide the tray back into place Paper jam in the booklet nisher 1 Open door G and then remove the jammed paper Note Make sure th...

Страница 76: ...2 Open door J 3 Open door H Clearing jams 76...

Страница 77: ...4 Remove the jammed paper from any of the following locations Note Make sure that all paper fragments are removed Door J Areas H1 and H2 Clearing jams 77...

Страница 78: ...Area H6 5 Pull out the booklet maker 6 Remove the jammed paper from any of the following locations Note Make sure that all paper fragments are removed Area H8 Clearing jams 78...

Страница 79: ...r back into place 8 Close doors H and J Paper jam in the staple nisher 1 Remove paper from the staple nisher bin 2 Slide the staple nisher and then remove the jammed paper Note Make sure that all pape...

Страница 80: ...If necessary turn the spinner wheel G1 downward to feed the jammed paper into the nisher bin and then remove the jammed paper 3 Slide the nisher back into place Clearing jams 80...

Страница 81: ...Staple jam in the staple nisher 1 Slide the staple nisher 2 Remove the staple cartridge holder Clearing jams 81...

Страница 82: ...3 Remove the loose staples 4 Insert the staple cartridge holder until it clicks into place 5 Slide the nisher back into place Clearing jams 82...

Страница 83: ...Staple jam in the staple hole punch nisher 1 Open door H 2 Remove the staple cartridge holder Clearing jams 83...

Страница 84: ...3 Remove the loose staples 4 Insert the staple cartridge holder until it clicks into place 5 Close the door Clearing jams 84...

Страница 85: ...Staple jam in the booklet nisher 1 Open door H and then pull out the booklet maker 2 Remove the staple cartridge holder Clearing jams 85...

Страница 86: ...3 Remove the loose staples 4 Insert the staple cartridge holder until it clicks into place 5 Push the booklet maker back into place and then close the door Clearing jams 86...

Страница 87: ...ngs page and then nding the TCP IP section Note An IP address appears as four sets of numbers separated by periods such as 123 123 123 123 Is the printer IP address correct Go to step 3 Type the corre...

Страница 88: ...Supported ash drives and le types on page 27 Is the ash drive supported Go to step 3 Insert a supported ash drive Step 3 a Check if the USB port is enabled For more information see Enabling the USB po...

Страница 89: ...outlet b Make sure that the internal option is installed in the appropriate connector in the controller board c Connect the power cord to the electrical outlet and then turn on the printer CAUTION PO...

Страница 90: ...or part installed in the printer Your Lexmark printer is designed to function best with genuine Lexmark supplies and parts Use of third party supplies or parts may affect the performance reliability o...

Страница 91: ...hase Paper feed problems Envelope seals when printing Action Yes No 1 Use envelopes that have been stored in a dry environment Note Printing on envelopes with high moisture content can seal the aps 2...

Страница 92: ...ing system specify the paper type and weight from the Printing Preferences or Print dialog Notes Make sure that the settings match the paper loaded in the tray You can also change the settings from th...

Страница 93: ...off the printer wait for about 10 seconds and then turn it back on If the error occurs a second time then 1 Turn off the printer 2 Unplug the power cord from the electrical outlet 3 Remove the indica...

Страница 94: ...ep 2 a From the Paper menu on the control panel check if the printer is detecting the correct paper size b Resend the print job Do paper jams still occur frequently Go to step 3 The problem is solved...

Страница 95: ...new le and then print the documents Are the documents printed The problem is solved Go to step 3 Step 3 If you are printing from the Internet then the printer may be reading the multiple job titles a...

Страница 96: ...e setting matches the paper loaded in the tray You can also change the setting on the printer control panel b Print the document Is the printer printing slow Go to step 3 The problem is solved Step 3...

Страница 97: ...document Is the printer printing slow Go to step 8 The problem is solved Step 8 a Add more printer memory b Print the document Is the printer printing slow Contact customer support The problem is solv...

Страница 98: ...conds and then turn it back on b Resend the print job Is the document printed The problem is solved Go to step 5 Step 5 a Remove and then reinstall the printer software Note The printer software is av...

Страница 99: ...es Go to step 2 The problem is solved Step 2 a Clean the printhead lens b Print the document Is the printer still printing blank or white pages Go to step 3 The problem is solved Step 3 a Replace the...

Страница 100: ...Print the document Is the print still too dark Go to step 4 The problem is solved Step 4 Check if the paper has no texture or rough nishes Are you printing on textured or rough paper Go to step 5 Go t...

Страница 101: ...d the tray with the correct paper type and weight b Print the document Do ghost images still appear on prints Go to step 2 The problem is solved Step 2 a Depending on your operating system specify the...

Страница 102: ...eading edge Trailing edge Note Before solving the problem print the print quality test pages From the home screen touch Settings Troubleshooting Print Quality Test Pages Action Yes No Step 1 a From th...

Страница 103: ...the document Does gray or colored background still appear on prints Contact customer support The problem is solved Horizontal dark lines ABCDE ABCDE ABCDE Notes Before solving the problem print the pr...

Страница 104: ...Step 4 a Inspect the test pages to determine which color is affected b Remove and then reinstall the photoconductor unit Warning Potential Damage Do not expose the photoconductor unit to direct light...

Страница 105: ...rizontal white lines still appear on prints Go to step 2 The problem is solved Step 2 a Load the speci ed tray or feeder with the recommended paper type b Print the document Do horizontal white lines...

Страница 106: ...argins Action Yes No Step 1 a Adjust the paper guides to the correct position for the paper loaded b Print the document Are the margins correct The problem is solved Go to step 2 Step 2 a Depending on...

Страница 107: ...b If the font is not supported then install a supported font For more information contact your administrator c Print the document Do prints still contain jagged or uneven characters Contact customer s...

Страница 108: ...rint the document Is the print still too light Go to step 4 The problem is solved Step 4 Check if the paper has no texture or rough nishes Are you printing on textured or rough paper Go to step 5 Go t...

Страница 109: ...nation Is the printer free of leaked toner Go to step 2 Contact customer support Step 2 a From the home screen touch Settings Device Preferences b Check if the paper type and size settings match the p...

Страница 110: ...ettings Troubleshooting Print Quality Test Pages Action Yes No Step 1 a Move the paper guides in the tray to the correct position for the paper loaded b Print the document Is the print still crooked o...

Страница 111: ...o step 3 Step 2 a Using the Print Quality Test Pages measure the distance between the repeating defects on the affected color page b Replace the supply item that matches the measurement on the affecte...

Страница 112: ...r black images Note Before solving the problem print the print quality test pages From the home screen touch Settings Troubleshooting Print Quality Test Pages Action Yes No Step 1 a Inspect the test p...

Страница 113: ...ing the problem print the print quality test pages From the home screen touch Settings Troubleshooting Print Quality Test Pages Action Yes No Step 1 a Move the paper guides in the tray to the correct...

Страница 114: ...document Is the page or image still clipped Contact customer support The problem is solved Toner easily rubs off Leading edge Trailing edge ABC DEF Note Before solving the problem print the print qua...

Страница 115: ...support The problem is solved Uneven print density Note Before solving the problem print the print quality test pages From the home screen touch Settings Troubleshooting Print Quality Test Pages Actio...

Страница 116: ...is solved Step 2 a Load paper from a fresh package Note Paper absorbs moisture due to high humidity Store paper in its original wrapper until you use it b Print the document Do vertical dark lines or...

Страница 117: ...ges From the home screen touch Settings Troubleshooting Print Quality Test Pages Action Yes No Step 1 a Depending on your operating system specify the paper type and weight from the Printing Preferenc...

Страница 118: ...nspect the test pages to determine which color is affected b Replace the photoconductor unit c Print the document Do vertical white lines still appear on prints Contact customer support The problem is...

Страница 119: ...tall the hardware options and then turn it back on For more information see the documentation that came with the option Is the printer responding The problem is solved Go to step 7 Step 7 Install the...

Страница 120: ...eck if the trays are not linked For more information see Linking trays on page 25 b Print the document Is the document printed from the correct tray The problem is solved Contact customer support Colo...

Страница 121: ...t can be added in various amounts to produce a large range of colors observed in nature Computer screens scanners and digital cameras use this method to display colors What is CMYK color CMYK color is...

Страница 122: ...box is obtained by passing the CMYK or RGB combination labeled on the box through the selected color conversion table By examining Color Samples sets you can identify the box with color closest to th...

Страница 123: ...type and serial number Go to http support lexmark com to receive e mail or chat support or browse through the library of manuals support documentation drivers and other downloads Technical support via...

Страница 124: ...K HAZARD To avoid the risk of electrical shock if you are accessing the controller board or installing optional hardware or memory devices sometime after setting up the printer then turn the printer o...

Страница 125: ...the printer 4 Remove the controller board access cover Warning Potential Damage Controller board electronic components are easily damaged by static electricity Touch a metal surface on the printer be...

Страница 126: ...5 Remove the controller board shield Upgrading and migrating 126...

Страница 127: ...ield and then reattach the access cover 9 Reattach the connector cover 10 Connect the power cord to the electrical outlet and then turn on the printer CAUTION POTENTIAL INJURY To avoid the risk of re...

Страница 128: ...and unplug the power cord from the electrical outlet before continuing If you have any other devices attached to the printer then turn them off as well and unplug any cables going into the printer 1 T...

Страница 129: ...l Damage Controller board electronic components are easily damaged by static electricity Touch a metal surface on the printer before touching any controller board components or connectors Upgrading an...

Страница 130: ...the card 7 Push the card rmly into place Note The entire length of the connector on the card must touch and be ush against the controller board Warning Potential Damage Improper installation of the c...

Страница 131: ...ometime after setting up the printer then turn the printer off and unplug the power cord from the electrical outlet before continuing If you have any other devices attached to the printer then turn th...

Страница 132: ...cover 5 Using the side handles align the printer with the tray and then lower the printer into place CAUTION POTENTIAL INJURY If the printer weight is greater than 18 kg 40 lb then it requires two or...

Страница 133: ...6 Using the screwdriver stored inside door A remove the connector cover from the rear of the printer Upgrading and migrating 133...

Страница 134: ...7 Connect the tray connector to the printer 8 Open trays 2 and 3 Upgrading and migrating 134...

Страница 135: ...tlet CAUTION POTENTIAL INJURY To avoid the risk of re or electrical shock connect the power cord to an appropriately rated and properly grounded electrical outlet that is near the product and easily a...

Страница 136: ...urn the printer off and unplug the power cord from the electrical outlet before continuing If you have any other devices attached to the printer then turn them off as well and unplug any cables going...

Страница 137: ...4 Using the screwdriver stored inside door A disconnect the 2 x 500 or 2500 sheet tray cable from the rear of the printer 5 Open trays 2 and 3 Upgrading and migrating 137...

Страница 138: ...to the printer Front Rear 7 Close the trays 8 Using the side handles remove the printer from the 2 x 500 or 2500 sheet tray CAUTION POTENTIAL INJURY If the printer weight is greater than 18 kg 40 lb t...

Страница 139: ...9 Remove the stabilizing feet from the tray Upgrading and migrating 139...

Страница 140: ...10 Remove the adhesive covers 11 Open the tray and then remove the mounting bracket and rail covers Upgrading and migrating 140...

Страница 141: ...ach the side mounting brackets to the tray and then insert the guide plate into the rail 13 Attach the rail and then attach the mounting bracket and rail covers 14 Close the tray Upgrading and migrati...

Страница 142: ...Using the side handles align the printer with the tray and then lower the printer into place 16 Align the 3000 sheet tray with the printer and then attach the mounting post Upgrading and migrating 14...

Страница 143: ...17 Secure the tray cable with the clamp Upgrading and migrating 143...

Страница 144: ...18 Connect the tray cable to the printer 19 Attach the tray cable cover Upgrading and migrating 144...

Страница 145: ...20 Slide the tray until it clicks into place 21 Attach the stabilizing feet to the printer Upgrading and migrating 145...

Страница 146: ...e 2 x 500 or 2500 sheet tray connector to the printer 23 Open trays 2 and 3 and then secure the 2 x 500 or 2500 sheet tray to the printer with the locking clips and metal bracket Front Upgrading and m...

Страница 147: ...ake it available for print jobs For more information see Adding available options in the print driver on page 159 Installing the staple nisher CAUTION TIPPING HAZARD Installing one or more options on...

Страница 148: ...Note Remove the tag but keep the screw for use in step 11 4 Remove the standard bin 5 Remove the adhesive cover and then remove the paper bail Upgrading and migrating 148...

Страница 149: ...6 Using the screwdriver stored inside door A remove the covers for the paper guide sensor and slide rail 7 Remove the paper guides Upgrading and migrating 149...

Страница 150: ...8 Attach the sensor cover 9 Insert the nisher 10 Secure the nisher to the printer Note Use the screw that came with the nisher Upgrading and migrating 150...

Страница 151: ...11 Attach the nisher slide rail cover Note Use the screws that came with the nisher 12 Remove the lter cover Note This step is applicable only in some printer models Upgrading and migrating 151...

Страница 152: ...13 Connect the nisher cable to the printer 14 Reattach the lter cover Note This step is applicable only in some printer models Upgrading and migrating 152...

Страница 153: ...printer performance 16 Turn on the printer Add the nisher in the print driver to make it available for print jobs For more information see Adding available options in the print driver on page 159 Inst...

Страница 154: ...tandard bin and then remove the paper bail 6 Using the screwdriver stored inside door A remove the paper guides 7 Insert the paper transport Note Use the screws that came with the nisher Upgrading and...

Страница 155: ...8 Attach the nisher to the printer Upgrading and migrating 155...

Страница 156: ...9 Insert the staple cartridge into the nisher until it clicks into place 10 Remove the lter cover Note This step is applicable only in some printer models Upgrading and migrating 156...

Страница 157: ...11 Connect the nisher cable to the printer 12 Reattach the lter cover Note This step is applicable only in some printer models Upgrading and migrating 157...

Страница 158: ...bins Notes Use the screws that came with the nisher When inserting bin 2 avoid moving the bracket Bin 3 is supported only in the booklet nisher 15 Attach the publications holder and then attach the c...

Страница 159: ...r software 1 Obtain a copy of the software installer package From the software CD that came with your printer Go to http support lexmark com and then select your printer and operating system 2 Run the...

Страница 160: ...age correctly 2 Export or import a con guration le for one or multiple applications For one application a From the Embedded Web Server click Apps the application that you want Con gure b Click Export...

Страница 161: ...ference to a product program or service is not intended to state or imply that only that product program or service may be used Any functionally equivalent product program or service that does not inf...

Страница 162: ...n its printer products This printer is intended to be compatible with the PCL language This means the printer recognizes PCL commands used in various application programs and that the printer emulates...

Страница 163: ...ments of DHHS 21 CFR Chapter I Subchapter J for Class I 1 laser products and elsewhere is certi ed as a Class I laser product conforming to the requirements of IEC 60825 1 2014 Class I laser products...

Страница 164: ...Laser advisory label The following laser notice label is affixed to the printer Notices 164...

Страница 165: ...ply noti cations maintenance kit 41 supply noti cations toner cartridge 41 con guring port settings 34 con guring supply noti cations 41 connecting to a wireless network using PIN method 33 using Push...

Страница 166: ...fuser 69 multipurpose feeder 69 optional tray 73 staple nisher 79 81 staple hole punch nisher 83 jams avoiding 67 K keyboard on the display using 20 L linking trays 25 loading card stock 24 transparen...

Страница 167: ...printing 91 incorrect margins 106 jammed pages are not reprinted 94 job prints from the wrong tray 119 job prints on the wrong paper 119 paper curl 92 paper frequently jams 94 print jobs do not print...

Страница 168: ...s status checking 39 supplies ordering photoconductor unit 40 staple cartridges 40 waste toner bottle 40 supply noti cations con guring 41 supply usage counters resetting 90 supported le types 27 supp...

Страница 169: ...sing the control panel 13 using the home screen 14 using the keyboard on the display 20 V verify print jobs 28 printing from a Macintosh computer 28 printing from Windows 28 vertical dark lines or str...

Отзывы: