139
A
A
A
p
p
p
p
p
p
e
e
e
n
n
n
d
d
d
i
i
i
x
x
x
D
D
D
8
8
8
0
0
0
2
2
2
.
.
.
1
1
1
x
x
x
S
S
S
e
e
e
t
t
t
t
t
t
i
i
i
n
n
n
g
g
g
Figure 1: Testing Environment (Use Windows 2000 Radius Server)
1 Equipment Details
PC1:
Microsoft Windows XP Professional without Service Pack 1.
D-Link DWL-650+ wireless LAN adapter
Driver version: 3.0.5.0 (Driver date: 03.05.2003)
PC2:
Microsoft Windows XP Professional with Service Pack 1a.
Z-Com XI-725 wireless LAN USB adapter
Driver version: 1.7.29.0 (Driver date: 10.20.2001)
Authentication Server
: Windows 2000 RADIUS server with Service Pack 3 and HotFix
Q313664.
Note. Windows 2000 RADIUS server only supports PEAP after upgrade to service pack
3 and HotFix Q313664
(You can get more information from
http://support.microsoft.com/default.aspx?scid=kb; en-us;313664
)
2 DUT
Configuration:
1.Enable DHCP server.
2.WAN setting: static IP address.
Содержание WBR-3402TX
Страница 1: ...1 LevelOne WBR 3402TX 1W 4L 11g Wireless ADSL Router w VPN Printer Server USB User s Manual ...
Страница 16: ...16 4 3 Wizard Setup Wizard will guide you through a basic configuration procedure step by step Press Next ...
Страница 17: ...17 Setup Wizard Select WAN Type For detail settings please refer to 4 4 1 primary setup 4 4 Basic Setting ...
Страница 18: ...18 4 4 1 Primary Setup WAN Type Press Change ...
Страница 22: ...22 ...
Страница 33: ...33 4 5 Forwarding Rules 4 5 1 Virtual Server ...
Страница 37: ...37 4 6 Security Settings ...
Страница 55: ...55 4 7 Advanced Setting ...
Страница 60: ...60 E mail Subject The subject of email alert This setting is optional ...
Страница 68: ...68 ...
Страница 70: ...70 Exanple2 Packet Filter Apply Rule 1 ftp time everyday 14 10 to 16 20 ...
Страница 71: ...71 4 8 Toolbox ...
Страница 72: ...72 4 8 1 View Log You can View system log by clicking the View Log button ...
Страница 73: ...73 4 8 2 Firmware Upgrade You can upgrade firmware by clicking Firmware Upgrade button ...
Страница 81: ...81 2 Select Ports page Click Add Port 3 Select Standard TCP IP Port and then click New Port ...
Страница 83: ...83 6 Select LPR type lp lowercase letter in Queue Name And enable LPR Byte Counting Enabled ...
Страница 84: ...84 7 Apply your settings ...
Страница 86: ...86 2 Click Add Forward 3 Enter the Pinter Name Comments then forward ...
Страница 87: ...87 4 Select LPD protocol and then forward 5 Enter the router LAN IP Address and the queue name lp Then forward ...
Страница 88: ...88 6 Select the Printer Brand and Model Name Then Forward 7 Click Apply to finish setup ...
Страница 98: ...98 Double click Administrative Tools ...
Страница 99: ...99 Local Security Policy Settings Double click Local Security Policy ...
Страница 102: ...102 click Add button ...
Страница 103: ...103 Enter a name for example xp router and dis select Use Add Wizard check box Click Add button ...
Страница 105: ...105 Click OK button Then click OK button on the IP Filter List page ...
Страница 106: ...106 select Filter Action select Require Security then click Edit button ...
Страница 107: ...107 select Negotiate security Select Session key Perfect Forward Secrecy PFS click Edit button ...
Страница 108: ...108 select Custom button ...
Страница 110: ...110 select Authentication Methods page click Add button ...
Страница 112: ...112 configure The tunnel endpoint is specified by this IP address 192 168 1 254 Select Connection Type ...
Страница 114: ...114 click Add button ...
Страница 115: ...115 Enter a name such as router xp and dis select Use Add Wizard check box Click Add button ...
Страница 117: ...117 Click OK button Then click OK button on IP Filter List window ...
Страница 118: ...118 select Filter Action tab select Require Security then click Edit button ...
Страница 119: ...119 select Negotiate security Select Session key Perfect Forward Secrecy PFS click Edit button ...
Страница 120: ...120 select Custom button ...
Страница 122: ...122 select Authentication Methods page click Add button ...
Страница 124: ...124 Configure The tunnel endpoint is specified by this IP address 192 168 1 1 Select Connection Type ...
Страница 125: ...125 select All network connections ...
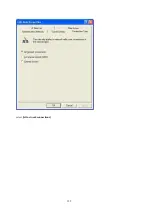
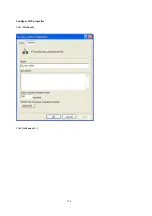
Страница 126: ...126 Configure IKE properties Select General Click Advanced ...
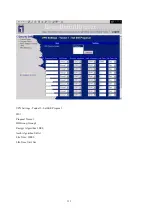
Страница 129: ...129 VPN Settings VPN Enable Max number of tunnels 2 ID 1 Tunnel Name 1 Method IKE Press More ...
Страница 134: ...134 3 Choose Virtual Private Network 4 Do not dial to initial connection ...
Страница 135: ...135 5 Input the router wan ip address 6 Then ok please input username and password as you setup in the router ...
Страница 136: ...136 7 Select the type of VPN ...
Страница 138: ...138 Then the steps refer to pptp settings ...
Страница 141: ...141 Figure 2 Enable IEEE 802 1X access control ...
Страница 143: ...143 Figure 4 Certificate information on PC1 Figure 5 Authenticating ...


