


Time and Date
Set the time and date by selecting the time zone according to your
location. It is imperative that you set the recorder’s time correctly to
avoid the following errors:
• Incorrect display time for playback videos
• Inconsistent display time of event logs and when they actually occur
After selecting the time zone, choose an option below to set the
recorder time
• Manual – Use the drop-down list and configure the time manually
• Sync with NTP server – enter the hostname or IP address of a
valid NTP server and set how often the recorder should synchronize
the time with it by using the “Update interval” drop-down menu
• Sync with PC – Check this option to synchronize the recorder time
with the PC that you are currently using to access the recorder
Содержание NVR-0432
Страница 2: ......
Страница 5: ...System Overview Front View Rear View ...
Страница 6: ...LED Definition ...
Страница 9: ...Push the tray door back to the case to secure it ...
Страница 11: ...To begin launch the Deivce Search utility from the CD and proceed with the installation ...
Страница 27: ...Only PTZ capable cameras will be listed in the drop down menu ...
Страница 36: ...Next hold the mouse left button and draw a square on the video to specify the zoom in area ...
Страница 40: ...Type in the IP address of the NVR in the address bar ...
Страница 41: ...You should be prompted to enter the username and password to access the NVR ...
Страница 42: ...Upon successful login you should see the live view video of the first channel ...
Страница 43: ...Click on the Channel drop down menu to select other cameras ...
Страница 45: ...Enable the Support Javascript option and click the menu button and click Save Options Go to General Properties ...
Страница 47: ...Press the button highlighted above to go back to the browser ...
Страница 48: ...Type in the IP address of the NVR in the address bar ...
Страница 49: ...You should be prompted to enter its username and password for access ...
Страница 58: ...You may click Update to update the list to display the most recent results ...
Страница 61: ...A new dialog will pop up and allows you to speficy the time frame or length of the video you wish to export ...
Страница 65: ...Locate the exported AVI file and click open normally under C ExportFolder ...
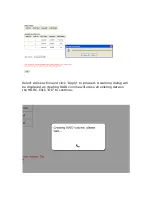
Страница 87: ...Once the RAID volume is created it will be listed in the RAID volume list with the status of Offline ...
Страница 100: ...The texts can be further adjusted with changes to different size color or font so they can be more visible on the video ...
Страница 123: ...The section at the bottom of the page allows you to disable audio recording record video only of particular channels ...
Страница 133: ...The process should be displayed and you should be prompted back to the Live View page after it is complete ...
Страница 134: ...Disk Status Disk Status gives you a more detailed information of the hard drive that is currently installed in the NVR ...
Страница 139: ...Click Browse to select the file from the USB disk A new dialog should be prompted for you to select the file location ...


