


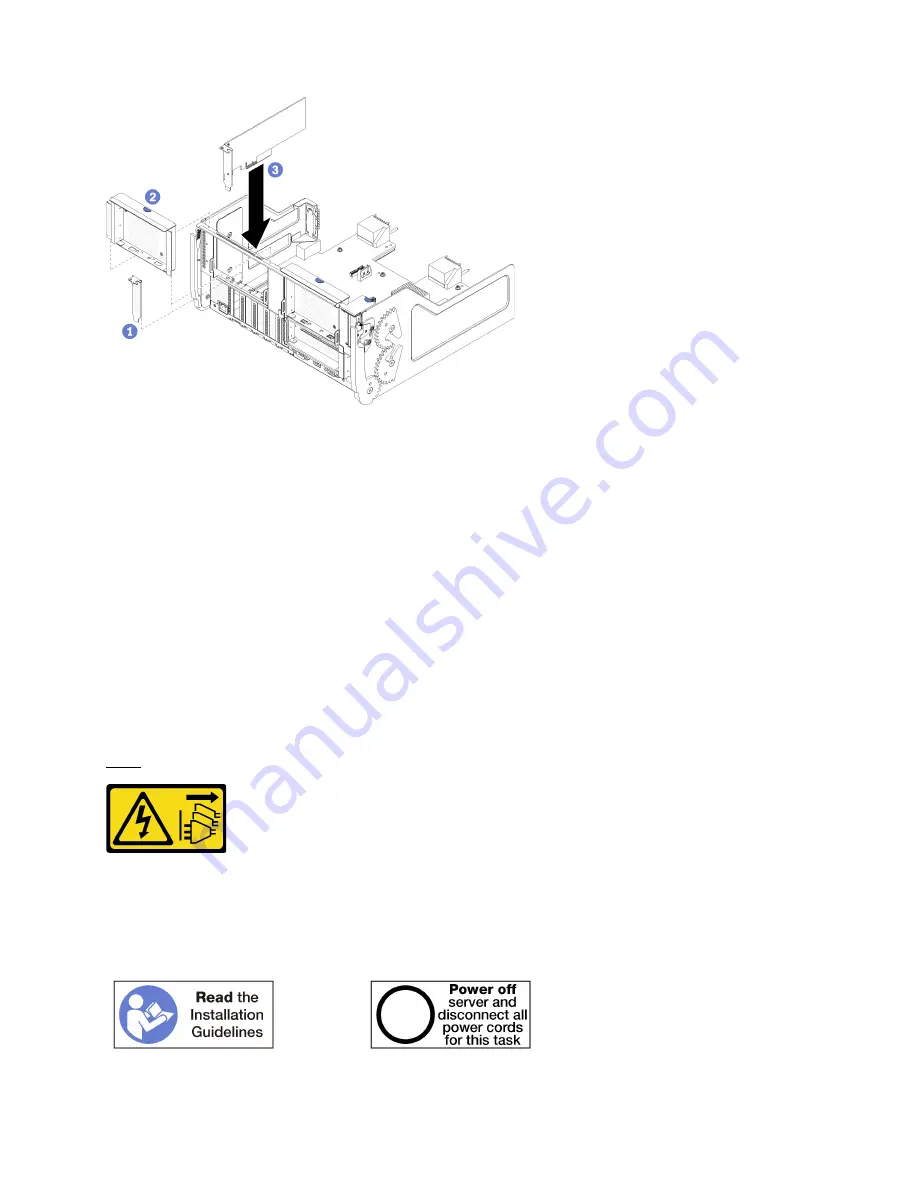
Figure 39. Adapter installation (slot 5 to 8)
Step 1. Align the adapter with the I/O tray slot and insert it; then, press the adapter into the I/O tray until the
connector is fully seated.
After installing an optional adapter in slot 5 to 8:
1. If you have no additional adapters to install in the I/O tray or in the riser for slot 1 to 4 (riser 1), install the
riser or riser filler for slot 1 to 4. See “Install the riser for slot 1 to 4 (riser 1)” on page 364.
2. If any of the adapters in the I/O tray have internal cables, make sure that they are connected before
installing the I/O tray.
3. If you have no additional options to install in the I/O tray, install it. See “Install the I/O tray” on page 335.
Install a PCIe adapter in slot 1 to 4
PCIe adapters in slot 1 to 4 are in an I/O tray riser that is accessed from the rear of the server. With the riser
removed from the I/O tray, open the retention latch and insert the adapter in the riser; then, close the
retention latch.
S002
CAUTION:
The power-control button on the device and the power switch on the power supply do not turn off the
electrical current supplied to the device. The device also might have more than one power cord. To
remove all electrical current from the device, ensure that all power cords are disconnected from the
power source.
CAUTION:
231
Содержание ThinkSystem SR950
Страница 1: ...ThinkSystem SR950 Setup Guide Machine Types 7X12 7X11 and 7X13 ...
Страница 55: ...Figure 22 Server components Chapter 2 Server components 51 ...
Страница 276: ...272 ThinkSystem SR950 Setup Guide ...
Страница 282: ...278 ThinkSystem SR950 Setup Guide ...
Страница 286: ...282 ThinkSystem SR950 Setup Guide ...
Страница 389: ......
Страница 390: ......