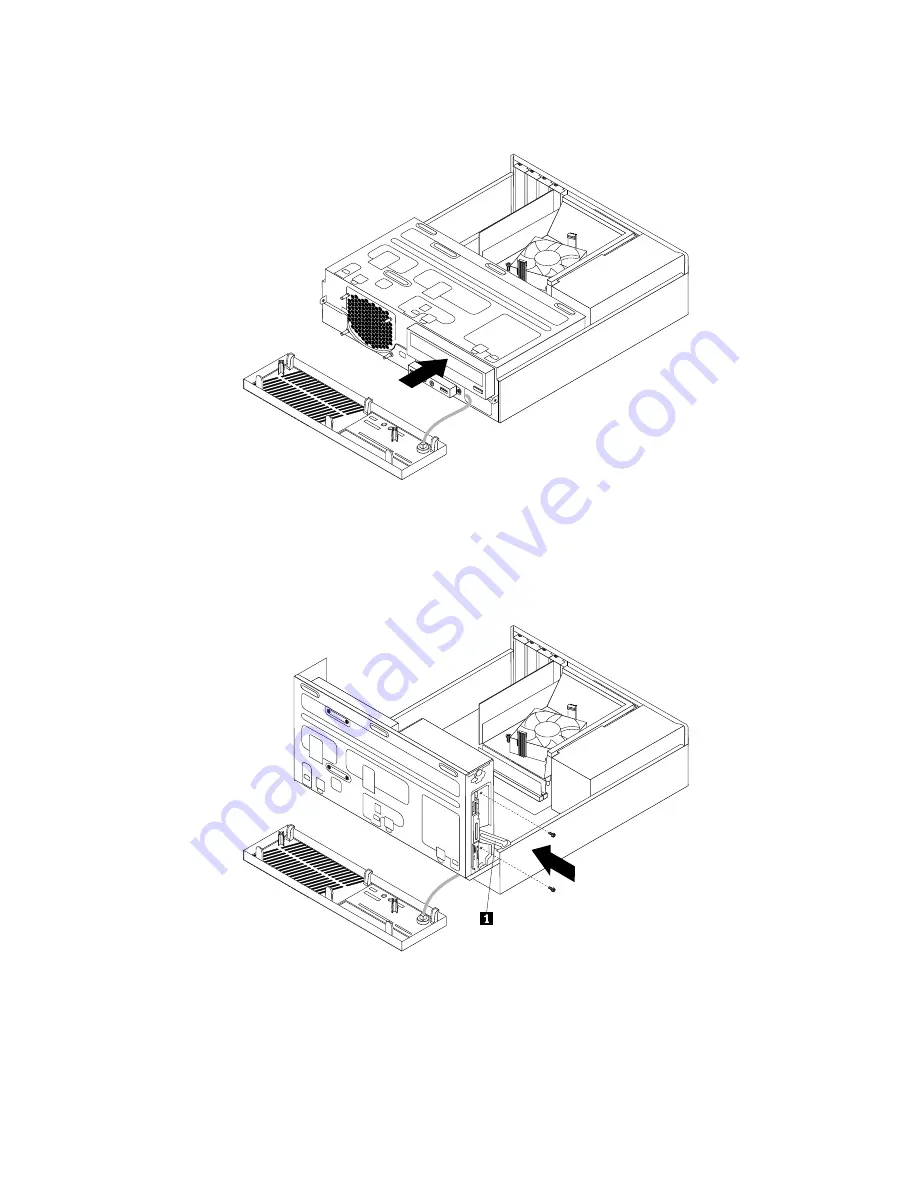
9. Slide the new optical drive into the optical drive bay from the front of the computer.
Figure 59. Installing a new optical drive
10. Hold the new optical drive and pivot the drive bay assembly upward. Align the screw holes in the new
optical drive with the corresponding holes in the drive bay. Then, install the two screws to secure
the new optical drive in place.
Figure 60. Installing the optical drive
11. Connect one end of the signal cable to the rear of the new optical drive and the other end to an available
SATA connector on the system board. See “Locating parts on the system board” on page 78. Then,
locate an available five-wire power connector and connect it to the rear of the new optical drive.
126
ThinkCentre Hardware Maintenance Manual
Содержание ThinkCentre M71e
Страница 6: ...iv ThinkCentre Hardware Maintenance Manual ...
Страница 8: ...2 ThinkCentre Hardware Maintenance Manual ...
Страница 15: ...Chapter 2 Safety information 9 ...
Страница 16: ... 18 kg 37 lb 32 kg 70 5 lb 55 kg 121 2 lb 10 ThinkCentre Hardware Maintenance Manual ...
Страница 20: ...14 ThinkCentre Hardware Maintenance Manual ...
Страница 21: ...1 2 Chapter 2 Safety information 15 ...
Страница 22: ...1 2 16 ThinkCentre Hardware Maintenance Manual ...
Страница 28: ...22 ThinkCentre Hardware Maintenance Manual ...
Страница 29: ...1 2 Chapter 2 Safety information 23 ...
Страница 33: ...Chapter 2 Safety information 27 ...
Страница 34: ...1 2 28 ThinkCentre Hardware Maintenance Manual ...
Страница 38: ...32 ThinkCentre Hardware Maintenance Manual ...
Страница 42: ...Minimum 200 V ac Maximum 240 V ac Input frequency range 50 to 60 Hz 36 ThinkCentre Hardware Maintenance Manual ...
Страница 54: ...48 ThinkCentre Hardware Maintenance Manual ...
Страница 78: ...72 ThinkCentre Hardware Maintenance Manual ...
Страница 112: ...106 ThinkCentre Hardware Maintenance Manual ...
Страница 400: ...394 ThinkCentre Hardware Maintenance Manual ...
Страница 405: ......
Страница 406: ...Part Number 0B02865 Printed in USA 1P P N 0B02865 0B02865 ...


