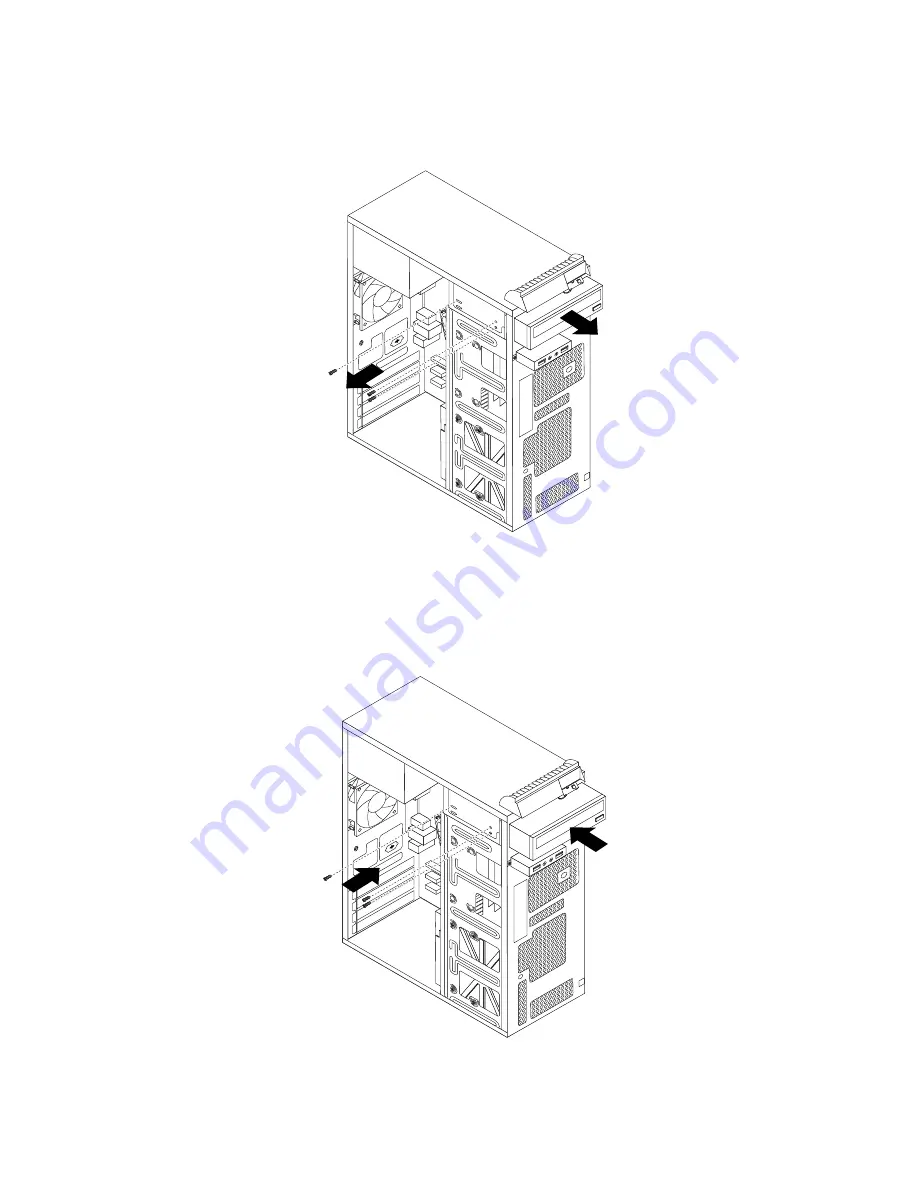
4. Remove the three screws that secure the optical drive. Then, slide the optical drive out of the front
of the computer.
Figure 17. Removing the optical drive
5. Slide the new optical drive into the drive bay from the front and align the screw holes in the new optical
drive with the corresponding holes in the drive bay. Then, install the three screws to secure the new
optical drive in place.
Figure 18. Installing the optical drive
90
ThinkCentre Hardware Maintenance Manual
Содержание ThinkCentre M71e
Страница 6: ...iv ThinkCentre Hardware Maintenance Manual ...
Страница 8: ...2 ThinkCentre Hardware Maintenance Manual ...
Страница 15: ...Chapter 2 Safety information 9 ...
Страница 16: ... 18 kg 37 lb 32 kg 70 5 lb 55 kg 121 2 lb 10 ThinkCentre Hardware Maintenance Manual ...
Страница 20: ...14 ThinkCentre Hardware Maintenance Manual ...
Страница 21: ...1 2 Chapter 2 Safety information 15 ...
Страница 22: ...1 2 16 ThinkCentre Hardware Maintenance Manual ...
Страница 28: ...22 ThinkCentre Hardware Maintenance Manual ...
Страница 29: ...1 2 Chapter 2 Safety information 23 ...
Страница 33: ...Chapter 2 Safety information 27 ...
Страница 34: ...1 2 28 ThinkCentre Hardware Maintenance Manual ...
Страница 38: ...32 ThinkCentre Hardware Maintenance Manual ...
Страница 42: ...Minimum 200 V ac Maximum 240 V ac Input frequency range 50 to 60 Hz 36 ThinkCentre Hardware Maintenance Manual ...
Страница 54: ...48 ThinkCentre Hardware Maintenance Manual ...
Страница 78: ...72 ThinkCentre Hardware Maintenance Manual ...
Страница 112: ...106 ThinkCentre Hardware Maintenance Manual ...
Страница 400: ...394 ThinkCentre Hardware Maintenance Manual ...
Страница 405: ......
Страница 406: ...Part Number 0B02865 Printed in USA 1P P N 0B02865 0B02865 ...


