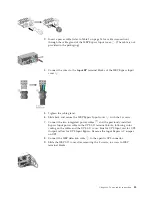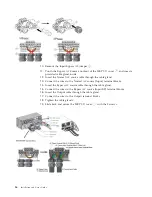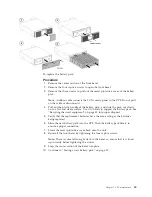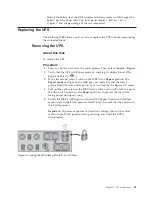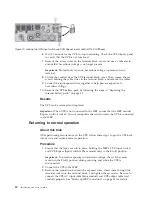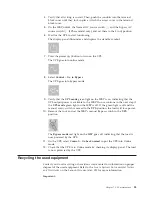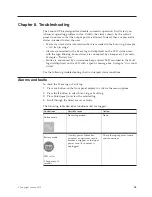
To replace the battery pack:
Procedure
1.
Remove the center section of the front bezel.
2.
Remove the four captive screws to open the front bezel.
3.
Remove the three screws to pull out the metal protective cover of the battery
pack.
Note:
A ribbon cable connects the LCD control panel to the UPS. Do not pull
on the cable or disconnect it.
4.
Pull out the plastic handle of the battery pack, and slide the pack out slowly
on to a flat and stable surface. Use two hands to support the battery pack. See
“Recycling the used equipment” on page 53 for proper disposal.
5.
Verify that the replacement batteries have the same rating as the batteries
being replaced.
6.
Slide the new battery pack into the UPS. Push the battery pack firmly to
ensure a proper connection.
7.
Screw the metal protective cover back onto the unit.
8.
Reinstall the front bezel by tightening the four captive screws.
Note:
There is some left-to-right slack in the bezel, so ensure that it is lined
up correctly before tightening the screws.
9.
Snap the center section of the bezel into place.
10.
Continue to “Testing a new battery pack” on page 50.
Chapter 7. UPS maintenance
49
Содержание RT11.0VA
Страница 1: ...6U Rack or Tower UPS RT8 0kVA and RT11 0VA and Maintenance Bypass Installation and User s Guide ...
Страница 2: ......
Страница 3: ...6U Rack or Tower UPS RT8 0kVA and RT11 0VA and Maintenance Bypass Installation and User s Guide ...
Страница 18: ...xvi Installation and User s Guide ...
Страница 22: ...4 Installation and User s Guide ...
Страница 86: ...68 Installation and User s Guide ...
Страница 98: ...80 Installation and User s Guide ...
Страница 100: ...82 Installation and User s Guide ...
Страница 101: ......
Страница 102: ...Part Number 00WA361 Printed in USA 1P P N 00WA361 ...

