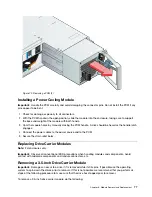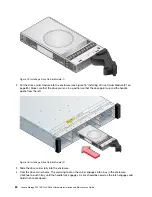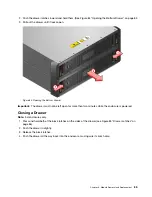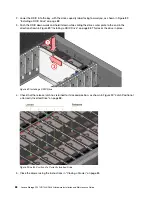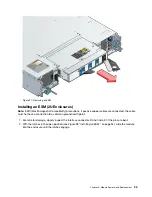
Figure 82. Removing a 2.5” Drive Carrier Module (2)
Dummy Carrier Module Removal/Replacement
Dummy drive carrier modules are removed and replaced in the enclosure simply by pulling the module out of
the enclosure or pushing it into place.
Opening a Drawer
Note:
5U enclosures only.
1. Make sure the anti-tamper locks are not engaged. The red arrows on the locks point inwards if the locks
are disengaged (see Figure 83 “Anti-tamper Locks (shown disengaged)” on page 84). Unlock them if
necessary by rotating them counterclockwise using a screwdriver with a torx T20 bit.
Figure 83. Anti-tamper Locks (shown disengaged)
84
Lenovo Storage D1212/D1224/D3284Hardware Installation and Maintenance Guide
Содержание D1212
Страница 6: ...iv Lenovo Storage D1212 D1224 D3284Hardware Installation and Maintenance Guide ...
Страница 20: ...xviii Lenovo Storage D1212 D1224 D3284Hardware Installation and Maintenance Guide ...
Страница 26: ...6 Lenovo Storage D1212 D1224 D3284Hardware Installation and Maintenance Guide ...
Страница 52: ...32 Lenovo Storage D1212 D1224 D3284Hardware Installation and Maintenance Guide ...
Страница 55: ...Figure 37 Unpacking the 2U12 and 2U24 Enclosure Systems Chapter 3 Installation 35 ...
Страница 70: ...50 Lenovo Storage D1212 D1224 D3284Hardware Installation and Maintenance Guide ...
Страница 136: ...116 Lenovo Storage D1212 D1224 D3284Hardware Installation and Maintenance Guide ...
Страница 142: ...122 Lenovo Storage D1212 D1224 D3284Hardware Installation and Maintenance Guide ...
Страница 150: ...Taiwan BSMI RoHS declaration 130 Lenovo Storage D1212 D1224 D3284Hardware Installation and Maintenance Guide ...
Страница 152: ...132 Lenovo Storage D1212 D1224 D3284Hardware Installation and Maintenance Guide ...
Страница 153: ......
Страница 154: ......


