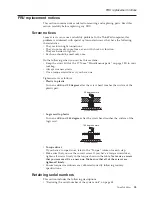
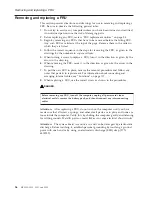
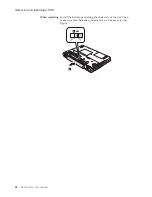
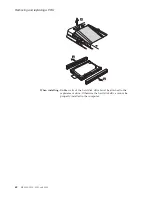

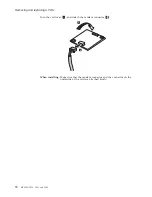
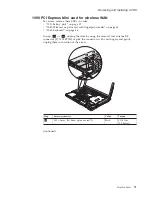

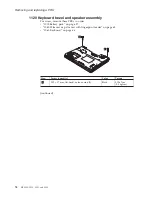
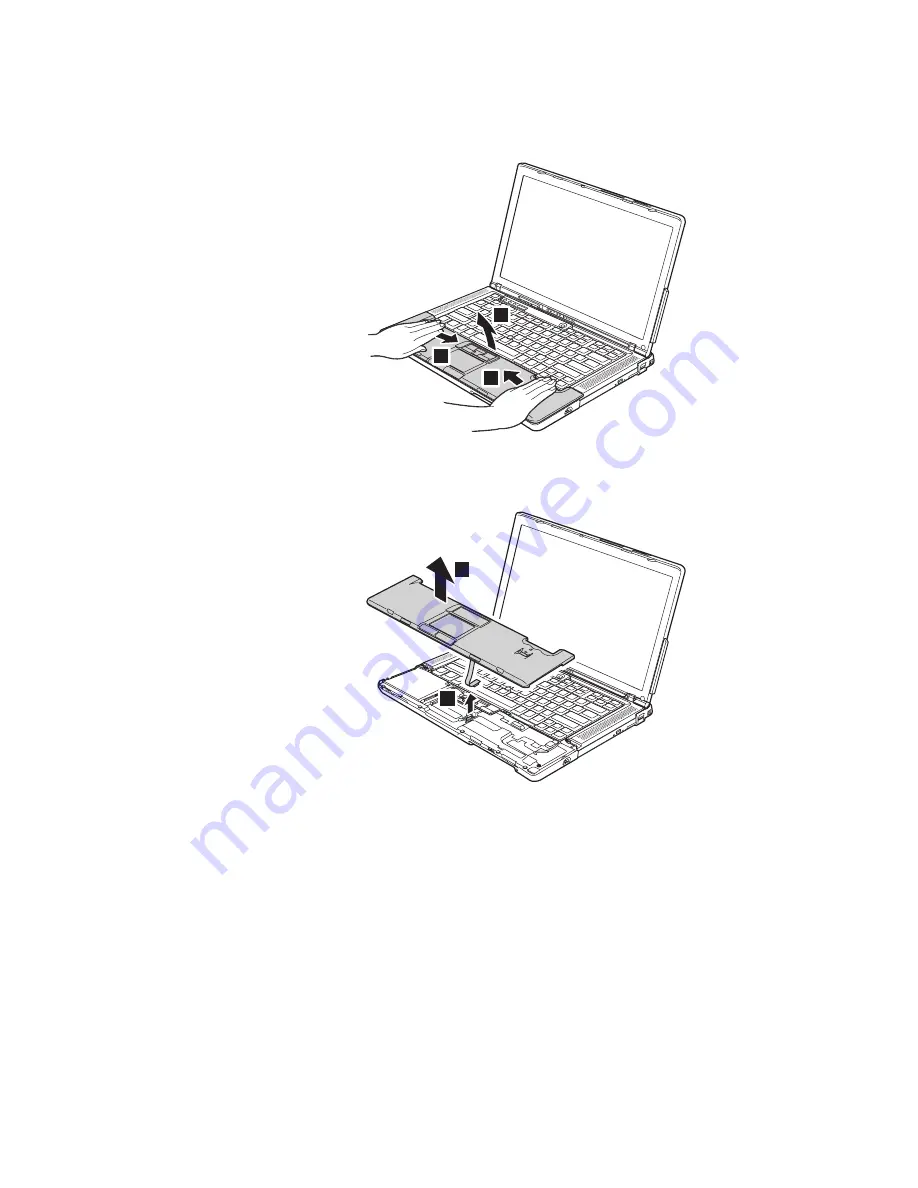
In
step
2
,
press
the
left
and
right
sides
of
the
palm
rest
toward
the
center
to
release
the
side
latches,
as
in
this
figure.
Then
release
the
latches
indicated
by
arrow
3
.
3
2
2
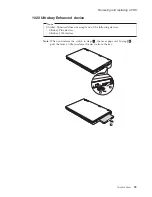
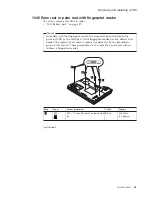
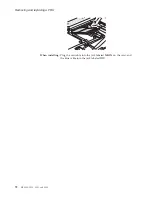
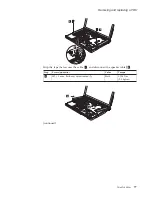
Pull
the
palm
rest
a
little
in
the
direction
shown
by
arrow
4
,
and
then
detach
the
touch
pad
connector
by
pulling
the
tab
with
your
fingers
in
the
direction
shown
by
arrow
5
.
5
4
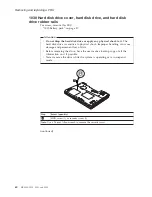
When
installing:
Make
sure
that
the
touch
pad
connector
is
attached
firmly.
Removing
and
replacing
a
FRU
64
MT
2529,
2530,
2531,
and
2532
Содержание 2529E8U
Страница 2: ......
Страница 3: ...ThinkPad Z60m Hardware Maintenance Manual ...
Страница 6: ...iv MT 2529 2530 2531 and 2532 ...
Страница 8: ...2 MT 2529 2530 2531 and 2532 ...
Страница 86: ...2 3 Removing and replacing a FRU 80 MT 2529 2530 2531 and 2532 ...
Страница 92: ...7 7 Removing and replacing a FRU 86 MT 2529 2530 2531 and 2532 ...
Страница 118: ...3a 3b 6 5 4 continued Removing and replacing a FRU 112 MT 2529 2530 2531 and 2532 ...
Страница 122: ...5 4 4 4 4 5 Removing and replacing a FRU 116 MT 2529 2530 2531 and 2532 ...
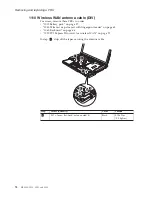
Страница 124: ...Wireless LAN antenna cable AUX black a Removing and replacing a FRU 118 MT 2529 2530 2531 and 2532 ...
Страница 129: ...Overall 1 2 a 4 5 3 7 8 10 12 13 14 15 16 b 17 18 19 20 21 22 c 23 24 25 9 6 11 Parts list ThinkPad Z60m 123 ...
Страница 149: ...LCD FRUs a b c d 1 2 3 7 8 9 10 4 5 6 e Parts list ThinkPad Z60m 143 ...
Страница 164: ...Part Number 39T6195_01 1P P N 39T6195_01 ...