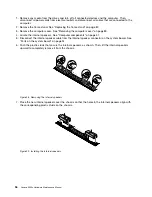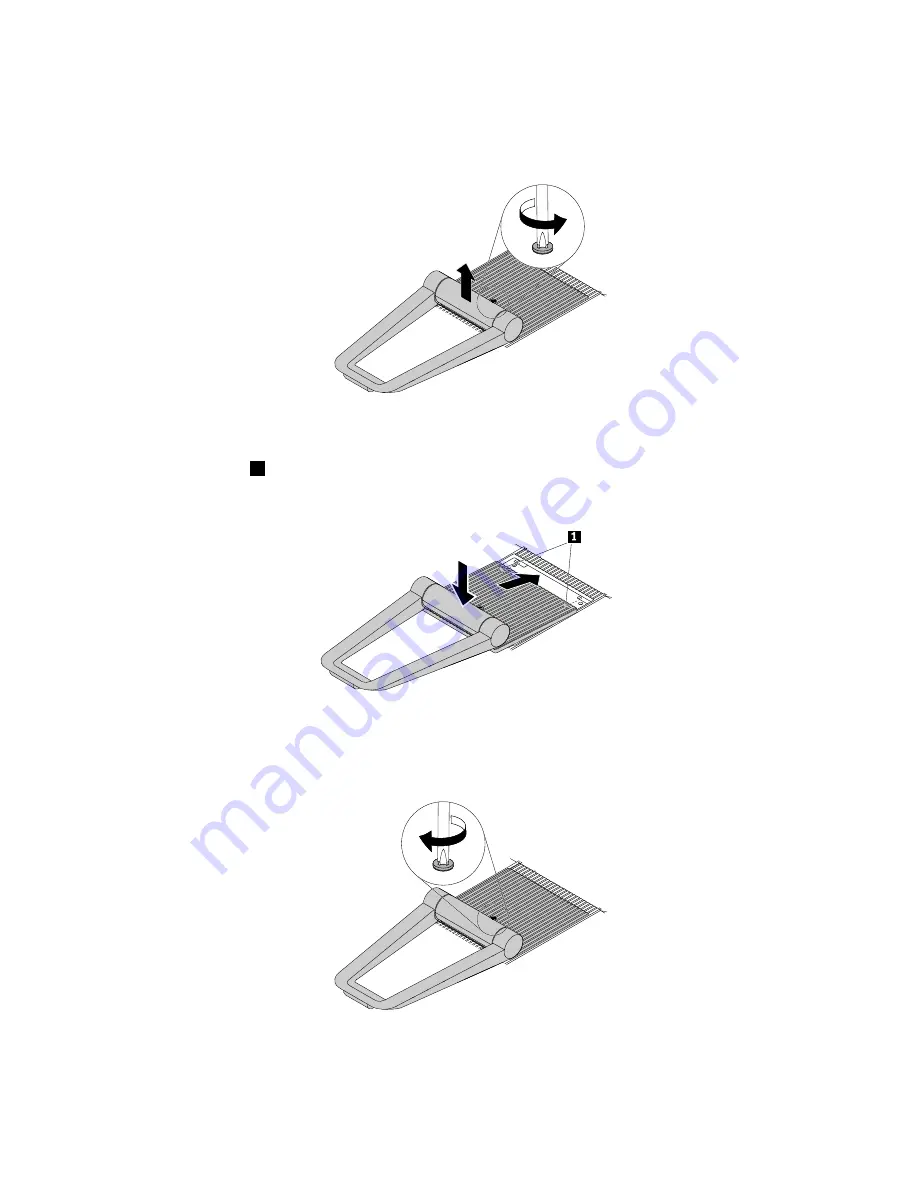
3. Loosen the screw that secures the frame stand. Then, lift the frame stand to remove it from the computer.
Note:
The screw cannot be removed from the frame stand.
Figure 11. Removing the frame stand
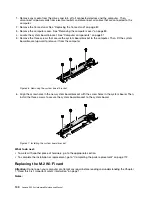
4. Insert the two tabs
1
on the new frame stand into the corresponding holes in the chassis. Then,
pivot down the frame stand.
Figure 12. Installing the frame stand
5. Tighten the screw to secure the frame stand to the computer.
Figure 13. Installing the frame stand
88
Lenovo S200z Hardware Maintenance Manual
Содержание 10HA
Страница 1: ...Lenovo S200z Hardware Maintenance Manual Machine Types 10HA 10K1 10K4 and 10K5 ...
Страница 6: ...iv Lenovo S200z Hardware Maintenance Manual ...
Страница 13: ... 18 kg 37 lb 32 kg 70 5 lb 55 kg 121 2 lb Chapter 1 Read this first Important safety information 7 ...
Страница 17: ...1 2 Chapter 1 Read this first Important safety information 11 ...
Страница 18: ...12 Lenovo S200z Hardware Maintenance Manual ...
Страница 24: ...18 Lenovo S200z Hardware Maintenance Manual ...
Страница 28: ...22 Lenovo S200z Hardware Maintenance Manual ...
Страница 32: ...26 Lenovo S200z Hardware Maintenance Manual ...
Страница 48: ...42 Lenovo S200z Hardware Maintenance Manual ...
Страница 62: ...56 Lenovo S200z Hardware Maintenance Manual ...
Страница 66: ...60 Lenovo S200z Hardware Maintenance Manual ...
Страница 72: ...66 Lenovo S200z Hardware Maintenance Manual ...
Страница 120: ...114 Lenovo S200z Hardware Maintenance Manual ...
Страница 124: ...118 Lenovo S200z Hardware Maintenance Manual ...
Страница 132: ...126 Lenovo S200z Hardware Maintenance Manual ...
Страница 135: ...Appendix D China Energy Label Copyright Lenovo 2015 2016 129 ...
Страница 136: ...130 Lenovo S200z Hardware Maintenance Manual ...
Страница 138: ...132 Lenovo S200z Hardware Maintenance Manual ...
Страница 141: ......
Страница 142: ......


