background image


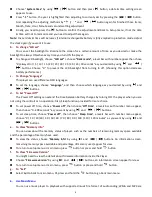
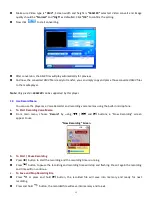
Choose “

System time

” by using 

  / 

  button and then press 


button, a date & time setting screen 

appears to use. 


Press 

” 

button, the year is highlighted then adjusting to current year by pressing the 

  / 

  button. 

And  repeating  the  adjusting  methods  by

  “

  / 

  and   

  / 

  button  again  for  finished  those  items; 

Month, Date, Hour, Minute and seconds setting adjustment. 


Finally, you need to press the


button to confirm the adjustment and back to Setup menu, if not the date 

& time will not to memorize and you need to adjust them again. 

Note: 

the set date & time will be losses if internal rechargeable battery is fully emptied in protection mode. Adjust 

the clock again if you want it to use. 

b.


To change “LCD set” 

You  can  set  the backlight  to  illuminate the  screen  for  a  certain  amount of time  as  you desired  or  make  the 

backlight to always ON when every time you turn ON the player. 


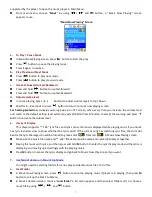
To change LCD backlight, choose 

“LCD set”

 > choose 

“Dark mode”

, a level bar with number appear then chose 

“0 (always On) / 5 / 10 / 15 / 20 / 25 / 30 / 35 / 40 / 45 / 50 seconds” as you desired by using 

  and   

  / 

  buttons.  Choose  “0”  to  prevent  the  LCD  backlight  from  turning  to  off.  (choosing  this  option  decrease 

battery performance) 

c.


To Change “Language” 

This player can use difference OSD languages. 


To  set  the  language,  choose  “

Language

”,  and  then  choose  which  language  as  you  desired  by  using 


and   

  / 

  buttons. 

d.


To Set “Power Off” 

The Power Off setting can extend the time between battery charges by turning OFF the player when you are 

not using the controls or no operation. Also, Sleep function provided for more choice. 


To set power off time, choose “

Power off

”, then choose “

Off time

”, a levels bar with number menu appear, 

then choose “0 - 200 seconds” as you want by using 


and   

  / 

  buttons. 


To  set  sleep  time,  choose  “

Power  off

”,  then  choose  “

Sleep  time

”,  a  levels  bar  with  number  menu  appear, 

choose “0 / 10 / 20 /30 / 40 / 50 / 60 / 70 / 80 / 90 / 100 / 110 / 120 minutes” as you want by using 


and   

  / 

  buttons. 

e.


To View “Memory info” 

You can view about the memory status of player, such as the numbers of remaining memory space available 

and the percentage of memory have used. 


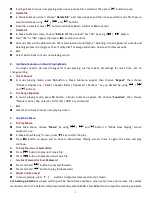
To  view  the  status,  choose  “

Memory  info

”  by  using 

  and   

  / 

  buttons.  An  information  screen, 

remaining memory space available and percentage of memory used, appear for view. 


To return to setup menu or main menu press 

  button or press and hold 

  button. 

f.


To View “Firmware Version” 

You might need to view the details about firmware information inside the Player. 


Choose “

Firmware version

” by using


  and   

  / 

  buttons, an information screen appear for view.   


To return to setup menu or main menu, press 

  button or press and hold 

  button. 

g.


To “Exit” 


Select Exit to back to main menu. Or, press and hold the 

  button to go back main menu. 


6.


Use Music Menu 

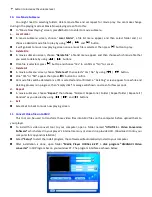
You  can use  music  player  to  playback  with  supported music  file  format of  audio  coding;  WMA  and MP3  are 

Содержание Xemio-657

Страница 1: ...1 USER S MANUAL Xemio 657 MP3 MP4 Media Player with 4GB memory For information and support www lenco com ...

Страница 2: ... for commercial or industrial use Do not expose to dripping or splashing No naked flame sources such as lighted candles should be placed on the product Ventilation should not be impeded by covering ventilation openings with items such as newspapers table cloths curtains and the like Make sure the unit is adjusted to a stable position Damage caused by using this product in an unstable position or b...

Страница 3: ... About Player Battery Player has an internal non user replaceable battery For best results the first time you use player let it charge for about 2 3 hours or until the battery status icon in the Connect screen shows that the battery is in full Battery is in full Note Player may continue use battery power after it s been turned off For maintain the battery life and performance if unit isn t used fo...

Страница 4: ...omputer plug the connector of USB Cable into a USB port on your computer and connect the other end to player then the Connect screen appear for view Now the player is ready for media files transfer with your computer and the battery is charging You can transfer the media files by using the computer mouse use drag and place or copy and paste in between the player and your computer Disconnect it whe...

Страница 5: ...N then you will see any one of the following shown Main Menu screen Music Movie Record Voice Photo eBook Game Setup will appear on LCD after the Loading and Opening screen have displayed To OFF the player press and hold the button for 3 seconds Main Menu screens 5 Use Setup Menu You might need to set date time or change some default setting as you desired in setup sub menu before you start to use ...

Страница 6: ... you desired by using and buttons d To Set Power Off The Power Off setting can extend the time between battery charges by turning OFF the player when you are not using the controls or no operation Also Sleep function provided for more choice To set power off time choose Power off then choose Off time a levels bar with number menu appear then choose 0 200 seconds as you want by using and buttons To...

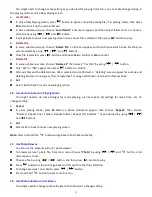
Страница 7: ...increase the volume level e Use Lyric Display This player supports LRC lyric files and lyrics can synchronous displayed while playing music if you music has lyric included How to know whether the lyrics exist If the current song has matching lyric files the color dot beside the Lyric Message icon will be turned to green color from red in Music Now Playing screen Make sure the music file name and L...

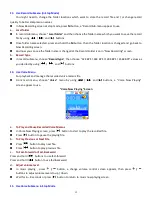
Страница 8: ... choose Repeat then choose Normal Repeat one Folder Repeat folder Repeat all Random as you desired by using and buttons b To Change Equalizer In music playing mode press M button a Music Submenu appear the choose Equalizer then choose Natural Rock Pop Classic Soft Jazz DBB as you desired c Exit Select Exit to back to music now playing screen 9 Use Movie Menu a To Play Movie From Main Menu choose M...

Страница 9: ...O appear then press button to confirm All movie files will be deleted once YES is selected and confirmed a Deleting screen appear for a while and deleting process is in progress then Empty disk message will shown on screen for few seconds d Repeat In movie submenu choose Repeat then choose Normal Repeat one Folder Repeat folder Repeat all Random as you desired by using and buttons e Exit Select Ex...

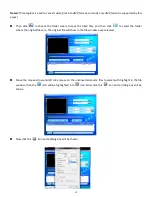
Страница 10: ...d then click to select the folder where the original files are The original file will show in the file window once selected Move the mouse arrow and left click mouse on the unconverted source files to select with highlight in the file window then the icon will be highlighted into icon Now click this icon and a dialog box will be shown Now click this icon and a dialog box will be shown ...

Страница 11: ...nu You can use the player as a Voice Recorder and recording voice memos using the built in microphone a To Start Recording Voice Memo From main menu choose Record by using and buttons a Now Recording screen appear to use Now Recording Screen b To Start Pause Recording Press button to start the recording and the recording time is running Press button to pause the recording and recording time will s...

Страница 12: ...2K BPS 64K BPS 128K BPS 256K BPS values as you desired by using and buttons 14 Use Voice Menu For playback and manage the recorded voice memos file From main menu choose Voice menu by using and buttons a Voice Now Playing screen appear to use Voice Now Playing Screen a To Play and Pause Recorded Voice Memos In Voice Now Playing screen press button to start to play the recorded file Press button to...

Страница 13: ...nd confirmed a Deleting screen appear for a while and deleting process is in progress then Empty disk message will shown on screen for few seconds d Exit Select Exit to back to music now playing screen 16 Use Voice Sub menu in Playing Mode You might need to do some changes for music playing such as repeat EQ settings for music files etc To change setting a Repeat In voice playing mode press M butt...

Страница 14: ...irm All photo files will be deleted once YES is selected and confirmed a Deleting screen appear for a while and deleting process is in progress then Empty disk message will shown on screen for few seconds e Exit Select Exit for back to photo browse list menu screen 19 Use eBook Menu You can use the player as a text reader with supported file format TXT a To open eBook From main menu choose eBook b...

Страница 15: ...ss M button to play b Bookmark Delete In eBook playing mode choose Bookmark delete a list menu appears and then choose which saved bookmark you want to delete by using button Once bookmark is selected press button to confirm The bookmark is deleted and goes back to current reading play c Bookmark Add In eBook playing mode select the reading page you want to bookmark press M button to call up eBook...

Страница 16: ...ick and carefully insert the stick use dull side into the earphone jack hole until you feel to hit the end Actually that is the tact switch button surface Then add a bit of force and you will get a click sound and feeling return from switch The device is reset and restart in seconds Important Do not reset the device if it is proper working 25 Trouble Shooting Unit cannot turn ON Check whether Powe...

Страница 17: ...enco offers service and warranty in accordance with the European law which means that in case of repairs both during and after the warranty period you should contact your local dealer Important note It is not possible to send products that need repairs to Lenco directly Important note If this unit is opened or accessed by a non official service center in any way the warranty expires This device is...

Страница 18: ...ment and disposal of electrical waste Waste Electrical and Electronic Equipment Directive 30 CE Marking Products with the CE marking comply with the EMC Directive 2004 108 EC and the Low Voltage Directive 2006 95 EC issued by the Commission of the European Community Hereby Lenco Benelux BV Thermiekstraat 1a 6361 HB Nuth The Netherlands declares that this product is in compliance with the essential...

Отзывы: