15
5. Knifemaking
5.1 Hints
For the best results from your Leica EM KMR 2 it is recommended that glass strips
supplied by Leica are always used. Leica glass strips for ultramicrotomy are produced
from specially selected glass, the thickness and quality of which is precisely controlled.
Only strict tolerances ensured by careful quality control allows breaking of two high
quality knives from one square.
All strips supplied by Leica are 400mm long and 25mm wide.
They are available in thicknesses from 6.4mm, 8mm and 10mm.
Leica glass strips are washed individually wrapped in tissue paper, and packed in a strong
carton. When handling the strips, avoid contacting the narrow edges as these may finally
form the knife edge.
The strips and squares can be held by the wide upper and lower surfaces.
Never touch the corners of a partly broken strip or square as these will
form the knife edge.
Cleaning the glass strips is in general not necessary because the strips are pre-cleaned
wrapped in tissue paper and kept away from dust in the carton.
However, if there is a need to clean the glass:
wash each strip seperately in cool tap water which has a low concentration of a mild
laboratory detergent added to it. Use a soft brush or cloth and take care not to touch the
sharp edges of the strip.
Completely rinse off all detergent, then rinse thoroughly with distilled water. Dry gently with
a clean, soft, lintfree cloth or place it in a drying oven
5.2 Making squares
Set the moveable stop by pressing it on the left hand side to release it and move it to
position 1 (Fig.10).
Move the rear stop
(Fig.9, No.11)
by means of the rotatable knob
(Fig.9, Nr.9)
backwards as shown in
detail Fig.10.
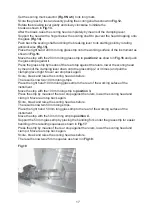
Place the 400mm long glass strip onto the KMR 2 and push it against the moveable stop,
which is in
position 1
(Fig.11).
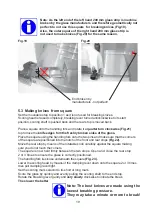
At the same time press the glass strip against the rulers
with the rear stop by means of the rotatable knob
(detail Fig.11a)
. Now lower the
scoring head down onto the glass strip by rotating the clamping lever and tightening it.
(
Fig. 11a )
. Move rear stop back again.
Note: for reproducible results always lock the clamping lever to
the same position
Note: lowering the clamping head orientates the glass strip
horizontal (parallel) to the surface of the instrument.
To be sure lower the clamping head 2 or 3 times onto the glass
before clamping. Do not hold the glass strip anytime during this
procedure, the glass must be free for self-orientation!
I
Warning:
glass knives and glass strips have sharp edges -
handle with great care!
Содержание EM KMR2
Страница 2: ...2 ...
Страница 4: ...4 ...
Страница 8: ...8 Fig 4 Scoring angle Real knife angle Fig 5 Stress line ...
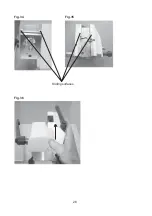
Страница 10: ...10 Fig 6 Fig 7 Fig 8 Side view Fig 8 ...
Страница 12: ...12 Fig 9 1 2 3 4 5 6 7 8 9 10 11 ...
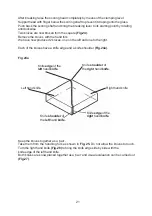
Страница 14: ...14 Fig 10 Moveable stop at position 1 Fig 11 Fig 11a ...
Страница 16: ...16 Fig 12 Fig 13 Fig 14 Fig 15 Fig 16 Fig 17 Moveable stop at position 2 ...
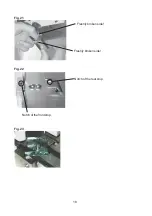
Страница 18: ...18 Freshly broken side Freshly broken side Fig 21 Fig 22 Notch of the front stop Notch of the rear stop Fig 23 ...
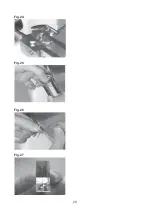
Страница 20: ...20 Fig 24 Fig 25 Fig 26 Fig 27 ...
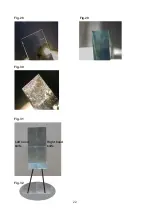
Страница 22: ...22 Fig 28 Fig 29 Fig 30 Fig 31 Right hand knife Left hand knife Fig 32 ...
Страница 26: ...26 Fig 34 Fig 35 Fig 36 Sliding surfaces ...
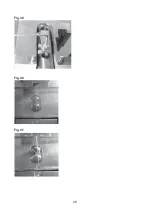
Страница 28: ...28 Fig 39 Fig 40 Fig 41 ...
Страница 30: ...30 Fig 42 Fig 43 Fig 44 Fig 45 Hotplate Wax bath ...


