


29
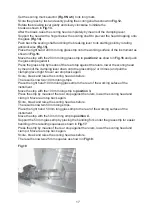
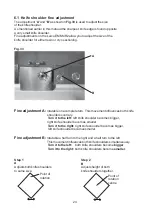
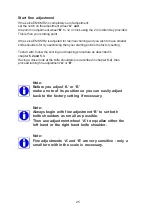
7.2 Adjusting the scoring pressure
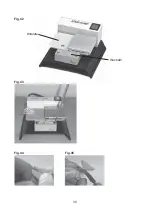
Raise the scoring head clompletely as shown in
Fig.36
and place it on the table
upside down.
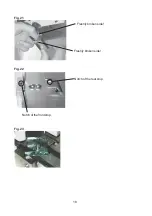
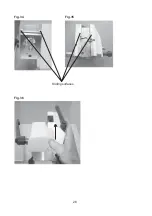
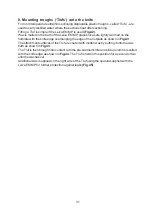
By turning the screw
(Fig.39)
with the 2 mm Allen Key (provided)
clockwise
the pressure
can be
increased
,
counter clockwise
the pressure can be
decreased
.
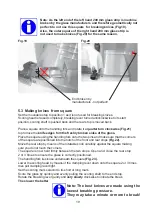
After turning the screw in the required direction (a quater to a half turn)
replace the scoring head and make a test score on a piece of glass.
Repeat until the pressure is correct.
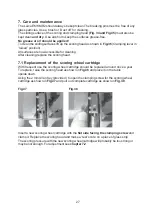
The pressure is correct
(Fig.40)
- one faint smooth line without glass splinters.
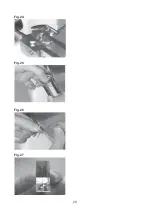
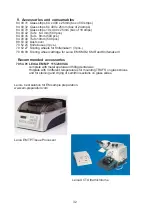
The pressure is too strong
(Fig.41)
- a groove and glass splinters can be seen.
The pressure is not enough when the scoring line is faint and interrupted.
Содержание EM KMR2
Страница 2: ...2 ...
Страница 4: ...4 ...
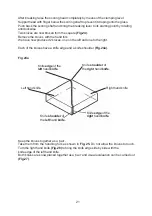
Страница 8: ...8 Fig 4 Scoring angle Real knife angle Fig 5 Stress line ...
Страница 10: ...10 Fig 6 Fig 7 Fig 8 Side view Fig 8 ...
Страница 12: ...12 Fig 9 1 2 3 4 5 6 7 8 9 10 11 ...
Страница 14: ...14 Fig 10 Moveable stop at position 1 Fig 11 Fig 11a ...
Страница 16: ...16 Fig 12 Fig 13 Fig 14 Fig 15 Fig 16 Fig 17 Moveable stop at position 2 ...
Страница 18: ...18 Freshly broken side Freshly broken side Fig 21 Fig 22 Notch of the front stop Notch of the rear stop Fig 23 ...
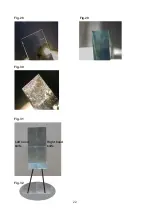
Страница 20: ...20 Fig 24 Fig 25 Fig 26 Fig 27 ...
Страница 22: ...22 Fig 28 Fig 29 Fig 30 Fig 31 Right hand knife Left hand knife Fig 32 ...
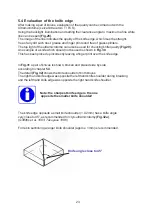
Страница 26: ...26 Fig 34 Fig 35 Fig 36 Sliding surfaces ...
Страница 28: ...28 Fig 39 Fig 40 Fig 41 ...
Страница 30: ...30 Fig 42 Fig 43 Fig 44 Fig 45 Hotplate Wax bath ...


