1- Lama Sand
Operation
The selected system is one of the most reliable on the market and provides the best filtration quality. In general, the
elements are supplied disassembled for easy transport, so they must be connected.
1
.-
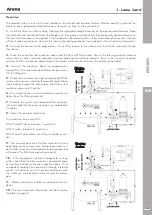
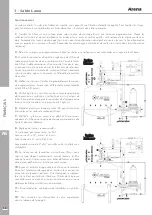
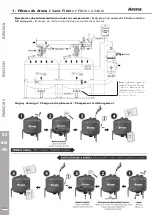
Install the filters on a flat surface, following the supplied assembly drawing, at the approximate distances. Place
the inlet and outlet manifolds, fasten the flanges with their gaskets and check that they are equally tightened crosswise.
Connect the drain pipes (not supplied in the standard configuration) and run them to an evacuation location that has
sufficient space and volume. Connect the input and output goosenecks (not supplied in the standard configuration).
2
.-
Connect the sensors to the programmer. Connect the outputs to the stations and then to the solenoids through
their bases.
3
.-
Open the sand filter top inspection covers and fill them half full of water. Pour in the filtering material (volcanic
sand, silica, or other material) gradually to avoid breaking the retention elements. Pour in the minimum required
quantity of filtering material, depending on the model, which can be found on the quality control label.
4
.- Connect the electricity. Read the programmer's
manual first. The recommended differential pressure is
0.5 to 0.8 kg/cm².
5
.-
Check that the screws are tight and gradually fill the
system with pressure, watching for possible leaks. Water
stops leaking through the drain pipes when the system
reaches a pressure of 1 kg/cm².
6
.-
Run several washes in a row to remove impurities or
debris from the filtering material.
7
.-
Operate the system at an adequate flow and pres-
sure and check that the pressure drop is as indicated on
the tables.
8
.-
Adjust the recommended times:
One wash per time every 24 h.
With 2" and 3" valves, between 1 and 3 min.
With 4" valves, between 2 and 4 min.
With 3" and 4” dual valves, consult your installer or ven-
dor.
9
.-
The renewal period of the filter material will vary
depending on the contaminant. Always leave water insi-
de the filter to prevent a hard paste being produced that
will prevent the filter from operating correctly.
10
.-
If the equipment has been stopped for a long
while, check that the filter material is completely loose
by inserting a hand into the top inspection covers. If it is
compacted, replace it by extracting it through the lower
mouth. Use water to assist this process and never strike
the inside, as internal plastic elements can be dama-
ged.
11
.-
Please contact your installer or product vendor if in
doubt.
12
.-
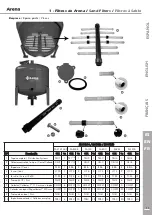
The most important information can be found on
the table on page 3.
9
EN
EN
G
LI
SH
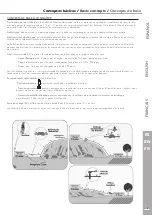
Filtration
Position
Cleaning
Position
Содержание Arena
Страница 2: ...Fernando Lama S L Septiembre 2019 Gelves Sevilla España Versión 2 0 ...
Страница 16: ......


