-9-
www.igmtools.com
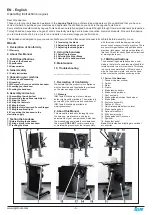
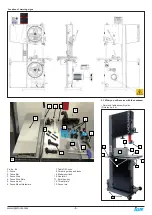
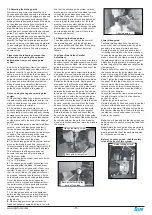
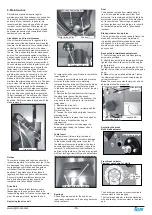
6.7 Fitting the optional light
Fixing screws and cable clips
The light is fitted to the top of the bandsaw as
shown. The light is supplied with a plug. The
cable must be held in position with the clips
provided and positioned so that the cable is
safe and will not in any way come close to the
blade or cabinet door.
Above is the suggested cable route. Use the
sticky cable clamps to secure the cable along
the top of the bandsaw. Ensure that the cable
is not over the vertical shaft hole, as it could be
damaged when the shaft exits the hole.
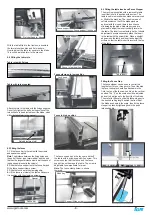
6.8 Connecting the bandsaw to the
electricity supply
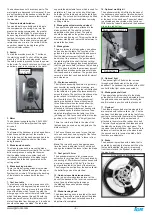
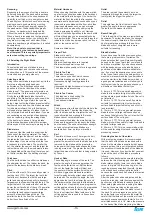
The bandsaw is supplied pre-wired with a 400V /
16 Amp plug. To protect the electrical circuit, it is
recommended that the bandsaw be connected to
a three-pole 16-amp breaker with class C tripping
characteristic (16/3/C). Pressing the Start/Stop
button turns the motor on and off.
7. Testing the bandsaw
1. Close the doors.
2. Check that the red safety switch is in the fully
out position.
3. Check that the machine is clear of all tools and
other loose objects.
4. Check that all the adjusting and locking
handles are tight.
5. Check that there is no blade fitted; it is far safer
to test the machine without a blade fitted.
6. Connect the bandsaw to the electricity supply.
7. Start the bandsaw by pressing the green start button.
8. The lower flywheel is now turning.
9. Now is the time to check that the stop switch is
functioning correctly.
10. With the machine running (no blade fitted),
operate the red stop switch by pressing toward
the machine. The motor should have the power
turned off and slow down.
11. If the switches fail to operate correctly, do not use
the machine until the fault has been corrected.
12. With the motor running, press the red
emergency stop button. The motor should have
the power turned off and slow down.
13. With the motor running, press the foot break pedal.
The motor should have the power removed and come
to a stop.
Should the bandsaw fail the test, it must not be
used until the fault has been corrected.
Disconnect the power from the bandsaw
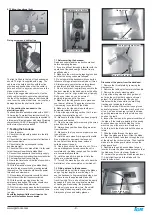
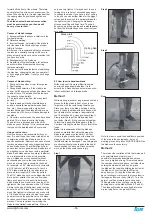
1. Remove the throat plate by removing the
clamp screw.
2. Remove the table split clamp ratchet handle.
3. Remove the plastic blanking plate.
4. Adjust the side guide and back guide out
as far as they will go (both upper and lower
guides). This will ensure that they do not
interfere with the blade while you are fitting,
tracking and tensioning the blade.
5. Uncoil the blade. Remember to use gloves
and safety glasses. The blade may have dirt or
oil on it, so use a clean rag to clean the blade
by pulling rearwards so that the cloth does not
hook on the teeth
6. Inspect the teeth and the general condition of
the blade. If the teeth are pointing in the wrong
direction when you hold the blade up to the
machine, you will have to turn it inside out.
To do this, hold the blade with both hands and
rotate.
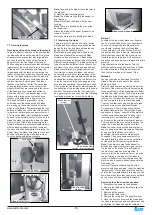
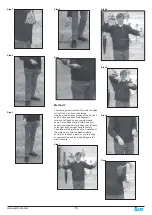
7. Slide the blade through the table split.
8. Open the blade guard door. Slide the blade
over the top flywheel and feed through the slot
at the side of the vertical column. Then feed the
blade into the blade guard slot and close the
blade guard door.
9. Deactivate the quick action blade tension
lever and rotate the blade tension wheel so that
the blade can fit over the lower flywheel.
10. Activate the quick action blade tension lever.
11. Apply light tension to the blade with the
blade tension wheel.
7.1 Before starting the bandsaw
Read and understand the instruction manual
before operating the saw.
1. If you are still not thoroughly familiar with the
operation of the bandsaw, get advice from a
qualified person.
2. Make sure the machine is properly grounded
and that the wiring codes are followed.
3. Do not operate the bandsaw while under the
influence of drugs, alcohol or medicine or if tired.
4. Always wear eye protection, safety glasses
or a safety shield, and hearing protection.
5. Wear a dust mask; long-term exposure to the
fine dust created by the bandsaw is not healthy.
6. Remove your tie, rings, watch and all jewelry.
Roll up your sleeves; you do not want
anything to get caught in the saw.
7. Make sure that the guards are in place and
use them at all times. The guards protect you
from coming in contact with the blade.
8. Make sure that the saw blade teeth point
downward toward the table.
9. Adjust the upper blade guard so that it is just
clearing the material being cut.
10. Make sure that the blade has been properly
tensioned and tracked.
11. Stop the machine before removing the scrap
piece from the table.
12. Always keep your hands and fingers away
from the blade.
13. Make sure that you use the proper size and
type of blade.
14. Hold the work piece firmly against the table.
Do not attempt to saw stock that does not
have a flat surface facing down, unless a
suitable support is used.
15. Use a push stick at the end of a cut. This is
the most dangerous time because the cut is
complete and the blade is exposed. Push sticks
are commercially available.
16. Hold the wood firmly and feed it into the
blade at a moderate speed.
17. Turn off the machine if you have to back the
material out of an uncompleted or jammed cut.
7.2 Fitting a blade to the bandsaw
A lot of people do not like to change the blades
and go to great lengths to avoid doing it. To
use the bandsaw to its greatest advantage, you
will have to use the appropriate blade and
track it quickly. This is a habit that can be easily
developed. If you use a step-by-step method
of tracking and tensioning, the procedure
should only take a minute or two. Be careful
when using blades, especially wide ones.
Always use gloves and safety glasses.
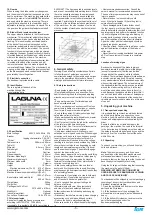
Throat plate
Clamp screw
Table split clamp screw
Table split clamp slot
Emergency stop button
Start / Stop buttons
Blade in table split


