-12-
www.igmtools.com
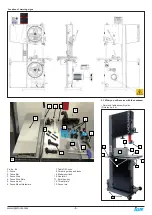
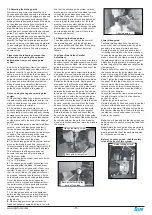
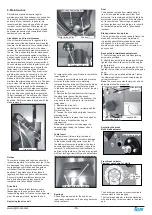
Lower blade guide shown with the table
removed for clarity
Side guides adjusted with ceramic just
behind the gullet
8. Using the bandsaw
8.1 Adjusting the fence
Although the bandsaw is usually associated
with cutting curves, a variety of straight cuts
are easily made with the saw. In fact, it is often
used to rip wood because it is much safer than
a radial arm saw and also has a smaller saw
cut, so it wastes less wood. This becomes very
important when using expensive wood where
waste must be kept to a minimum. The cut is
safer because the force of the cut is straight
down on the table; the work cannot be pulled
back or kicked back, which sometimes happens
with table or radial arm saws. The bandsaw
can also cut very thick stock, which the radial
arm, or table saw cannot do. The disadvantage
of cutting with the bandsaw is that the surface
finish of the cut is not as good as with the
table or radial arm saw. This can be overcome
to a great degree by using the Resaw king
blade from Laguna. The blade has many of
advantages such as superior surface finish to
the cut, thin kerf (low wood waste), it can be
re-sharpened, will cut hard woods and has a
long life.
Ripping
Ripping is a cut made with the grain of the
wood. The four most common cuts made with
the grain of the wood are rip, bevel, taper
and resaw cuts. There are two frequently
used techniques for making straight bandsaw
cuts. One technique is to use a single point
to guide the work. The rationale for using a
single point is that the saw may tend to cut at
a slight angle. This is called drift or lead. The
single point allows the operator to compensate
for the drift and cut the wood straight. With
a little practice, you will obtain satisfactory
results using this method. However, you now
own a real bandsaw, so this method is not
recommended. Another method is to use the rip
fence as a guide. Once set up, this takes the
guesswork out of cutting, reduces the stress
on the operator and is a must for volume work.
Once you have mastered the setup procedure,
you will tend to use the single point method less
and less.
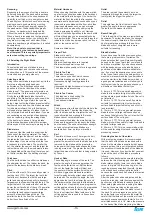
Adjusting the fence for drift
Method 1
1. Make a straight pencil line on the edge of a
board.
2. Feed the wood into the blade cutting next
to the pencil mark. If the blade is drifting, you
will have to compensate by angling the wood
to keep the cut straight.
3. Stop the cut in the middle of the wood and
mark (with pencil) the angle on the table. This
is the angle of drift, and you will have to set the
fence to the pencil line.
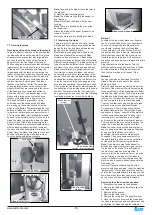
4. To adjust the fence, loosen the clamp bolts
that attach it to the cast bracket. Move the
fence so that it lines up with the pencil mark on
the table and retighten the clamp screws.
Method 2
1. Set the fence parallel with the blade by
loosening the clamp screws that hold it to the
cast bracket. It is not important that it is exact
because you will be readjusting later in the
procedure.
2. Using a piece of scrap wood, make a cut
while holding the wood against the fence. Stop
the cut in the middle of the wood.
3. Look at the position of the back of the blade
within the saw cut. The back of the blade
should be in the center of the slot, but you will
probably find that it is closer to one side.
4. Slightly loosen the clamp screws and adjust
the fence to compensate. Repeat steps 2, 3
and 4 until the blade is centered.
Note
: You may have to do several fine
adjustments, and it is better to do several small
adjustments until you become skilled at the
procedure. Once you have mastered the
process, it should only take a minute to perform
the adjustment.
Note
: Each blade has a slightly different drift,
and each time you change a blade, you must
check and readjust if necessary.
Note
: It is worth taking the time to set the fence
accurately as it will save frustration and
enhance the performance of your machine.
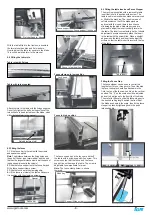
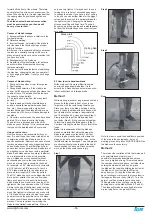
Adjusting the table rule
There is a rule that is fitted to the side of the
table and can be used as a quick guide on the
distance that the fence is from the blade.
Note
. The rule will have to be adjusted each
time the fence is adjusted for drift, as this will
change the distance the fence is from the blade.
Once the fence has been adjusted for drift:
1. Lock the fence to the rail.
2. Measure the distance from the front of the
blade to the fence.
3. Check the distance indicated on the rule.
4. Loosen the clamp bolts and adjust the rule.
5. Tighten the clamp bolts and recheck.
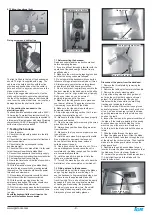
Fence position
Fence in low position
Fence in high position
The aluminum fence can be used in two height
positions (high and low). The low position is
handy for cutting thin wood and is used where
the fence in the high position would make it
awkward to complete cuts. The fence in the
high position is used for supporting tall work.
Changing the fence height.
1. Loosen the clamp screws that are located on
the cast bracket.
2. Slide the aluminum fence off the cast iron
bracket.
3. Slide the aluminum fence back onto the
bracket using the second slot and retighten the
clamp screws.
Table rule
Adjustment slot
Correct
Adjust


