LaCie Rugged Hard Disk
• D
esign
by
n
eil
P
oulton
Optional Formatting and Partitioning
User Manual
page 29
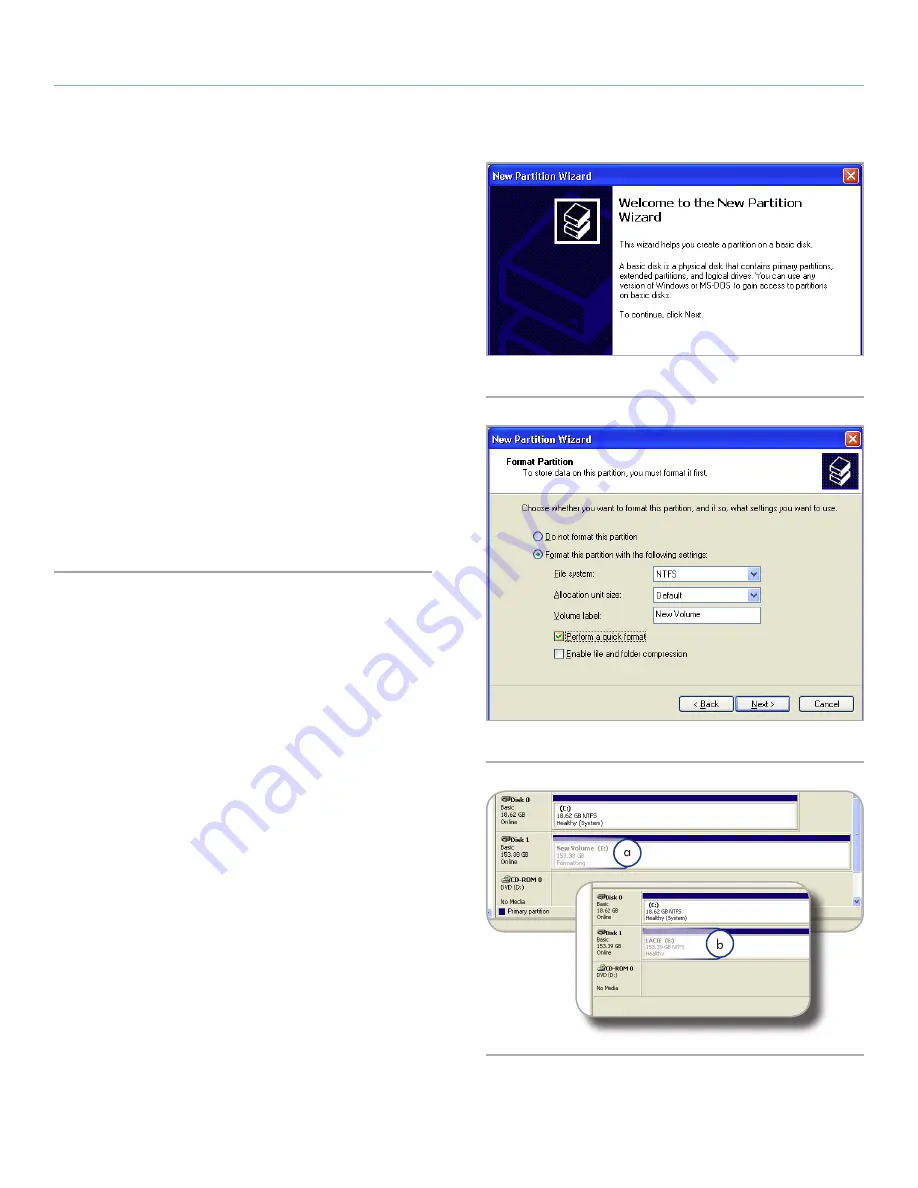
4. On the Welcome to the New Partition Wizard screen, click
Next
(
Fig. 36
).
5. Select
Primary Partition
and click
Next
.
6. If you would like to create more than one partition on the disk,
enter the size of the first partition in the “Partition size in MB”
field. Otherwise, leave the default values and click
Next
.
7. Choose a drive letter to assign to the drive. Click
Next
.
8. Select “Format this partition with the following settings” and En-
ter a name for the volume as you’d like it to appear on your
computer. Select “Perform a quick format.” Click
Next
. See
Fig.
37
.
9. Review your settings and click
Finish
to begin the formatting
process.
10. During the formatting process, the status of the disk changes to
“Formatting” (a) in the Computer Management window. When
Formatting is complete, the status changes to “Healthy” (b). See
Fig. 38
.
Fig. 36
Fig. 37
Fig. 38


