


AUTOMIZER
VERSA HAND
TM
1-44
FLOOR GUIDE
REPLACEMENT PROCEDURE
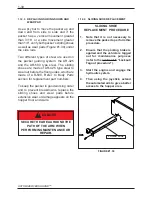
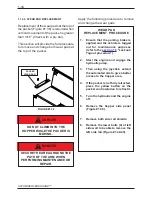
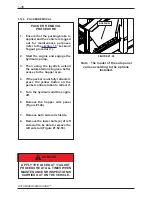
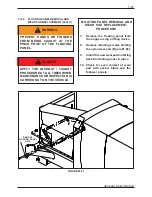
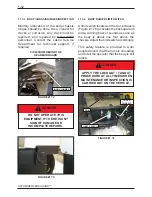
8.
Clean the hopper floor and wall
surfaces.
9.
Position new guides onto the
hopper floor (Do not tack or weld
yet).
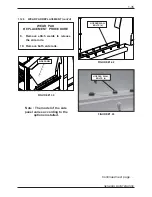
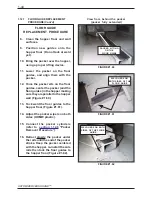
10. Bring the packer over the hopper,
using a proper lifting device.
11. Lower the packer on the floor
guides, and align them with the
packer.
12. Once the packer sits on the floor
guides, center the packer (and the
floor guides) in the hopper making
sure they are parallel to the hopper
wall (Figure #1.60).
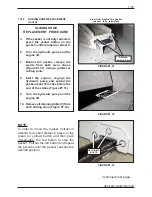
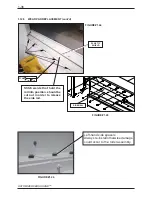
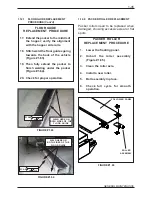
13. Tack weld the floor guides to the
hopper floor (Figure #1.61).
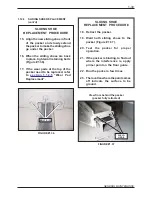
14. Adjust the packer wipers on both
sides (UHMW plastic).
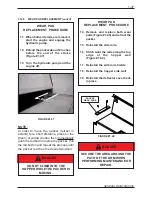
15. Connect the packer cylinders
(refer to
section 1.12.6
“Packer
Removal Procedure”).
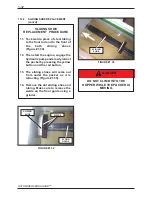
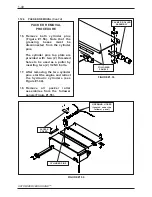
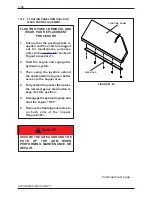
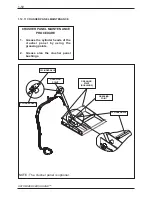
16. Retract slowly the packer under
the rails until the end of the packer
stroke. Keep the packer centered
with the hopper, re-install the side
rails then tack the floor guides to
the hopper floor (Figure #1.62).
FIGURE #1.62
FIGURE #1.60
FIGURE #1.61
PACKER SITTING
ON THE
FLOOR GUIDE
WELD HERE ON
BOTH SIDES OF THE
FLOOR GUIDE
WELD HERE ON BOTH
SIDES OF THE FLOOR
GUIDE
View from behind the packer
(packer fully extended)
1.12.7
FLOOR GUIDE REPLACEMENT
PROCEDURE (Cont’d)
Содержание Automizer Versa Hand
Страница 2: ...AUTOMIZER VERSA HANDTM 1 2...
Страница 4: ...AUTOMIZER VERSA HANDTM 1 4...
Страница 8: ...AUTOMIZER VERSA HANDTM 1 8...
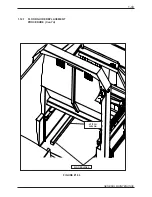
Страница 43: ...1 43 GENERAL MAINTENANCE FIGURE 1 59 STITCH WELDS FLOOR GUIDES 1 12 7 FLOOR GUIDE REPLACEMENT PROCEDURE Cont d...
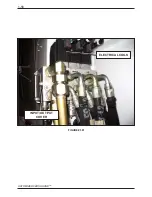
Страница 58: ...AUTOMIZER VERSA HANDTM 1 58 FIGURE 1 81 INPUT OUTPUT COVER ELECTRICAL COILS...
Страница 69: ...1 69 GENERAL MAINTENANCE FIGURE 1 89A Strainer Seal...
Страница 77: ...1 77 GENERAL MAINTENANCE A B C BEHIN D D F MAIN RELIEF B E...
Страница 105: ...1 105 GENERAL MAINTENANCE NOTES...