


3-11
FS-1010
(3) Downloading the firmware from the memory card
To download data written in a memory card (CompactFlash) to the printer, proceed as explained in
this section.
CAUTION
Downloading firmware takes several minutes. Do not turn power off during
downloading. If downloading is interrupted by an accidental power failure,
etc., the system DIMM may have to be replaced.
NOTE
The firmware program data must be stored to the root directory of the memory
card (CompactFlash).
1
Turn power switch off.
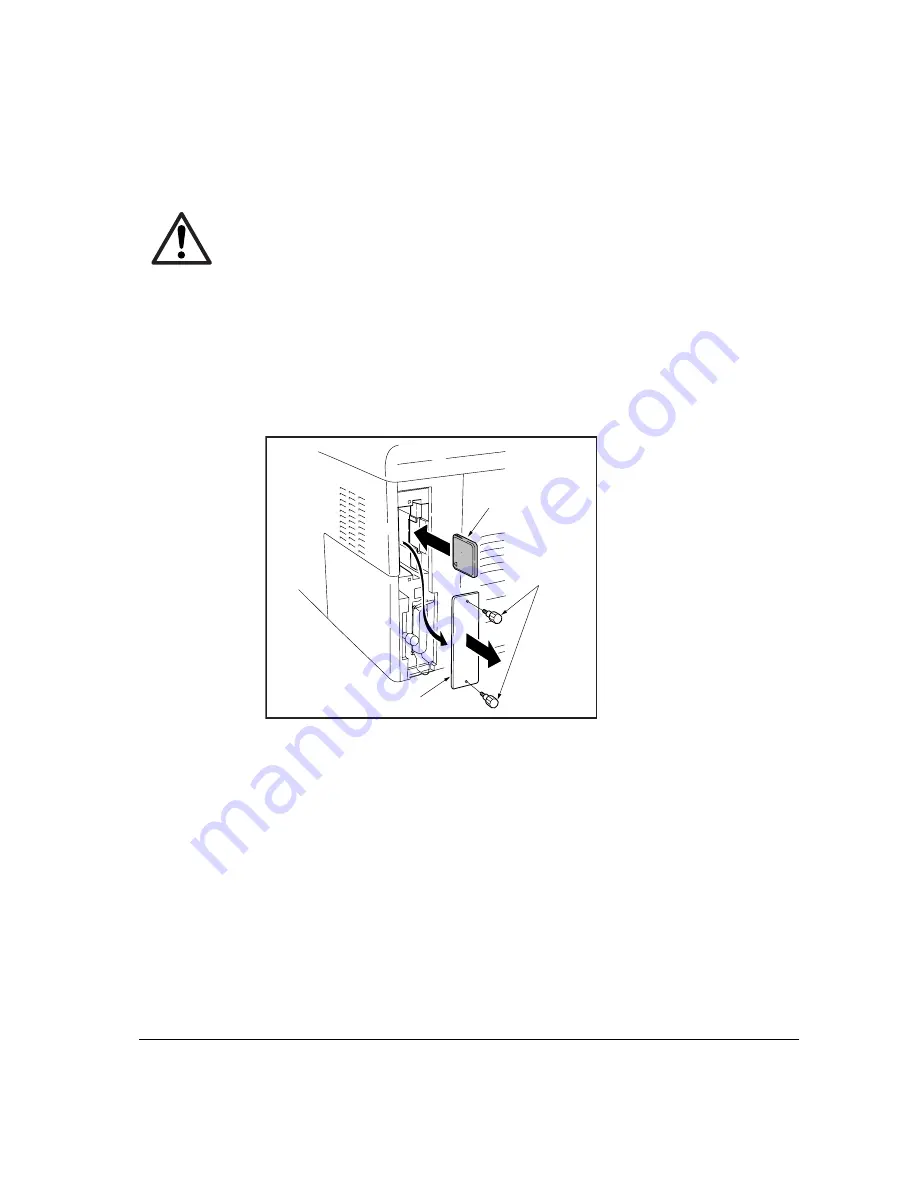
2
Remove the two screws and then remove the slot cover. Insert the memory card in the printer’s
memory card slot.
3
Turn power switch on.
4
The printers starts and finishes downloading automatically.
5
Confirm that downloading was finished normally by the LED indicator. (See the table below.)
6
Turn power off.
7
Remove the memory card and then secure the slot cover by using two screws.
8
Turn power on again. Check the printer gets ready.
Confirm the status page shows the new firmware version (See
Service information on the status
page
on page B-4). If downloading fails, the printer indicates an error display using the LED
indicators. To identify error, refer to the table on page 3-12.
Memory card
Slot cover
Screws
Содержание Ecosys FS-1010
Страница 1: ...SERVICE MANUAL Published in Dec 01 Laser printer...
Страница 2: ...Version Replaced pages Remarks Date 1 0 Revision history 5 Dec 2001...
Страница 9: ...Chapter 1 P r o d u c t I n f o r m a t i o n...
Страница 24: ...Chapter 2 Installation Operation...
Страница 40: ...Chapter 3 Maintenance Adjustments...
Страница 52: ...Chapter 4 O p e r a t i o n O v e r v i e w...
Страница 81: ...Chapter 5 D i s a s s e m b l y...
Страница 99: ...FS 1010 5 19 14 Remove the four screws 15 Remove the drive unit Figure 5 2 18 Removing the drive unit...
Страница 101: ...FS 1010 5 21 7 Remove two screws 5 8 Open and split the fuser unit 4 Figure 5 2 20 Splitting the fuser unit 5 5 4...
Страница 111: ...FS 1010 5 31 8 Remove the eraser lamp 9 9 5 2 28 Removing the eraser lamp...
Страница 113: ...Chapter 6 T r o u b l e s h o o t i n g...
Страница 144: ...Appendix A D i a g r a m s...
Страница 153: ...Appendix B S t a t u s P a g e...
Страница 154: ...Appendix B Contents Status page B 3 Printing the service status page B 3 Details of service information B 4...
Страница 160: ...Appendix C I n t e r f a c e...


