


FS-1010
2-11
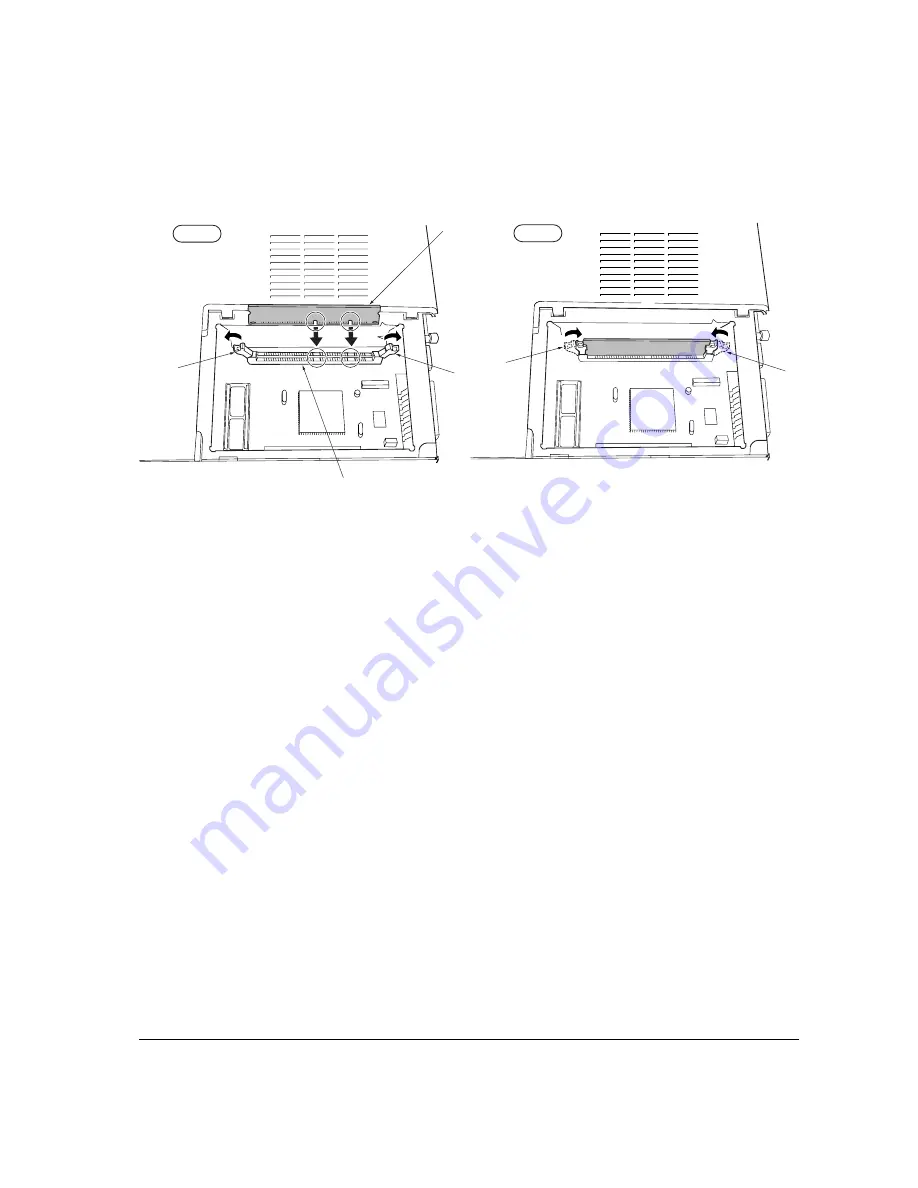
Open the clips
2
on both ends of the DIMM socket
3
. Insert the DIMM
4
into the DIMM socket
3
so that the notches on the DIMM align with the corresponding protrusions in the slot. Close the
clips
5
on the DIMM slot to secure the DIMM.
Figure 2-2-8 Inserting the DIMM
(5) Testing the expansion memory
After installing DIMM in the printer, test the printer to see if the installation has been successful. To
test the expansion memory, turn printer power on and print a status page. If the installation has been
successful, the Available Memory item of the status page will show the expanded memory size
corresponding to the amount of memory added.
2
3
5
2
5
4
Step 1
Step 2
Содержание Ecosys FS-1010
Страница 1: ...SERVICE MANUAL Published in Dec 01 Laser printer...
Страница 2: ...Version Replaced pages Remarks Date 1 0 Revision history 5 Dec 2001...
Страница 9: ...Chapter 1 P r o d u c t I n f o r m a t i o n...
Страница 24: ...Chapter 2 Installation Operation...
Страница 40: ...Chapter 3 Maintenance Adjustments...
Страница 52: ...Chapter 4 O p e r a t i o n O v e r v i e w...
Страница 81: ...Chapter 5 D i s a s s e m b l y...
Страница 99: ...FS 1010 5 19 14 Remove the four screws 15 Remove the drive unit Figure 5 2 18 Removing the drive unit...
Страница 101: ...FS 1010 5 21 7 Remove two screws 5 8 Open and split the fuser unit 4 Figure 5 2 20 Splitting the fuser unit 5 5 4...
Страница 111: ...FS 1010 5 31 8 Remove the eraser lamp 9 9 5 2 28 Removing the eraser lamp...
Страница 113: ...Chapter 6 T r o u b l e s h o o t i n g...
Страница 144: ...Appendix A D i a g r a m s...
Страница 153: ...Appendix B S t a t u s P a g e...
Страница 154: ...Appendix B Contents Status page B 3 Printing the service status page B 3 Details of service information B 4...
Страница 160: ...Appendix C I n t e r f a c e...


