background image

There is a standard USB Storage Device external interface which 

supports the USB Storage Device of 16M ~ 32G capability. It is 

compatible with the file system format of the FAT 16/32. It is better to use 

the USB Storage Device which is formatted by the keyboard. Please do 

not edit these files which come from the keyboard in PC.

USB Device Operation

1.

 In the mode, use the key as following: [USB DEVICE], [START/STOP]

     /[+/YES], [-/NO], data dial and [START/STOP]. 

2. 

Press [USB DEVICE] button to enter mode, press again to exit mode. 

3. 

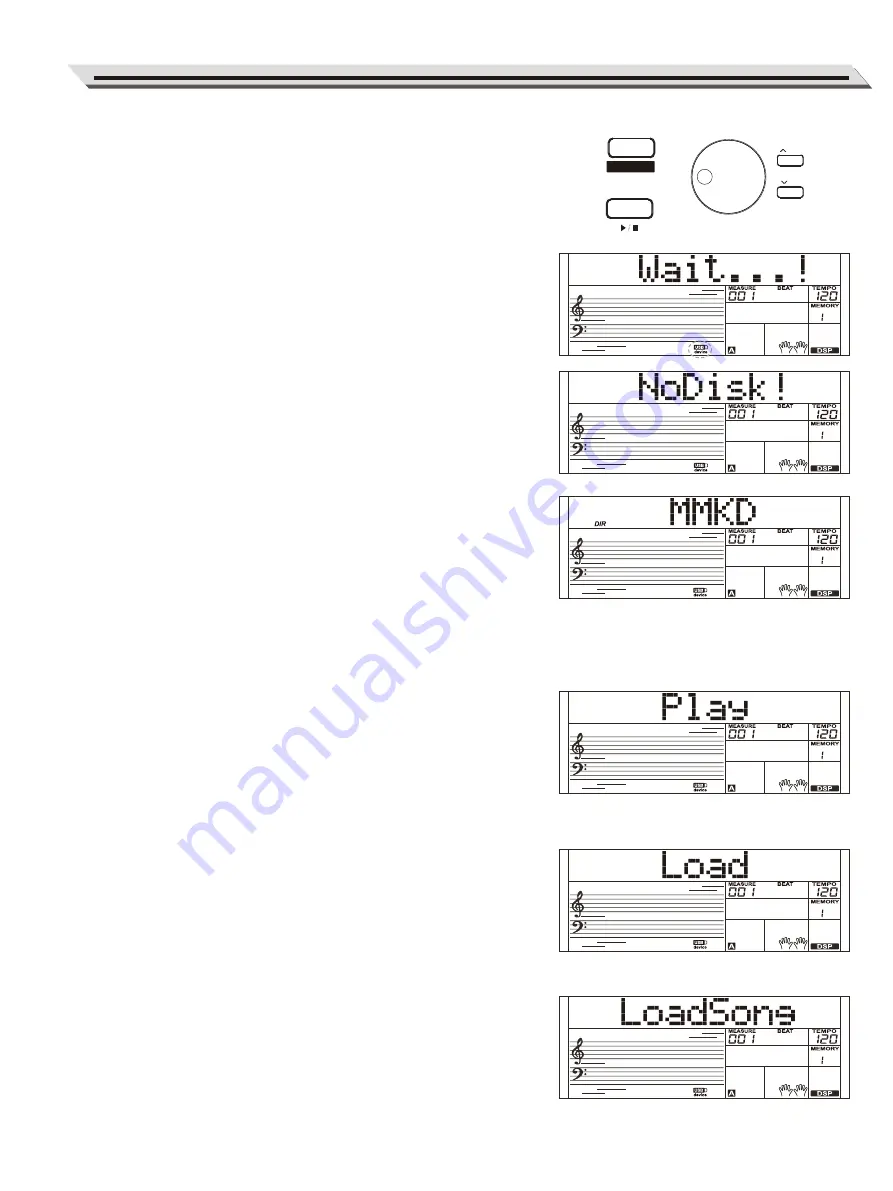
If the USB Storage device has been inserted before press the 

     [USB DEVICE] button, the LCD will display “Wait...!”. After the     

    initialization finished, the LCD displays “Play”.

4. 

If the initialization failed, the LCD will display “DiskErr!”.If the USB 

     Device has not been inserted, the LCD will displays “NoDisk!”

5. 

In the mode, use data dial to choose menu, or use the [+/YES] button

     to the next operation, press [-/NO] to return to the previous menu.

6. 

In USB Storage mode, a directory includes 512 files at most. The LCD 

     displays “DIR” for directory, ”FILE” for files. Press the [USB Device]/

     [STYLE]/[SONG] button to exit USB Device mode.

7. 

When playing the MIDI files, press the [MIXER] button to adjust the 

     volume.

8. 

You can only execute the operations of “Load”, ”Save”, “Format” with 

     the files in the directory “MMKD”. 

Note:

The “MMKD” folder will be generated  automatically when user data is 

saved to the USB storage device.

Play

1. 

Press [USB DEVICE] button to enter mode, use data dial to choose

     “Play”.

2.

 Press the [+/YES] button, the LCD will display the name of MIDI and 

     sub-directory.

3. 

When you choose a sub-directory, the LCD will display its name and 

     the icon will light up. Press the [+/YES] button to enter in. 

4. 

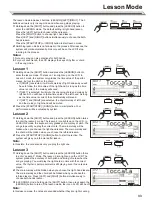
Use data dial to choose a MIDI file. Press [START/STOP] to play the 

     MIDI file in circle. Press [+/YES] to start all files playback in circle.

     Press [START/STOP] again to stop.

5. 

Press the [+/YES] button to return to previous menu when the LCD 

     displays “..”.

Load

1. 

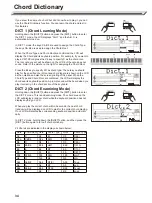
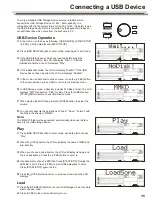
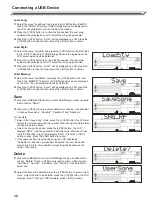
Press the[USB DEVICE]button to enter USB Storage mode. Use data 

     dial to choose “Load”.

2. 

Press [+/YES] to the enter subdirectory menu.

Connecting a USB Device

35

 USB DEVICE

START


/


STOP

OCTAVE

/ YES

/ NO

Содержание KA-120

Страница 1: ......

Страница 2: ...the designated AC adaptor to an AC outlet of the correct voltage Do not connect it to an AC outlet of voltage other than that for which your instrument is intended Unplug the AC power adaptor when no...

Страница 3: ...ct 20 Performance Assistant What s the Performance Assistant 20 Enter the Performance Assistant 20 Guitar Mode 21 Playing in Guitar Mode 21 Piano Mode 22 Playing in Piano Mode 22 Exit the Performance...

Страница 4: ...utton Choose the chord mode 19 TEMPO TEMPO Button Adjust the current Tempo value When the SHIFT button is pressed 4 5 MIXER MIXER Button Enter the Mixer menu 6 7 Function Function Button Enter the Fun...

Страница 5: ...Turn the lower function on or off 29 TOUCH Button Set an appropriate touch sensitivity level 30 DSP Button Turn the DSP function on or off 31 SUSTAIN Button Turn the sustain function on or off 32 DIC...

Страница 6: ...the power cable to the AC outlet 3 Plug the AC adapter into the AC outlet 4 Press the POWER switch the LCD will display Loading which indicates the piano has been powered on 5 Press the POWER switch...

Страница 7: ...a MP3 CD Player Connect the audio output of an MP3 CD player or other audio source to the stereo AUX IN jack on the rear panel The input signal is mixed with the piano signal so as to play along Conne...

Страница 8: ...pedal to sustain the sound It also supports the half pedal operation Performing with the sustain pedal will achieve a smoothly effect Sostenuto Pedal This pedal sustains only the sounds of the keys th...

Страница 9: ...h different characters Please refer to the Demo List for details 1 Press the DEMO button Enter the main interface of demo playing back the LCD displays current demo number and name meanwhile all demo...

Страница 10: ...ES NO button to select the song you want 3 Press the START STOP button it will stop playing Press the button again it will play the selected song in circle 4 When the song stops press either STYLE or...

Страница 11: ...and press the DUAL button to turn the dual function on The LCD displays DUAL and VOICE 2 will light up which indicates the name and number of DUAL 2 Use the data dial or the YES NO button to select t...

Страница 12: ...touch setting using the YES NO button or data dial or while hold down the SHIFT button press the TOUCH button to change touch type Pressing the YES and NO buttons simultaneously will restore the touc...

Страница 13: ...E TRANSPOSE simultaneously to restore the transpose value to its default setting 000Transpos Notes 1 Playing in G key set the transpose to 05 or 007 and then you can play the G scale using C scale key...

Страница 14: ...To set the split point of Twinova please refer to Split Point Setting part for details 3 Octave is invalid unless in the Twinova mode After adjusting the octave some highest range or the lowest part...

Страница 15: ...animent of all tracks The accompaniment automatically changes followed by the change of the chord Press the START STOP button to start the auto accompaniment of the rhythm track then play a chord in c...

Страница 16: ...animent as soon as you start playing in Chord section When the playback of the intro is finished it automatically leads into Main A section 7 Press the FILL B button plays an appropriate fill in patte...

Страница 17: ...the root position then it forms Inversion we call this chord Inversion Chord See the following major triad and its inverted chord Chord Name The chord name contains two parts content Chord root and C...

Страница 18: ...ights up and then keeps flashing with style playing 3 Fade In Out time The default time is 10 seconds Metronome The Metronome function provides a steady beat to help practicing the piano at a consiste...

Страница 19: ...lume value option is Rhythm_s for the first time it will keep the last option when you enter the mixer menu again 2 Holding down the SHIFT button and press the MIXER MIXER button repeatedly to select...

Страница 20: ...mony types are available only when the A B C is open 2 The harmony types cannot be recorded in user songs There are 2 voices you can select to perform in performance assistant mode Guitar Piano What s...

Страница 21: ...note will be sounded Play a broken chord in the sub area 1 When the chord type displayed press a white key in the sub area 1 a wonderful broken chord phrase will start Try to change the white key and...

Страница 22: ...In this mode you can use some perform skills like piano rhythm 5 broken chord 5 and also 3 endings The piano key map is similar with the guitar key map Press A6 to C7 white keys to start an ending All...

Страница 23: ...r pedal on an acoustic piano letting you sustain the sound of voices even after releasing the keys Step and press on the pedal to turn the sustain effect on Release the pedal to turn the sustain effec...

Страница 24: ...f 1 Holding down the SHIFT button and press the FUNCTION FUNCTION button repeatedly to select split point menu the LCD displays Split Pt Use the YES NO button or data dial to change the split point Ad...

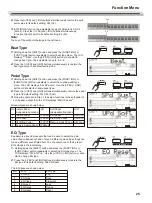
Страница 25: ...SPd Sust 3 Follow the operation in Step 1 to assign functions to the soft pedal of a unit pedal except that the LCD displays 00X UPd xxxx All pedal types are shown below EQ Type Equalizer is a sound p...

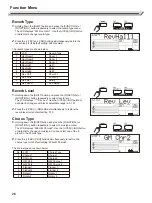
Страница 26: ...t setting 070 Chorus Type 1 Holding down the SHIFT button and press the FUNCTION or FUNCTION button repeatedly to select chorus type menu The LCD displays 004 GM Chorus2 Use the YES NO button or data...

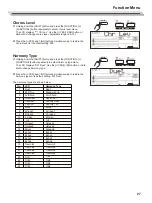
Страница 27: ...a dial to change harmony type 2 Press the YES and NO buttons simultaneously to restore the harmony type to its default setting 001 Duet The harmony types are shown below Function Menu 27 No 1 2 3 4 5...

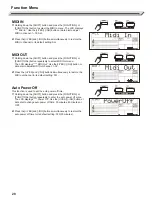
Страница 28: ...the YES NO button or data dial to adjust MIDI Out channel 1 16 2 Press the YES and NO buttons simultaneously to restore the MIDI out channel to its default setting 001 Auto Power Off This function is...

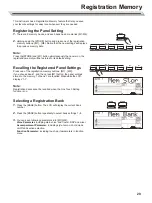
Страница 29: ...ings Press one of the registration memory buttons M1 M6 If you choose bank 1 and then press M1 button the panel settings stored in the memory 1 of bank 1 are recalled Meanwhile the LCD displays 1 1 No...

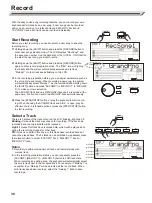
Страница 30: ...ODY tracks simultaneously 4 Press the START STOP button or play the keyboard to start record ing When choosing the ACCOMP track and A B C is open play an effective chord in left hand section or press...

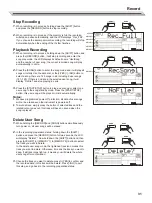
Страница 31: ...T STOP button this user song will be played in circle automatically Notes 1 We have programmed power off protection all data of user songs will not be erased even the instrument is powered off 2 To mu...

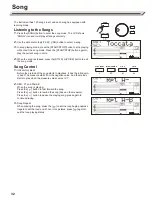
Страница 32: ...exit the song mode Song Control 1 Introductory Beat Before the prelude of the song starts to playback it has the introducto ry beat The measure starts from the negative value And the melody starts to...

Страница 33: ...lody of left hand and the melody of right hand will be muted 2 Press the START STOP SONG button to start practice Your performance will be evaluated by system Lesson 2 1 Holding down the SHIFT button...

Страница 34: ...e Chord Type and Chord Root are confirmed the LCD will display the chord and its keyboard position A prompt sound will be heard when you play it correctly in the chord section of the keyboard DICT 2 C...

Страница 35: ...mode a directory includes 512 files at most The LCD displays DIR for directory FILE for files Press the USB Device STYLE SONG button to exit USB Device mode 7 When playing the MIDI files press the MIX...

Страница 36: ...isplayed on LCD press the YES button to load the file or press the NO button to cancel Save 1 Press the USB DEVICE button to enter USB Storage mode use data dial to choose SAVE 2 Press the YES button...

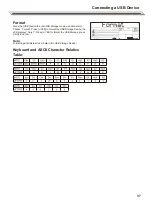
Страница 37: ...age mode use data dial to Choose Format Press YES to format the USB Storage Device the LCD displays Sure Press YES to format the USB Storage press NO to cancel Note Formatting will delete all user dat...

Страница 38: ...volume vibrato audio panning and program change information to change the voice selections 2 The instrument can output the real time playback information via MIDI messages and control external MIDI d...

Страница 39: ...ressed Certain notes sound at wrong pitch The Harmony function does not operate The instrument cannot be recognized after connecting with PC via USB cable Possible Cause and Solution This is normal pl...

Страница 40: ...Input Output Power Supply Power Power Off Protection Amplifiers Speakers Amplifiers Speakers Dimensions Weight Dimensions LWH mm Weight kg 88 Hammer Action Keys 3 Types Off Multi functional LCD 128 6...

Страница 41: ...EP Pno Vib DetunEP1 DetunEP2 E Piano1 E Piano2 E Piano3 E Piano4 E PnoV1 E PnoV2 60 sEP EPLegend PhaseEP Clavi Clavi2 PhsClav WahClav PlsClav DreamEP TremEP FunkEP WarmEP ChoirEP WahEP ModernEP EPPad...

Страница 42: ...t2 FunkGtr MutVeGtr JazzMan Ovrdrive Ovrdriv2 GtPinch DistGtr DistGtr2 FeedbkGt FeedbkG2 DistRyth GtrHarmo GtHarmo2 NylnGtVe AcBass AcBass2 WahBass FngrBass FngrSlap PickBass PickBs2 Fretless Fretlss2...

Страница 43: ...ax TenoSax2 TenoSax3 BariSax BariSax2 BariSax3 Oboe Oboe2 Oboe3 2Oboes EngHorn EngHorn2 EngHorn3 263 264 265 266 267 268 269 270 271 272 273 274 275 276 277 278 279 280 281 282 283 284 285 286 287 288...

Страница 44: ...e NewAge2 WarmPad WarmPad2 SinePad PolySyn PolySyn2 PolySyn3 PolySyn4 ChoirPad ChoirPd2 ItopiaPd BowedPad BowedPd2 MetalPad MetalPd2 HaloPad HaloPad2 SweepPad SweepPd2 SweepPd3 PanPad PanPad2 368 369...

Страница 45: ...i SplashCy Cowbell AnaCowbl HiBongo LoBongo MuHiCnga OpHiCnga LowConga AnHiCnga AnMiCnga AnLoCnga HiTimbal LoTimbal Cabasa Maracas AnMaracas ShGuiro 473 474 475 476 477 478 479 480 481 482 483 484 485...

Страница 46: ...Trombones Loose 3 Muted Trumpets Loose Club Brass Brass Woodwinds Woodwinds Strings Section Woods Small Pan Flute Strings Pad Koto Shamisen Flute Clarinet Flute Oboe Flute Bassoon Flute Oboe Clarinet...

Страница 47: ...pRock1 PopDanc1 PopFusn AnalgNt1 6 8Pop BritPop1 BritPop2 PopHit FusShufl AnalgNt2 GtPop3 PopBeat SoftBeat 60 sPop StigLatn R BBld1 GtBallad BaldRock PianoPop SoftBald NatulBld LoveBald 53 54 55 56 57...

Страница 48: ...scSamba Mambo Meneito 159 160 161 162 163 164 165 166 167 168 169 170 171 172 173 174 175 176 177 178 179 180 181 182 183 184 185 186 187 188 189 190 191 192 193 194 195 196 197 198 199 200 201 202 20...

Страница 49: ...Jug BatlHyme YellRose CannBall AnnieLa Turkish Musik Lieder 55 56 57 58 59 60 61 62 63 64 65 66 67 68 69 70 71 72 73 74 75 76 77 78 79 80 81 82 83 84 85 86 87 88 89 90 91 92 93 94 95 96 97 98 99 100 1...

Страница 50: ...Butterfly Basic Tutorial Beyer Piano 45 Christmas Eve Basic Tutorial Beyer Piano 50 Basic Tutorial Beyer Piano 52 Basic Tutorial Beyer Piano 55 Basic Tutorial Beyer Piano 59 Beyer18 Cuckoo Beyer21 Bey...

Страница 51: ...51 MIDI Implementation Chart...

Страница 52: ......

Отзывы: