22
VP-725N - Configuring and Controlling the VP-725N
7.1.1
The Input Screen
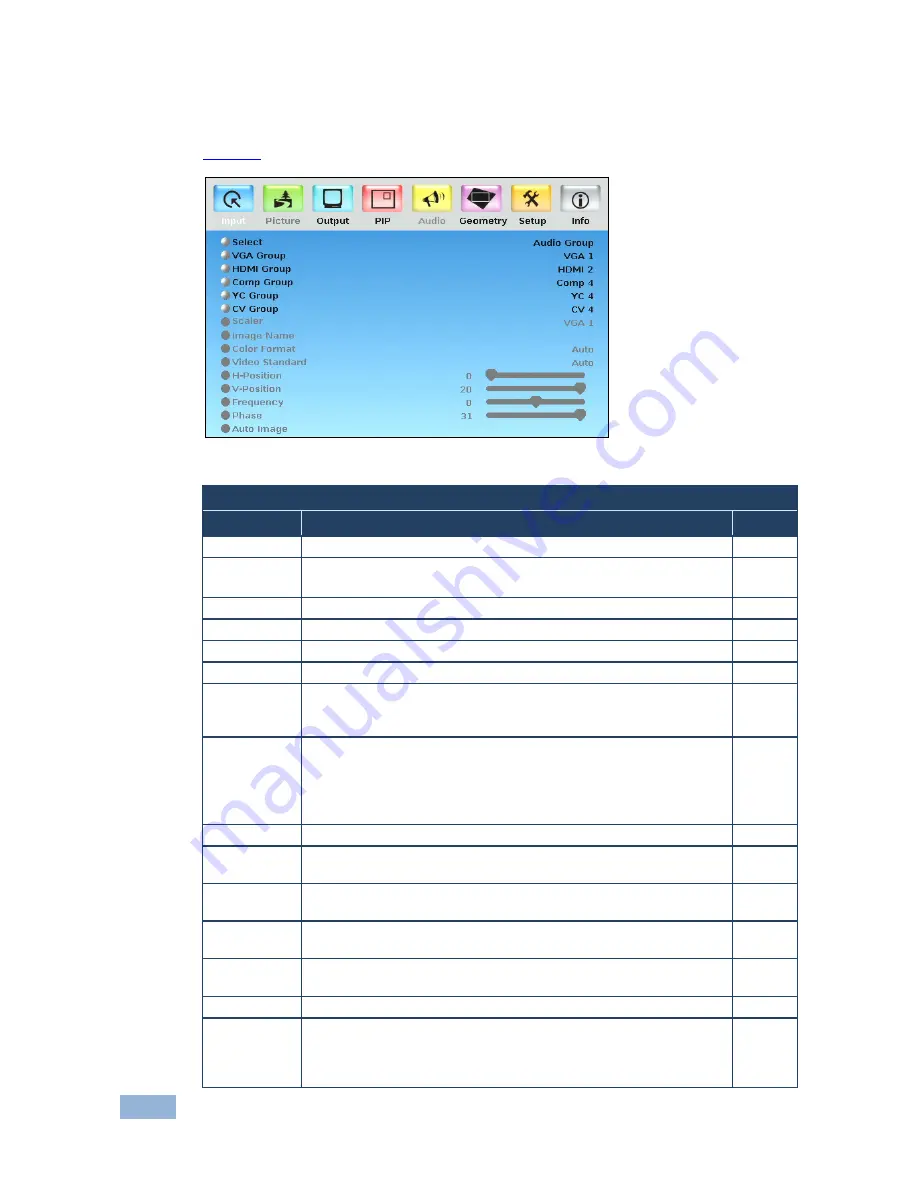
Figure 9
defines the Input screen.
Figure 9: Input Screen
Input Screen
Setting
Function
Default
Select
Select the group: Video Group, Scaler
Scaler
VGA Group
Select the VGA input: From 1 to 4
In the Video Group operation mode
VGA 1
HDMI Group Select the HDMI input: From 1 to 4
HDMI 1
Comp Group Select the Comp input: From 1 to 4
Comp 1
YC Group
Select the YC input: From 1 to 4
YC 1
CV Group
Select the CV input: From 1 to 4
CV 1
Scaler
Select the source to scale (in the Scaler operation mode): From
VGA 1 to VGA 4; from HDMI 1 to HDMI 4; from COMP 1 to COMP
4; from YC 1 to YC 4; from CV 1 to CV 4, and USB
VGA 1
Image Name Shows the file name that is displayed when the USB port is connected
Supports JPEG format only. The JPEG file should not exceed a
resolution of 2048x1536. If the image file is not within the definition a
blank screen appears and the machine displays the message: "File too
big" or "File too small" (smaller than 320x240)
Color Format Select the color format: Auto, RGB or YUV
Auto
Video
Standard
Select the video standard: Auto, NTSC, PAL, PAL-M, PAL-N, NTSC
4.43, SECAM or PAL-60
H-Position
Set the horizontal position (For UXGA and component video inputs):
The range changes according to the input mode
Auto
V-Position
Set the vertical position: The range changes according to the input
mode
Frequency
Adjust the frequency (for the UXGA inputs): The range changes
according to the input mode
Phase
Adjust the phase: 0 to 31
0
Auto image
Assesses the image and improves the quality accordingly, by
automatically adjusting the phase, frequency and position. Upon
completion, the relevant OSD values are updated (Hpos, Vpos,
Phase and Frequency)
Содержание VP-725N
Страница 1: ...KRAMER ELECTRONICS LTD USER MANUAL MODEL VP 725N Presentation Switcher Scaler P N 2900 000738 Rev 3...
Страница 2: ......
Страница 3: ......
Страница 61: ...56 VP 725N...


