


34
K-CONFIG - The Driver Manager – Getting Started
5
The Driver Manager – Getting Started
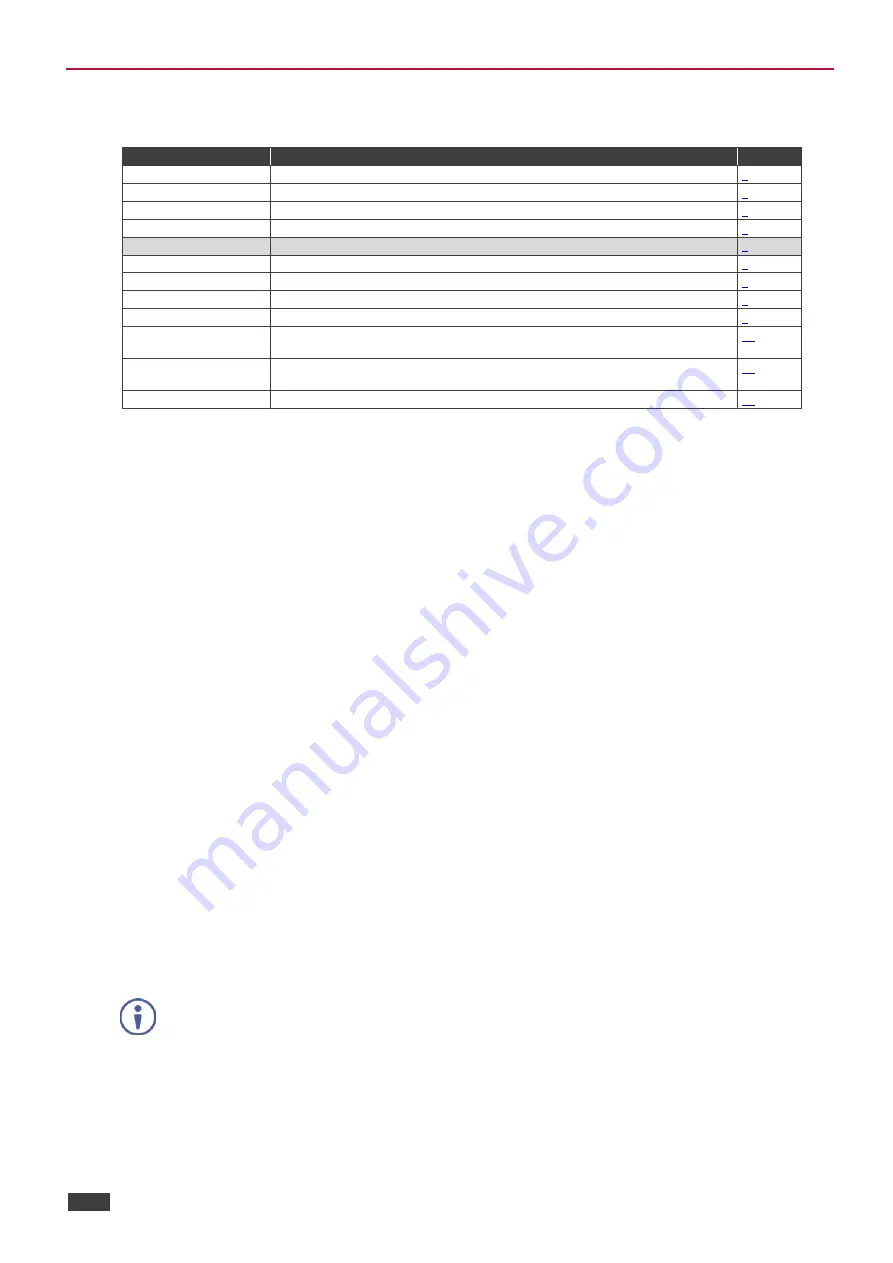
You are here:
Configuration Steps
Description
Section
Introduction
General information and system requirements
Planning
Carefully plan your controlled room
Installation
Install the Software
Introduction to K-Config
Get to know the K-Config main window, menus and quick access icons
Driver Manager
Define the Controlled Device Drivers
Project Navigator
Define the Controlled Room
Port Manager
Assign the controlled devices to the Master and Auxiliary device ports
Triggers
Activate the Triggers
Adding Actions
Describes how to add the various actions to a trigger
Connecting to a Device
Describes how to connect to a device, upgrade the firmware, read/write to the device
and so on
Using the Web pages
Describes how to control the device via the Ethernet and perform minor configuration
operations
Creating a Virtual Master
Describes how to create a Virtual Master to control a room via KRAMER NETWORK
5.1
Getting to Know the Driver Manager
Controlled AV devices (such as projectors, DVD players, switchers, scalers and so on) are controlled by sending out
an appropriate command from the room controller to the controlled device, over serial, ETH or IR interfaces. A Driver
is a collection of these commands which includes all the relevant commands for the specific device.
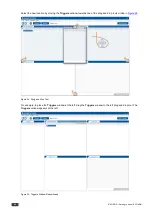
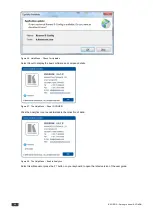
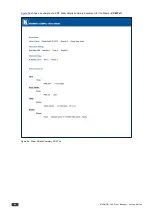
When selecting “Driver Manager” from the file menu or the icon, the Drivers Tree window appears and you need to
select a specific controlled device driver or to import a new driver. Once selected, the Driver Manager window
appears.
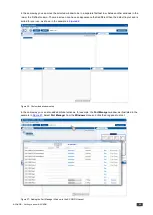
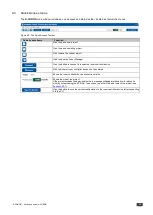
The Driver Manager has standard command names for different controlled devices by means of a shared-command-
name structure which can be used to build a standard command list. Each command type has a shared name that is
common to controlled devices in the controlled room.
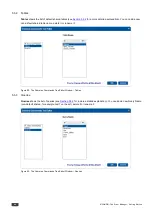
A shared command can be either empty (only the name is on the list but it has no device command content), or full
(the command has content); when the command is full, the command name on the list appears bold.
The driver manager presents a list of standard shared command names. You can add a command name to the
shared list. When adding a new command name to the shared sections of a driver – this command name will appear
in every driver you will open in the future as an empty command name. This makes it easy to use the same command
names in all your drivers.
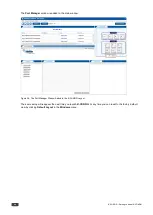
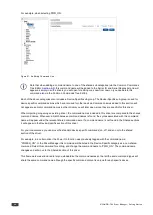
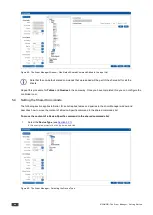
For example, if you have two types of projectors (made by different manufacturers) in the controlled room and each of
them has its own specific communication protocol, they will most likely have different command names specified in
their user manual for the same exact functional action. For example, the command name for powering up the
projector can be named “PWR: ON” for the first projector and “Power: on” for the other one. The driver manager
defines a common (or shared) name for both, “PWR_ON”, for the same type of command, while the content of the
command (syntax) remains specific for each projector.
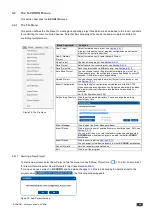
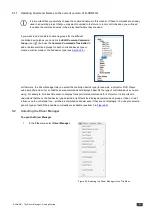
Note that a command name cannot include spaces. Some command names, in former versions had spaces.
For your convenience these command names will still appear with spaces. If you want to change these
names via the Common Commands Tree Editor, you will not be able to rewrite them back to their original
names (with spaces).


