K-CONFIG –
Connecting to the Device
147
10
Connecting to the Device
You are here:
Configuration Steps
Description
Section
Introduction
General information and system requirements
Planning
Carefully plan your controlled room
Installation
Install the Software
Introduction to K-Config
Get to know the K-Config main window, menus and quick access icons
Driver Manager
Define the Controlled Device Drivers
Project Navigator
Define the Controlled Room
Port Manager
Assign the controlled devices to the Master and Auxiliary device ports
Triggers
Activate the Triggers
Adding Actions
Describes how to add the various actions to a trigger
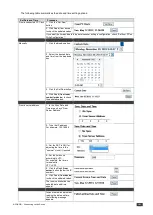
Connecting to a Device
Describes how to connect to a device, upgrade the firmware, read/write to the device
and so on
Using the Web pages
Describes how to control the device via the Ethernet and perform minor configuration
operations
Creating a Virtual Master
Describes how to create a Virtual Master to control a room via KRAMER NETWORK
While many actions are available to
K-CONFIG
users without needing to connect to the device itself, the following
actions require that the device is connected to your PC. These actions include:
•
Set the K-NET IDs, see
Section 10.2
•
Firmware upgrade, see
Section 10.3
•
General settings, see
Section 10.4
•
Ethernet settings, see
Section 10.5
•
Security settings, see
Section 10.6
•
Date and time settings, see
Section 10.6.1
•
Syncing the configuration to the device, see
Section 10.7
•
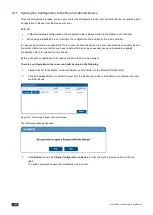
Reading the configuration from the device, see
Section 10.7.1
•
Clearing the configuration from the device, see
Section 10.9
You can connect your PC to:
•
A Master room controller device
•
An auxiliary device that is connected with a K-NET cable to its Master room controller.
•
An auxiliary device that is connected directly to the PC.
10.1
Connecting Methods
Before you perform any of the actions described above, you need to physically connect to the room controller device.
This can be done in any of the following ways:
•
Connecting via the Ethernet
•
Connecting to the device via the RS-232 port (no null-modem is required).
•
Connecting the room controller device directly to your PC via the USB connector whether it is defined as an
auxiliary device or a standalone Master room controller.
You can connect only via the available ports on the room controller device.
Note that you can read from a room controller device only via the Ethernet.


