Page 21
TO PREVENT INJURY OR DAMAGE TO THE HEATER, ALWAYS UN-
PLUG THE HEATER FROM THE POWER OUTLET BEFORE SERVICING.
4.9 Damper Control
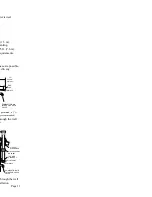
The damper control rod is located on the left side of the heater. This rod controls the
amount of air passing through the burn pot. By pushing the control rod in, you reduce
the amount of air passing through the burn pot. By pulling the rod out, you will increase
the amount of air passing through the burn pot. Once properly set, you should not need
to adjust the damper. The
MX2
TM
control will automatically change the exhaust fan speed
to adjust the amount of combustion air needed for each heat setting. A typical damper
setting is between 5/8” (15 mm) to 3/4” (20 mm) from the fully pushed in position.
4.10 Starting (lighting) your Heater for the First Time
Read the following instruction completely before attempting to light your heater for the
first time. This method applies to all modes of operation (“AUTO, HIGH/LOW,
“MANUAL”). For “AUTO” mode, use thermostat or other switching device in lieu of
“ON/OFF” button.
Once your heater is properly installed, complete the following steps to light it for the
first time or whenever your heater runs out of fuel:
1. Fill the hopper with pellet fuel. At this time the auger tube is empty. It
needs to be filled before the heater can be operated properly.
2. Press the “ON/OFF” button; The “ON/OFF” light and the “AUGER”
light should begin to blink. The motors should also begin to turn.
3. Adjust the HEAT SELECT setting to the desired level.
4. Press and hold the “AUGER” button; the “AUGER” light should light
and stay lit until the button is released.
5. Continue to hold the “AUGER” button until fuel begins to drop into the
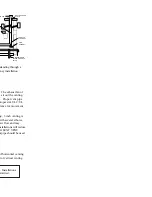
burn pot (located inside the burn chamber, see “Stove Cross Section”
diagram for exact location). This may take several minutes. If the heater
turns OFF before fuel begins to drop into the burn pot, repeat steps 2, 3
and 4.
6. Release the “AUGER” button once pellet fuel begins to drop.
7. Monitor the burn pot. A flame should appear within 5 to 8 minutes.
Allow the flame to stabilize. IN THE EVENT YOUR HEATER SHUTS
OFF BEFORE THE FLAME IS STABLE or if a flame does not appear;
press the “ON/OFF” button once again Refer to the “Adjusting your
Heater” section for more information on operating your heater properly.
4.11 Starting (lighting) your Heater
To start your heater, complete the follow steps:
1. Ensure there is adequate fuel in the hopper and that all ashgates and doors
are closed. Open ashgates/door will turn OFF the feed system.
2. Adjust damper to approximate setting. (If in doubt, pull open to
approximately 3/4" - 2 cm)
3. Press the “ON/OFF” button. The following should happen :
a. The exhaust fan will start.
Содержание MX2
Страница 1: ...Page 1 N tured By ustries Ltd verley Street g Manitoba R3T 0P5 Lithoid in Canada Rev Apr 2008 ARTS ...
Страница 2: ...EFTBLANK ...
Страница 3: ...Page 3 s se td at 07 ...
Страница 7: ...Page 7 lease note that turer supplier has or C BACKWALL ...
Страница 9: ...Page 9 ced 0 mm in uilding or eater A r heater ion on the manual ...
Страница 25: ...Page 25 d one near ugs in one to and ing irculation fan ated in the This will oved ash es ...
Страница 31: ...Page 31 maker or your t resolve your ...
Страница 33: ...Page 33 6 ...
Страница 34: ......
Страница 35: ...Page 35 16 19 24 ...
Страница 38: ......
Страница 39: ...Page 39 ...
Страница 40: ...M ...

