31
Global mode
Available characters
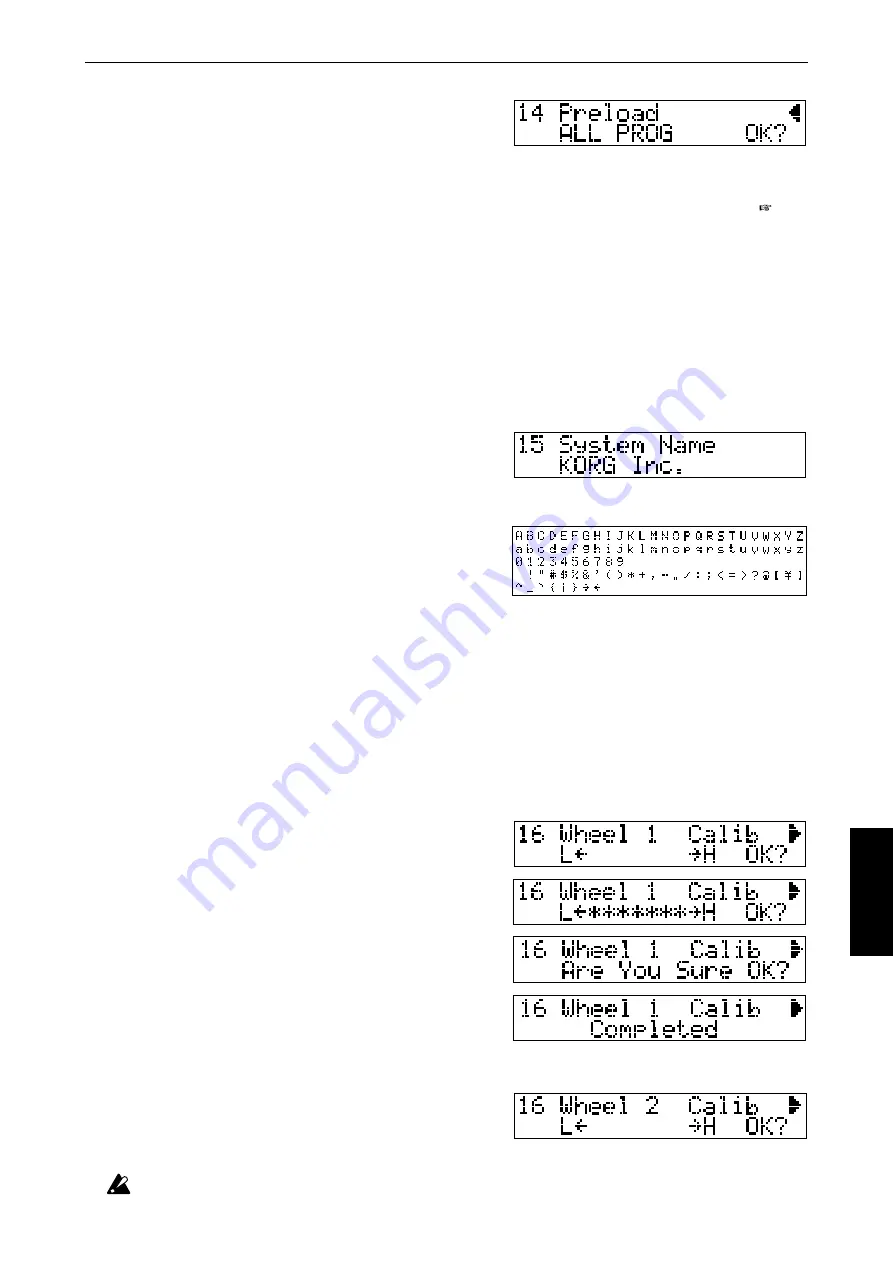
Preload
This operation loads the preloaded data (factory settings)
into the settings of the specified mode.
ALL PROG will load settings for programs A01 to D16,
ALL PERF will load performance settings for A01 to D16, GLOBAL will load settings for parameters 1 to
6 and 9 to 15, and ALL will restore Global data, all programs, and all performances to their factory settings.
Before loading ALL PROG, ALL PERF or ALL data, turn the applicable memory protect setting “OFF.” ( p.30)
After selecting the type of data to be loaded, move to “OK?” and press the [+/YES] key. A message of “Are
You Sure OK?” will appear. Press [+1/YES] once again, and the display will show “Completed,” indicating
that the Preload operation has been executed.
Range of settings:
ALL PROG, ALL PERF, GLOBAL, ALL
15. SYS NAME (System name setting)
This function allows you to specify the system name that will appear when the power is turned on. Up to 10
characters can be displayed.
Use the
〈
CURSOR
〉
switches to move among the character locations, and use the
〈
VALUE
〉
switches or
〈
VALUE
〉
slider to change the character at that location. You can also use the assignable sliders and switches as follows.
AL1 slider: Select uppercase alphabetical characters (26
types)
AL2 slider: Select lowercase alphabetical characters (26
types)
AL3 slider: Select numerals (10 types)
AL4 slider: Select symbols (34 types)
AL1 switch: Convert the lowercase character at the cur-
sor to uppercase
AL2 switch: Convert the uppercase character at the cur-
sor to lowercase
AL3 switch: Delete the character/numeral/symbol at the cursor location
AL4 switch: Insert the previously-deleted character at the cursor location
16. CALIB (Calibrate each controller)
This function allows you to adjust the operating range of the control wheels, keyboard aftertouch, damper
pedal and assignable pedal. If you feel that the sensitivity of these controllers needs adjustment, use the
following procedures to adjust them for optimal operation.
Use the
〈
CURSOR
〉
switches to select the controller to be calibrated.
Control wheel calibration
Control wheel 1
1) Rotate control wheel 1 upward until it stops. Then rotate
it downward until it stops. As you do so, asterisks
❋
will
be displayed to indicate the movement of the wheel.
2) Release wheel 1 so that it returns to the center. Then an-
swer the “OK?” prompt by pressing the
〈
+1/YES
〉
switch,
and the display will ask “Are You Sure OK?” Press the
〈
+1/YES
〉
switch once again, and the display will indi-
cate “Completed.”
Control wheel 2
1) Rotate control wheel 2 upward until it stops. Then rotate it downward until it stops. As you do so, aster-
isks
❋
will be displayed to indicate the movement of the wheel.
2) Answer the “OK?” prompt by pressing the
〈
+1/YES
〉
switch, and the display will ask “Are You Sure OK?” Press
the
〈
+1/YES
〉
switch once again, and the display will in-
dicate “Completed.”
Be sure to rotate the control wheel all the way until it stops. If the display indicates “Invalid Data,” the calibration has
failed. Perform the procedure once again. If the display repeatedly indicates “Invalid Data,” it is possible that a
malfunction has occurred. Please contact a Korg authorized service center or your dealer.


