63
Basic functions
Sequencer mode
6
Press the [REC/WRITE] key.
This instrument will enter record-standby mode.
The “
PLAY/MUTE/REC”
of the track(s) you speci-
fied in step
4
will change from
PLAY
to
REC
.
The metronome will begin sounding when you
press the [REC/WRITE] key. If it does not sound, go
to the SEQ 1.1: Play/REC, Preference page and set
the Metronome parameter.
The default values are
“Metronome Sound” REC
Only, “Metro. Bus Select” L/R, “Level”
127, “Pre-
count” 2
. With these settings, there will be a two-
measure pre-count, the metronome sound will be
output at the maximum level from the L/MONO
and R jacks (and from the headphones), and will
be heard only during recording.
7
Set “Tempo Mode” to Manu (manual), and as you
listen to the metronome, use “Tempo (
)” to set
the tempo.
8
Set “Meter” to the desired time signature.
9
If necessary, set “Reso” (Resolution) to the desired
realtime quantize setting (
☞
p.66).
This completes preparations for recording. The
recording procedure will depend on the “Over-
write” – “Multi (multitrack recording)” setting
explained below. Press the [REC/WRITE] key to
temporarily cancel record-standby mode, and try
out the various recording methods described below.
The time signature will be recorded when you
actually begin recording. If you cancel recording
during recording-standby or during the precount,
the time signature specified in
8
will not be
recorded.
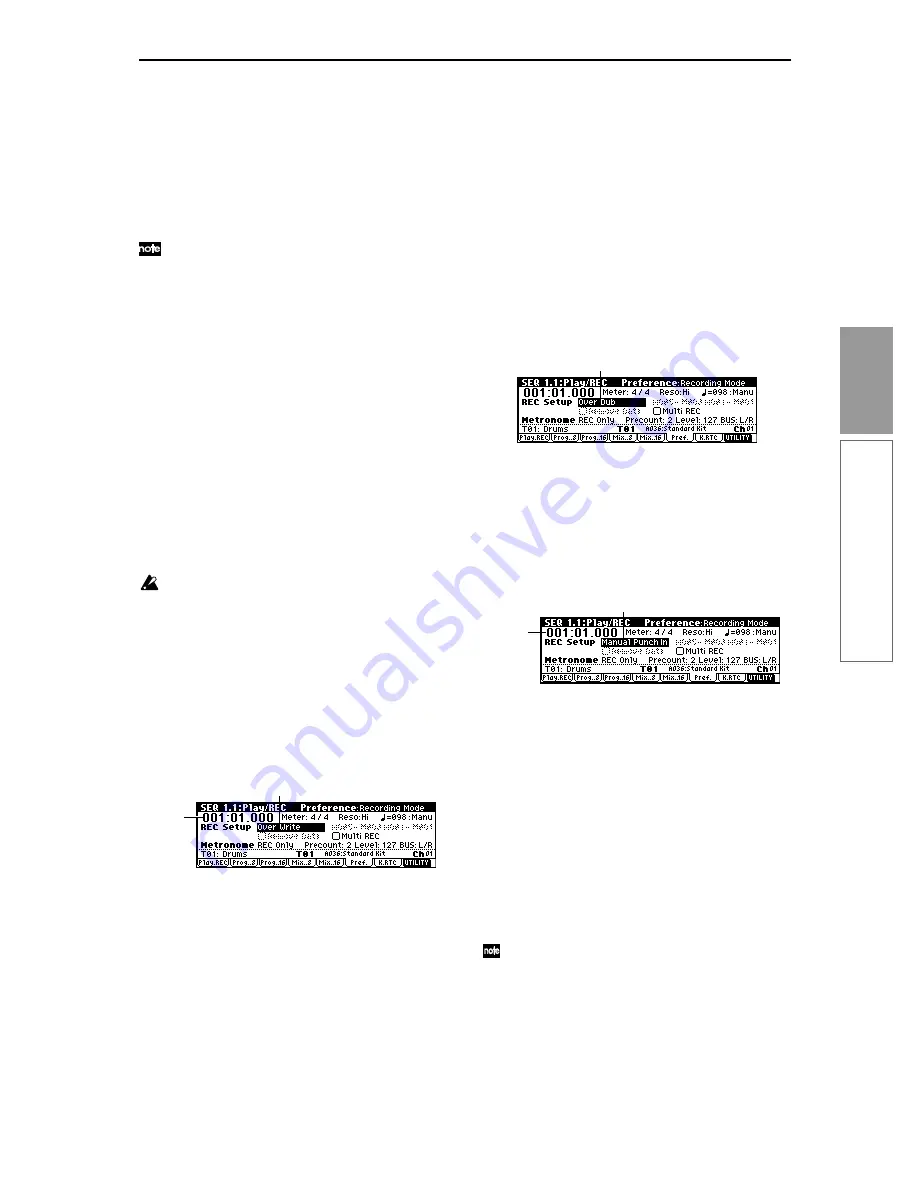
Overwrite
Use this method when recording for the first time.
1
Make the necessary settings in “Preparations for
recording.”
2
In theSEQ 1.1: Play/REC Preferences page REC
Setup “Recording Set Mode,” select Over Write.
3
In “Location,” specify the location at which you
wish to begin recording.
4
Press the [REC/WRITE] key, and then press the
[START/STOP] key.
If “Metronome Setup” has the default settings (refer
to “Preparations for recording” step
6
), the metro-
nome will sound for a two-measure pre-count, and
then recording will begin.
Play the keyboard and move controllers such as the
joystick to record your performance.
5
When you finish playing, press the [START/STOP]
key.
Recording will end, and the location will return to
the point at which you begin recording.
At this time if you press the [PAUSE] key instead of
the [START/STOP] key, recording will pause. When
you press the [PAUSE] once again, recording will
resume. When you are finished, press the [START/
STOP] key to stop recording.
Overdub
1
Make the necessary settings in “Preparations for
recording.”
2
In the SEQ 1.1: Play/REC Preferences page REC
Setup “Recording Mode,” select Over Dub.
3
For the rest of the procedure, refer to steps
3
–
5
of
“Overwrite”.
Manual punch-in
1
Make the necessary settings in “Preparations for
recording.”
2
In the SEQ 1.1: Play/REC Preferences page REC
Setup “Recording Mode select Manual Punch In.
3
In “Location,” specify a location several measures
earlier than the point at which you wish to begin
recording.
4
Press the [START/STOP] key.
Playback will begin.
5
At the point at which you wish to begin recording,
press the [REC/WRITE] key.
Recording will begin.
Play the keyboard and operate controllers such as
the joystick to record your performance.
6
When you finish recording, press the [REC/
WRITE] key.
Recording will end (playback will continue).
Instead of pressing the [REC/WRITE] switch in
steps
5
and
6
, you can use a foot switch con-
nected to the [ASSIGNABLE SWITCH] jack. Set
the Global 6.1: Controller, Foot page “
Foot Switch
Assign
” to
Song Punch In/Out (
☞
p.101
)
.
7
Press the [START/STOP] key.
Playback will stop, and you will return to the loca-
tion that you specified in step
3
.
Location
Recording Mode
Recording Mode
Location
Recording Mode
Содержание Karma
Страница 1: ...3 E ...
Страница 42: ...36 ...


