


Solving Problems with Printing Quality
187
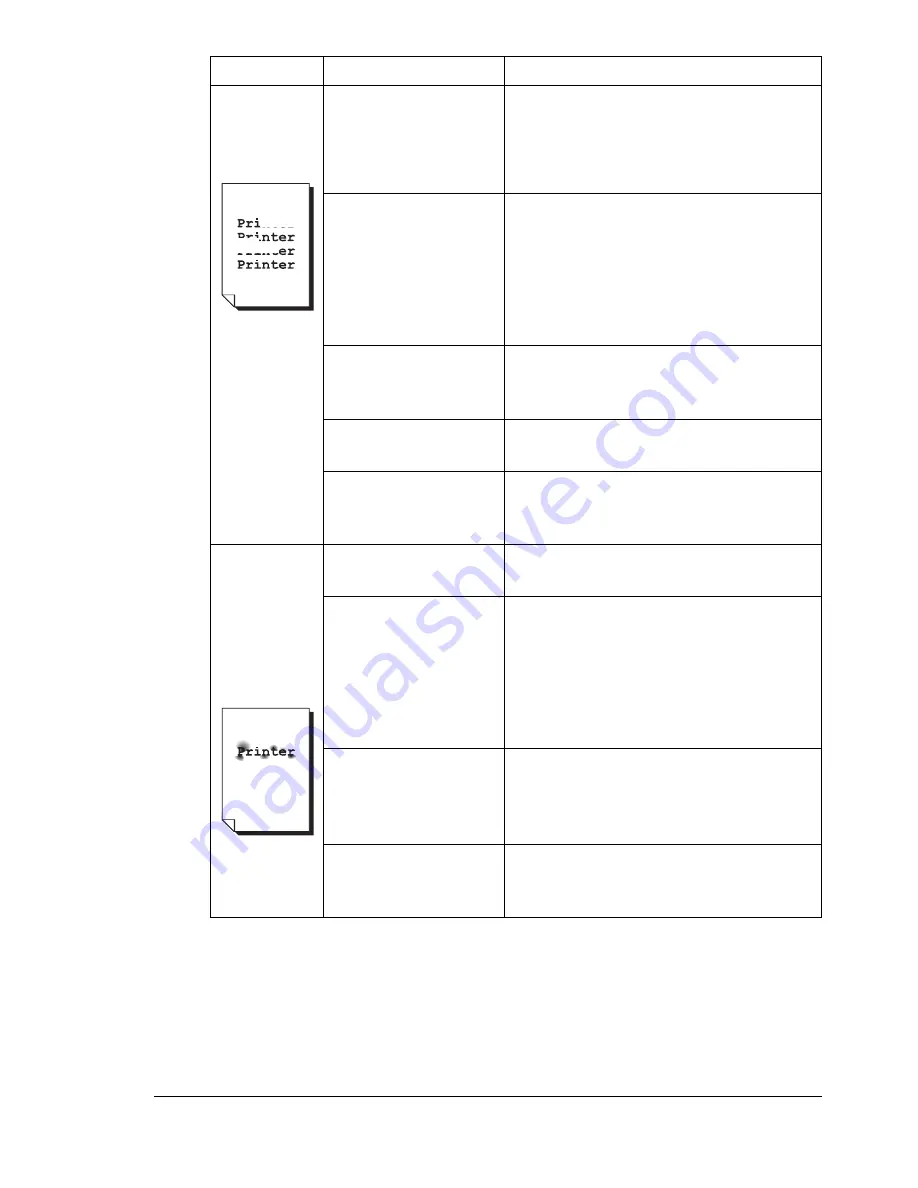
Irregular
print or mot-
tled image
appears.
The media is moist
from humidity.
Adjust the humidity in the media stor-
age area.
Remove the moist media and replace it
with new, dry media.
Unsupported media
(wrong size, thick-
ness, type, etc.) is
being used.
Use KONICA MINOLTA-approved
media. See “Specifications” on page
40.
Also, refer to http://printer. konicami-
nolta.com for a complete list of cur-
rently approved media.
One or more of the
toner cartridges may
be defective.
Remove the toner cartridges and
check for damage. If it is damaged,
replace it.
The drum cartridge is
defective.
Remove the drum cartridge and check
for damage. If it is damaged, replace it.
The fuser separator
levers are adjusted
for envelope printing.
Return the fuser separator levers to the
plain paper setting.
There is
insufficient
fusing or the
image
comes off
when
rubbed.
The media is moist
from humidity.
Remove the moist media and replace it
with new, dry media.
Unsupported media
(wrong size, thick-
ness, type, etc.) is
being used.
Use KONICA MINOLTA-approved
media. See “Specifications” on page
40.
Also, refer to http://printer. konicami-
nolta.com for a complete list of cur-
rently approved media.
Media type is set
incorrectly.
When printing envelopes, labels, post-
cards, thick stock, or transparencies,
specify the appropriate media type in
the printer driver.
The fuser separator
levers are adjusted
for envelope printing.
Return the fuser separator levers to the
plain paper setting.
Symptom
Cause
Solution
Содержание Magicolor 2590
Страница 1: ...magicolor 2590MF Printer Copier Scanner User s Guide 4556 9602 01A 1800835 001B...
Страница 14: ...Contents viii...
Страница 15: ...1 Introduction...
Страница 24: ...Getting Acquainted with Your Machine 10...
Страница 25: ...2 Control Panel and Configuration Menu...
Страница 52: ...Configuration Menu Overview 38...
Страница 53: ...3 Media Handling...
Страница 71: ...Loading Media 57 10 Carefully close the engine cover...
Страница 77: ...Loading Media 63 6 Reattach the lid to Tray 2 7 Reinsert Tray 2 into the machine...
Страница 87: ...4 Using the Printer Driver...
Страница 96: ...Printer Driver Settings 82...
Страница 97: ...5 Using Direct Print...
Страница 100: ...Camera Direct Photo Printing 86...
Страница 101: ...6 Using the Copier...
Страница 112: ...Making Advanced Copies 98...
Страница 113: ...7 Using the Scanner...
Страница 138: ...Basic Scan to PC Operation 124...
Страница 139: ...8 Replacing Consumables...
Страница 155: ...9 Maintenance...
Страница 164: ...Cleaning the machine 150 8 Carefully close the engine cover 9 Carefully close the scanner unit...
Страница 170: ...Storing the machine 156...
Страница 171: ...10 10 Troubleshooting...
Страница 181: ...Clearing Media Misfeeds 167 8 Reinstall the drum cartridge 9 Carefully close the engine cover...
Страница 182: ...Clearing Media Misfeeds 168 10 Carefully close the scanner unit 11 Remove the lid from Tray 1 12 Remove any misfed paper...
Страница 185: ...Clearing Media Misfeeds 171 20 Reinsert Tray 2...
Страница 188: ...Clearing Media Misfeeds 174 4 Remove any misfed media 5 Close the ADF cover 6 Close the ADF feed cover...
Страница 214: ...Status Error and Service Messages 200...
Страница 215: ...11 11 Installing Accessories...
Страница 223: ...A Appendix...
Страница 236: ...222...


