


C353/C253/C203
11-30
Utility mode
11
!
Detail
The Authentication Device Settings parameters are available only if the optional authentication unit is
installed.
The authentication units of the IC card type and the biometric type cannot be installed at the same time.
Using Touch & Print, a user can print a job sent from a computer by positioning their finger or IC card
on the authentication unit
11.4.5
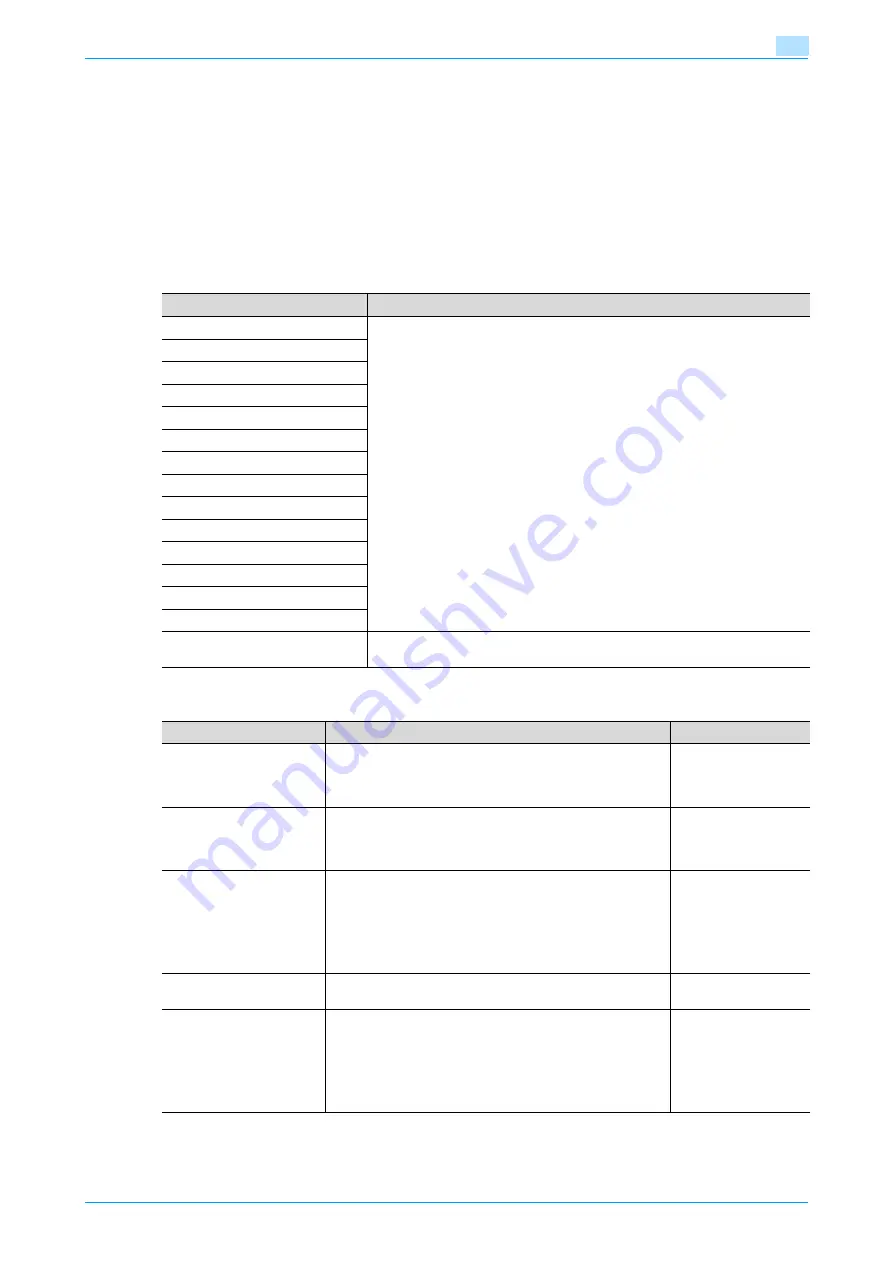
Network Settings
11.4.6
Copier Setting
Parameter
Description
TCP/IP Settings
Specify settings for using the network. For details, refer to the User’s Guide
[Network Scan/Fax/Network Fax Operations].
NetWare Settings
HTTP Server Settings
FTP Settings
SMB Settings
LDAP Settings
E-mail Settings
SNMP Settings
AppleTalk Settings
Bonjour Setting
TCP Socket Settings
WebDAV Client Settings
Web Service Settings
Detail Settings
Network Fax Settings
Specify settings for using network faxing. For details, refer to the User’s Guide
[Network Scan/Fax/Network Fax Operations].
Parameter
Description
Default Setting
Auto Zoom (Platen)
Select whether or not the "Auto" Zoom setting is automatical-
ly selected when a paper tray is selected (except when the
"Auto" Paper setting is selected) while an original is placed on
the original glass.
OFF
Auto Zoom (ADF)
Select whether or not the "Auto" Zoom setting is automatical-
ly selected when a paper tray is selected (except when the
"Auto" Paper setting is selected) while an original is loaded
into the ADF.
ON
Specify Default Tray when
APS Off
Select which paper tray is selected when the "Auto" Paper
setting is canceled.
•
Tray Before APS ON:
The paper tray that was being used before the "Auto" Pa-
per setting was selected is selected.
•
Default Tray:
Tray 1 is used.
Tray Before APS ON
Select Tray for Insert Sheet
Select the default paper tray loaded with paper for the cover
pages (front cover), inserted pages and chapter title pages.
Tray 2
Print Jobs During Copy
Operation
Select whether or not print data or fax data can be accepted
for printing while a copy operation is being performed.
•
Accept:
Print data and fax data can be accepted and printed.
•
Receive Only:
Print data and fax data is printed after the copy operation
is finished.
Accept
Содержание bizhub C203 Series
Страница 1: ...User s Guide Copy Operations ...
Страница 17: ...C353 C253 C203 x 16 Introduction Explanation of manual conventions ...
Страница 18: ...C353 C253 C203 x 17 Introduction ...
Страница 21: ...C353 C253 C203 x 20 Introduction ...
Страница 22: ...1 Before making copies ...
Страница 70: ...2 Basic copy operations ...
Страница 148: ...3 Additional copy operations ...
Страница 150: ...C353 C253 C203 3 3 Additional copy operations 3 ...
Страница 178: ...4 Troubleshooting ...
Страница 230: ...C353 C253 C203 4 53 Troubleshooting 4 4 Close the misfeed clearing door ...
Страница 248: ...5 Specifications ...
Страница 256: ...6 Copy paper originals ...
Страница 276: ...7 Application functions ...
Страница 365: ...C353 C253 C203 7 90 Application functions 7 Text Background Color screen Density screen Copy Protect Pattern screen ...
Страница 371: ...C353 C253 C203 7 96 Application functions 7 Text Color screen Density screen ...
Страница 384: ...8 Replacing toner cartridges and staple cartridges and emptying punch scrap box ...
Страница 414: ...9 Care of the machine ...
Страница 422: ...10 Managing jobs ...
Страница 435: ...C353 C253 C203 10 14 Managing jobs 10 ...
Страница 436: ...11 Utility mode ...
Страница 493: ...C353 C253 C203 11 58 Utility mode 11 11 Touch OK To cancel the setting and select the default press the Reset key ...
Страница 496: ...C353 C253 C203 11 61 Utility mode 11 12 Repeat steps 6 through 11 three times 13 Touch Close ...
Страница 522: ...12 Appendix ...
Страница 530: ...13 Index ...
Страница 534: ...http konicaminolta com Copyright 2007 2007 9 A02E 9585 11 ...


