


AccurioPress C2070series
6-13
6.1
Both Sides Adjustment
6
4
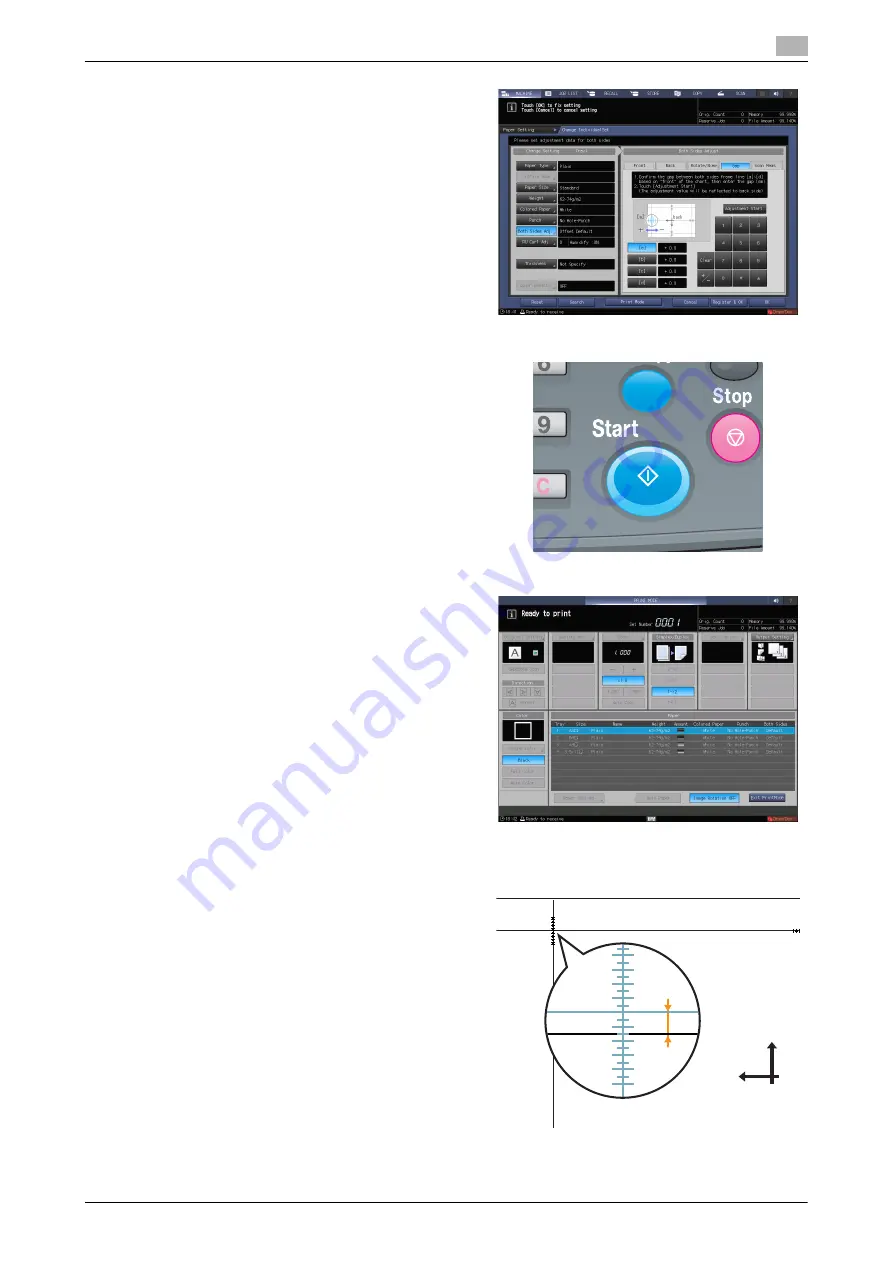
Select [Gap], then press [Print Mode].
5
When the [PRINT MODE] screen is displayed,
press
Start
on the
control panel
.
A test chart is printed out.
6
Press [Exit Print Mode].
7
Measure the gap between the front and back
sides at each point of [a] to [d] on the [back] side
of the printed out chart.
%
This figure shows an example to measure
[a]. The scale resolution is 0.5 mm.
%
In this figure, the black line indicates the
front side, and the blue line indicates the
back side.
%
The measurement value can be entered in
units of up to 0.1 mm.
%
For example, as shown in the figure, if the
scale of [a] is misaligned 1.5 mm in the plus
side compared with the front side, press [1]
- [5] - [+/-] to enter "-1.5" as the adjustment
value. Then, the blue line on the back side
will be moved 1.5 mm toward the minus
side.
>D@
[
\
back
Содержание AccurioPress C2060
Страница 1: ...AccurioPress C2070 C2070P C2060 AccurioPrint C2060L Colour production printing system Quick GUIDE ...
Страница 2: ......
Страница 6: ...Contents 4 AccurioPress C2070series ...
Страница 7: ...1 Introduction ...
Страница 8: ......
Страница 16: ...1 10 AccurioPress C2070series Make a Note about This Machine Information 1 1 6 ...
Страница 17: ...2 Before Getting Started ...
Страница 18: ......
Страница 32: ...2 2 Available Operations in this Machine 2 AccurioPress C2070series 2 16 ...
Страница 33: ...3 Let s Make Prints ...
Страница 34: ......
Страница 37: ...4 Installing Software ...
Страница 38: ......
Страница 57: ...5 Basic Operations ...
Страница 58: ......
Страница 75: ...6 Maintaining the Finishing Quality ...
Страница 76: ......
Страница 119: ...7 Troubleshooting ...
Страница 120: ......
Страница 136: ...7 7 If you forget the administrator password 7 AccurioPress C2070series 7 18 ...
Страница 137: ...8 Appendix ...
Страница 138: ......
Страница 184: ...8 6 Maximum paper size and printing area 8 AccurioPress C2070series 8 48 ...


