


Manual EDU 2AE/TOP/MITO
Page 5
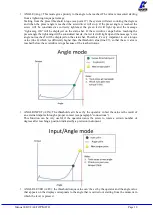
7) Ramp:
You can select the slow start time (acceleration) from 0.2 to 3.0 sec. This option is only available
for the screwing phase, while during the unscrewing phase the ramp time is always 0.2 sec. We suggest
using this option with self tapping screws.
ATTENTION: Reaching the torque while the ramp is still on could give as result a different torque level
from the one that results when the ramp is over. This is due to the motor acceleration.
Reaching the torque while the ramp is still on will activate the “screw OK” s
ignal anyway (this option is
useful if you need to tighten screws that are already tightened, the so called “double hit” ).
On the other hand, if you wish to see an error signal during the preset torque in the ramp phase, you can
change the minimum time by setting value which is equal or superior to the ramp value (see point 9).
8) Speed:
You can select any speed value of the screwdriver between nominal (maximum speed given in
the catalogue) and the minimum speed of every single screwdriver (see table with technical data).
- - - - - M E N U - - P R : 1 - - - - -
9 ) M i n
t i m e :
O F F
1 0 ) M a x
t i m e :
2 0 . 0 s
1 1 ) A u t o
r e v . :
0 . 7 s
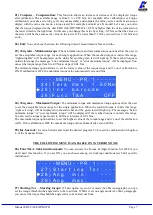
9) Min time - Minimum Time:
You can set this time from 0.1 sec to 'Max time - 0.1s'. To disable the
function select OFF by pressing
as many times as needed. (Min time = 0).
Torque reached below the minimum time won’t activate the torque signal and will result in an error
signal. “
Below minimum time
” will be displayed on the status bar and the red led will light up. You will
hear two beep sounds, too.
10) Max time - Maximum time:
You can select the maximum time of tightening. You can set from 'Min
time + 0,1s' to 20.0 sec.
ATTENTION
: If torque isn’t reached by the maximum time, the screwdriver will stop. “
Over maximum
time
” will be displayed on the status bar and the red
led will light up. You will hear two beep sounds, too.
11) Auto rev.
–
Auto reverse:
This option will automatically start a reverse cycle after a torque reached
signal. You can set time from 0.1 to 20.0 sec.
To disable the function select OFF by pressing
as many times as needed.
ATTENTION: During the reverse cycle, it is necessary to keep the lever or the start signal pressed as long
as it won’t stop. “
Correct screw
” will be displayed on the status bar and
a green led will light up. You will
hear one beep sound, too. In case the lever is released before the end of the reverse cycle, “
unfinished
screw
” will be displayed and a red led will light up. You will hear two beep sounds, too.
- - - - - M E N U - - P R : 1 - - - - -
1 2 ) R e v
s p d :
6 0 0 r p m
1 3 ) R e v
t o r q u e :
M A X
1 4 ) P V
t o r q u e :
O F F
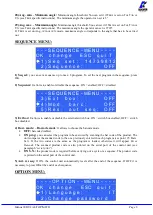
12) Rev spd - Reverse speed:
You can select any reverse speed value of the screwdriver between the
maximum and the minimum specific speed of every single screwdriver (see table with technical data).
13) Rev torque
–
Unscrewing torque:
You can select the desired torque as a percentage of the torque
range of the selected screwdriver (see point 3). If the torque is set on MAX, the unscrewing torque is about
20% higher than the possible maximum torque, so that it is always possible to unscrew the tightened screw
(we suggest leaving this function on in normal use). If the setting is from MIN to 99% the unscrewing
torque with the same percentage will be equal to the settings of the screwing phase.
Содержание EDU 2AE/TOP/MITO
Страница 22: ...Manual EDU 2AE TOP MITO Page 22 EXPLODED VIEW...


