Kodak 2400DSV-E Скачать руководство пользователя страница 43


3-22 

A-61316  September 2004 

Entering and exiting


the User mode


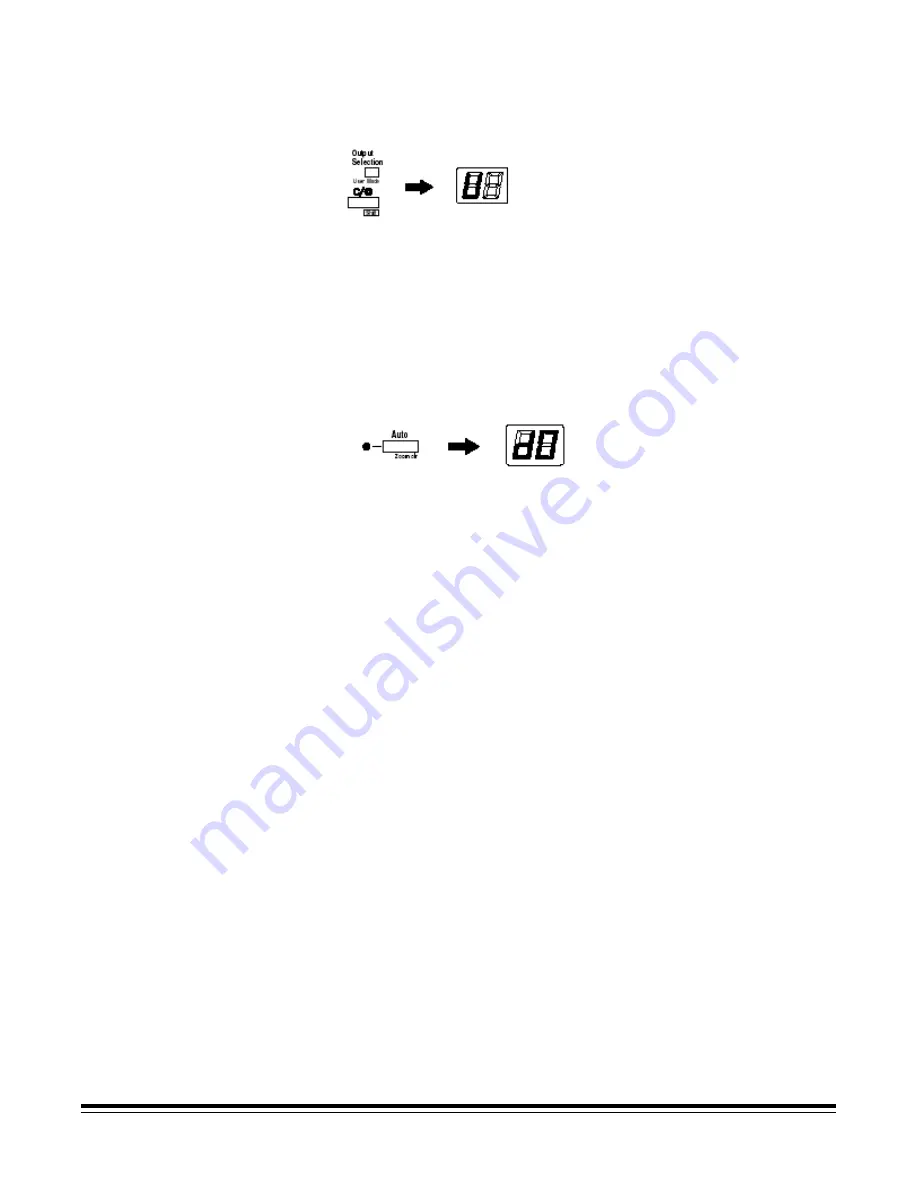
1.  Hold down the Shift key and Output Selection key at the same time. 

The Multi-Print Display displays a “U”. 


2.  Press the Exposure Adjustment key (Darker or Lighter) to select the 

specific function: U2, U6 or U7.


• 

Pressing the Darker key scrolls through the functions in the 
following order: U, U1, U2, U3, etc.


• 

Pressing the Lighter key scrolls through the functions in the 
following order: U8, U7, U6, U5, etc.


3. 

Press the Exposure Mode key to display d(*). The asterisk 
indicates the current setting value. 


4.  Press the Exposure Adjustment key (Darker or Lighter) to select the 

specific setting value.


• 

Pressing the Darker key scrolls through the setting values in the 
following order: d0, d1, d2, etc.


• 

Pressing the Lighter key scrolls through the setting values in the 
following order: d5, d4, d3, etc.


5.  Press the Start key to validate the setting value. 


NOTES:


• 

If the Exposure Mode key is pressed, the setting value is not validated 
and the User mode initial screen (U) appears.


• 

If a new function is to be set, start the procedure over beginning with 
Step 2.


6.  Press the Clear key to exit User mode.


Содержание 2400DSV-E

Страница 1: ...Operator s Manual A 61316 2400DSV E Digital Scanner Printer...

Страница 2: ...wet hand Keep hands hair and clothing away from rollers and other moving parts Do not scratch abrade place a heavy object on heat twist bend pull on or damage the power cord Use of a damaged power co...

Страница 3: ...or falls it may cause personal injury Do not store toner units and PC drum units near a floppy disk or watch that are susceptible to magnetism They could cause these products to malfunction Replacing...

Страница 4: ...image quality could result Do not throw or drop a toner unit or PC drum unit as poor image quality could result Do not use this product in an area where ammonia or other gases or chemicals are present...

Страница 5: ...2 Installing a projection lens 3 3 Selecting the Connection mode PR PC 3 4 Zooming and focusing images 3 5 Rotating images 3 6 Auto skew correction 3 6 Selecting the film type 3 6 Selecting the image...

Страница 6: ...per feeding tray 4 5 Loading paper into the paper cassette 4 6 Replacing the toner 4 7 5 Maintenance 5 1 Cleaning the scanner 5 1 Replacing the projection lamp 5 3 6 Troubleshooting 6 1 Error codes 6...

Страница 7: ...age processing features etc In addition information about setting up and recalling job programs is included Chapter 4 Printer Functions provides general information about the High Speed Video Laser Pr...

Страница 8: ...the power cord can be disconnected at any time An area free from direct sunlight A place which has easy access to a power outlet so the unit may be easily plugged in and unplugged A place which is out...

Страница 9: ...Make sure that the power cord does not become caught in any mechanism of the system Do not allow the power cord to become caught underneath the weight of the unit Grounding To prevent electrical shoc...

Страница 10: ...6 September 2004 High Speed Video Laser Printer For ease of operation maintenance and replenishment of supplies the minimum clearance shown below is required Install the unit in an area that allows ea...

Страница 11: ...dedicated printer allowing scanned images to be printed out directly NOTE Each 2400DSV E Scanner is designed exclusively for use with its respective printer Contact your Kodak Representative if you ar...

Страница 12: ...or 3M Type Cartridges This carrier is designed for very high speed 16 mm film searching ACF 7 for automatic loading viewing and ejection of aperture cards and works in medium to high volume applicatio...

Страница 13: ...the printer is warming up you can scan and memorize the film image of about 9 pages Letter or A4 size 400dpi The Printer allows that print process to be started as soon as the printer completes warmi...

Страница 14: ...matically turns off the Projection Lamp of the scanner Both are activated when the system is left idle for a specified period of time These functions may be disabled or enabled When enabled timing can...

Страница 15: ...f each function Chapter 3 Using the Scanner provides procedures on how to use each function Standard Control Panel functions The functions described below are standard Control Panel functions Correcti...

Страница 16: ...cassette Paper that best suits the format of the image as displayed on the screen will be used for printing If you want to use this function contact your Kodak Service Representative For more informa...

Страница 17: ...anual Masking to Off Off Indicates no masking or trimming will be done Auto Masking omits the frame non image area of a printed film image Auto Masking is not applicable with the Masking or Trimming s...

Страница 18: ...darker image density Lighter supports lighter image density 8 Exposure Mode key select either Auto or Manual exposure mode When Auto is selected the system produces the optimum quality of the image fo...

Страница 19: ...ge Distortion Correction 14 Clear Stop key use this key to clear the setting on the Multi Print display reset the Multi Print display to 1 or stop a multi print cycle This key also provides a Shift fu...

Страница 20: ...e NOTE All of these functions can be performed when the Shift key and one of the keys described below are pressed 1 User Mode Output Selection key pressing this key together with the Shift key puts th...

Страница 21: ...Recall when this key is pressed together with the Shift key the program registration locations IJ 2J and 3J are called Each time this key is pressed while the Shift key is held down the display rotat...

Страница 22: ...ier optional that is being used Review the Operator s Manual that came with your Film Carrier for more information 2 Select and replace the lens 3 Select the connection mode 4 If desired zoom focus or...

Страница 23: ...below shows the standard types of film and the recommended zoom ratios of lenses to be used with the scanner The size and format of one frame of film may vary depending on the shooting conditions Film...

Страница 24: ...uide 4 Pull out the Brightness Select lever and slide it to a position appropriate for the type of the Projection Lens loaded in the machine The lever should click into position Each lens is color cod...

Страница 25: ...PC key to switch between Printer mode and PC mode if you are connected to a PC PC mode when the display is switched from Multi Print to PC connection to the PC is valid PR mode when the display is swi...

Страница 26: ...e image on the screen into print size frame Marked on the screen are the size frame markers corresponding to the paper size 8 5x 11 inch A4 A4 8 5 x 11 Width A4 8 5 x 11 Height 2 Zoom the film image s...

Страница 27: ...tations of up to 30 degrees Selecting the film type You can choose Auto Negative or Positive film type Auto automatically determines the polarity of the film being used NOTES The system cannot determi...

Страница 28: ...uto light is on The green Auto light turns off when the scanner is in the Manual Exposure mode Darker Auto Lighter The bar on the right side of the Darker Auto and Lighter keys is the Exposure Display...

Страница 29: ...r keys are pressed at the same time the exposure level returns to the center Setting print quantities The Multi Print key on the Control Panel allows you to set the number of prints you want to make T...

Страница 30: ...when the Tray and Cassette1 indicators are both lit To select the paper tray Press the Output Selection key until the paper tray you want to print from is selected The standard magnification is fixed...

Страница 31: ...ise Prints the on screen lengthwise area Lengthwise Crosswise Prints the on screen image by automatically judging whether it is lengthwise or crosswise Crosswise Lengthwise Print mode The Print mode k...

Страница 32: ...e Manual Frame Masking Kit option is required Masking 1 Frame The center of the displayed image through the Manual Frame Masking panel is masked NOTE The Manual Frame Masking Kit option is required Au...

Страница 33: ...me date and messages can be included on a print Image Distortion The system automatically corrects slight image distortion that can occur during scanning Using auto masking The Auto Masking function p...

Страница 34: ...ication Panel used to specify the vertical print scan area of the displayed image There are 42 lights placed at 7 mm intervals The lights create a pattern when lit specifying the area on the screen th...

Страница 35: ...mode the lights on the Vertical and Horizontal Area Indication Panel will light according to the currently selected paper size and print position You can print the area specified by the green lights o...

Страница 36: ...rface of the print Screen Image Print Image Centering Centering Off Centering On Fit Fit Off Fit On Centering an image 1 Press the Centering Fit key to turn Centering On Centering Fit 2 Press Start NO...

Страница 37: ...intervals that can be set between scanning operations The time interval is based upon how much time it takes you to move for example a roll of film from frame to frame Refer to this table when making...

Страница 38: ...blinking display to a constant display 3 While the pause function is enabled you can exit the Cycle Print mode by pressing Clear a second time the value displayed in the No of Copies display changes...

Страница 39: ...Display 400 dpi 4H PR mode 600 dpi 6H 200 dpi 2H 300 dpi 3H 400 dpi 4H 600 dpi 6H PC mode 800 dpi 8H To set the resolution for scanning or printing 1 Press the Shift key and Resolution keys together...

Страница 40: ...ng Auto Skew Correction Horizontal Area setting Vertical Area setting Electrical Zoom Resolution Image Distortion To set a job program 1 Press the desired function on the Control Panel i e Resolution...

Страница 41: ...rement of 0 01X down to 0 50X NOTE The Zoom magnification is displayed in the Multi Print display to two decimal places For example when the magnification is 0 50X it is displayed as 50 When the magni...

Страница 42: ...ous functions to be set or changed as necessary Most of these functions are set up and changed by your Kodak representative however some User modes can be changed by you Setting these default values a...

Страница 43: ...s the Exposure Mode key to display d The asterisk indicates the current setting value 4 Press the Exposure Adjustment key Darker or Lighter to select the specific setting value Pressing the Darker key...

Страница 44: ...r User mode 2 Select U2 3 Press the Exposure Mode key to display d The table below shows the amount of correction based on the setting value Code Setting Value d0 0 mm d1 0 5 mm d2 1 0 mm d3 1 5 mm d4...

Страница 45: ...enter User mode 2 Select U6 3 Press the Exposure Mode key to display d The table below shows the amount of time based on the setting value Code Setting Value d0 Year month day 2004 05 15 d1 Month day...

Страница 46: ...ear default setting is displayed Each time the Darker key is pressed the Exposure Display scrolls upward to select the current setting mode in the following order Month Day Hours Minutes Each time the...

Страница 47: ...is turned on 3 Print Tray prints are output from the printer face down onto this tray which can hold up to 500 sheets of standard paper 4 Paper Guides slide the guides to secure the paper stack 5 Pape...

Страница 48: ...separate scanner units 13 imaging cartridge where the image is generated for transfer onto a sheet of paper Avoid touching it with your bare hands 14 Seal remove the seal before installing the new car...

Страница 49: ...nsive printer operations Care of the printer supplies When handling the printer supplies imaging cartridge paper etc avoid storing the supplies in any of the following places Any place subject to dire...

Страница 50: ...ft dry cloth A damp cloth and a mild home detergent can be used for heavier cleaning Replenishing the paper supply Use only the following types of paper Type Plain and recycled paper weight 60 to 90 g...

Страница 51: ...feeding tray 1 Open the paper feeding tray 2 Fan the paper stack thoroughly and align the edges 3 Load the paper stack face up in the tray and adjust the paper guides to secure the paper stack NOTE Ma...

Страница 52: ...Paper Lifting Plate until it locks Fan the paper stack thoroughly align the edges and place the paper in the cassette 3 Secure the paper stack in the paper cassette with the paper guides NOTE Make sur...

Страница 53: ...ing the Upper Unit Lock Release Lever forward 2 Remove the old imaging cartridge from the printer 3 Take a new imaging cartridge out of the box Holding it with both hands shake it well in the directio...

Страница 54: ...n to evenly distribute the toner inside 6 Slide the pins located on both sides of the imaging cartridge into the grooves of the printer as shown and gently push the imaging cartridge securely into pla...

Страница 55: ...scanner should be cleaned daily for optimal operating conditions Screen With a damp cloth clean and remove any dust or debris from the surface of the screen IMPORTANT Never use alcohol or any other so...

Страница 56: ...canner 1 With a damp cloth clean and remove any dust or debris from the surface of the carrier glass 2 To open the carrier glass pull out the handle of the microfiche holder Wipe the inner surfaces of...

Страница 57: ...n the stage of the job Once the system detects the projection lamp has burnt out the scan job will be cancelled If the system is operating in the Cycle Print mode the scanning operation will stop WARN...

Страница 58: ...wards Make sure the new projection lamp is inserted securely so there is no gap between the projection lamp and the lamp socket IMPORTANT Do not touch the reflector mirror surface of the projection la...

Страница 59: ...eptember 2004 5 5 7 Slide the projection unit back into the machine NOTE If the projection unit is not properly installed power will not be supplied and the machine will not operate 8 Turn the power s...

Страница 60: ...printer is not closed Make sure the cover is completely closed PE The printer is out of paper Load some paper into the paper cassette See Chapter 4 Printer Functions PC The scanner is connected to the...

Страница 61: ...otor malfunction Printer CA A Fan Motor malfunction C6 A Communication malfunction Printer Scanner Printer CL A Printer Clock malfunction Scanner PC CC A Communication malfunction PC Clearing misfeeds...

Страница 62: ...ging cartridge with a heavy cloth to protect it from light when it is removed from the printer 3 Remove the sheet s of paper that caused the misfeed from the paper feeding tray 4 Check that no misfed...

Страница 63: ...ver forward NOTE Push the paper cassette into before opening the upper unit 2 Remove the imaging cartridge NOTE Be sure to cover the imaging cartridge with a heavy cloth to protect it from light when...

Страница 64: ...the upper unit lock release lever forward NOTE Push the print tray in before opening the upper unit 2 Remove the imaging cartridge NOTE Be sure to cover the imaging cartridge with a heavy cloth to pr...

Страница 65: ...ou and out as shown NOTES Since the toner has not yet been fixed onto the sheet of paper be careful not to soil you hands or clothes when pulling out the misfed sheet Do not remove the misfed paper by...

Страница 66: ...ng out Replace the imaging cartridge with a new one Dark image B B B B B C C C C C D D D D D E E E E E F F F F F A A A A A Print density is not properly set Change the print density setting as necessa...

Страница 67: ...tion 7 5x 9x 16x 13x 27x 23x 50x Image rotation Motorized Image Rotation Print size 8 x 11 A4 crosswise 11 x 17 A3 lengthwise 8 x 11 A4 lengthwise 8 x 14 B4 lengthwise Power consumption 350 W Dimensio...

Страница 68: ...e 8 x 11 A4 lengthwise 8 x 14 B4 lengthwise Print speed 20 sheets per minute 8 x 11 or A4 crosswise First print time 13 seconds 8 x 11 or A4 crosswise Warm up time Less than 50 seconds Multiple printi...

Страница 69: ...ction Default Description Auto reset Enabled Disabled Enabled Setting changes made to the control panel that are not used within 60 seconds of being input are automatically cancelled and the system re...

Страница 70: ...7 The print function at the time of Toner Empty detection PR mode only Disable Print Enable Print Disable Print After a toner empty condition is detected this function allows you to select either to s...

Страница 71: ...rtment name floor number machine location etc K Mainframe and or Printer model name serial number condition or system s indication s on the display etc For your reference purposes Kodak 2400DSV E Scan...

Страница 72: ...Kodak problems due to failure of Customer to conform to Kodak s site specifications service or parts to correct problems resulting from the use of attachments accessories or alterations not marketed...

Страница 73: ...316 9 04 CAT No 199 6768 Eastman Kodak Company 2004 EASTMAN KODAK COMPANY Document Imaging Rochester New York 14650 Kodak is a trademark of Eastman Kodak Company Printed on recycled paper DOCUMENT IMA...

Отзывы: