


Mars PRO Series NVR
9
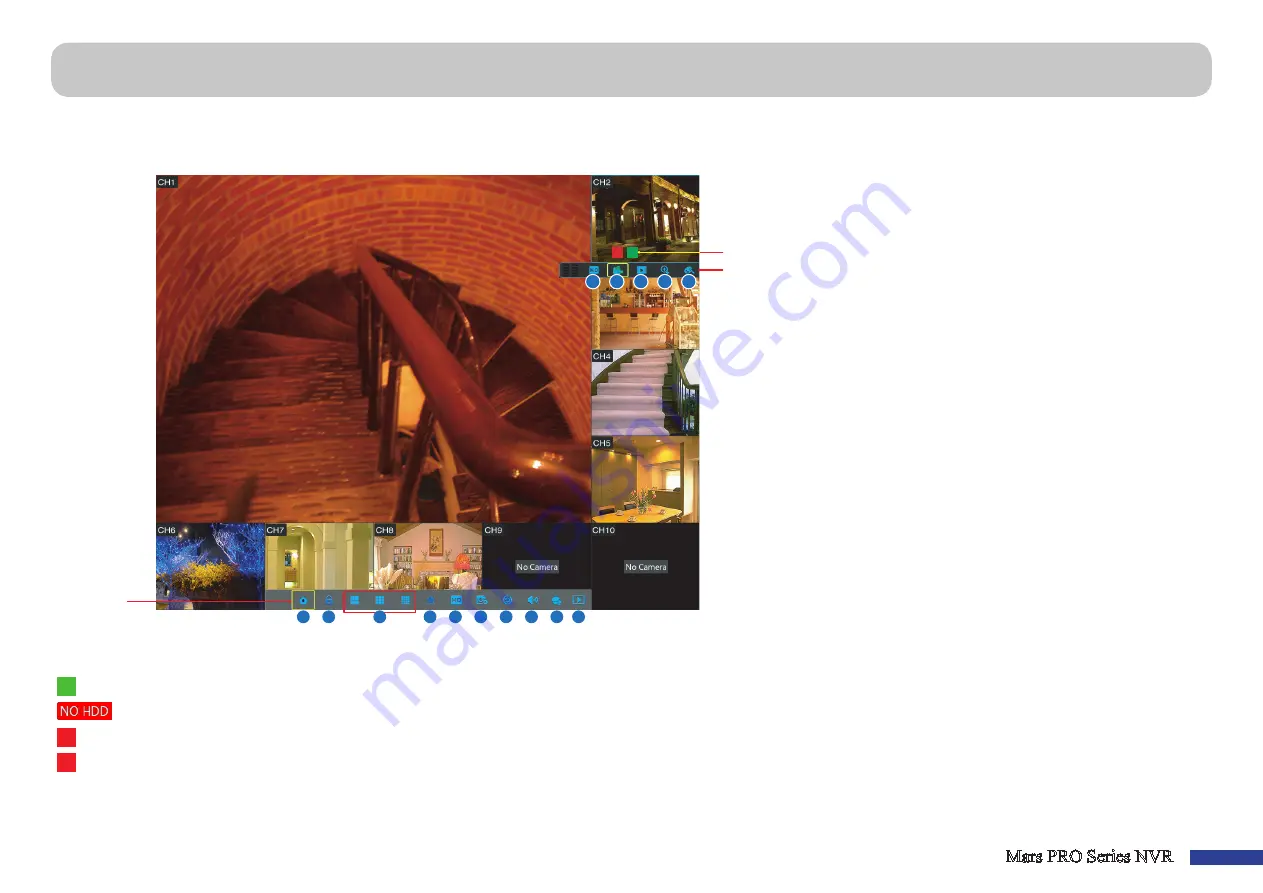
First screen you see after going through or skipping the Startup Wizard. On this screen, you see the live views from all connected cameras.
Status Icons
Menu Bar
R M
A
B
D
E
F
G
H
I
J
K
L
M
N
O
C
Status Icons
Menu bar
Quick Camera
Toolbar
A)
Click this to open the Main Menu.
B)
Click this to lock the screen.
C)
Click this to switch to different camera views.
D)
Click this to view more layout options.
E)
Click this to switch all channels to mainstream or
substream (for live view resolution).
F)
Click this to switch between realtime, balanced,
or smooth view. The view effect modes influence
only the displayed video quality by bit rate and
frame rate but do not influence the recording
quality.
G)
Click this to start viewing channels in a sequence
set in
Display: Output
on
.
H)
Click this to adjust the volume.
I)
Click this to start / stop cruise for a PTZ camera.
J)
Click this if you want to playback videos.
K)
Click this to switch all channels to mainstream or
substream (for live view resolution).
L)
Click to start recording the channel manually.
M)
Click to review the channel playback of the recent
5 minutes recording.
N)
Click to zoom in the channel.
M
The motion icon indicates that the NVR is detecting motion from the camera.
O)
Click to adjust the channel color settings.
The HDD icon indicates that the NVR cannot detect a HDD or the HDD is not formatted.
R
This indicates that the NVR is currently recording.
M
This icon appears when the camera has detected motion and triggers recording.
No Camera:
Camera is not connected to the NVR.
Live Viewing Screen


