


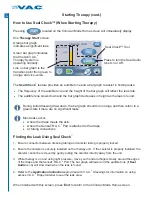


How to Use Seal Check™ (When Starting Therapy)
Finding the Leak Using Seal Check
™
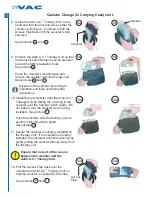
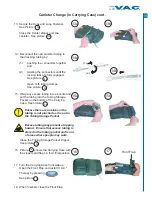
Starting Therapy (cont.)
Most leaks occur:
where the drape meets the skin.
where the SensaT.R.A.C. Pad is attached to the drape.
at tubing connections.
·
·
·
®
1. Ensure connector between dressing tubing and canister tubing is properly locked.
2. Ensure the canister is securely installed on the therapy unit. If the canister is properly installed, the
canister cannot be removed by gently pulling the canister directly away from the unit
3. While therapy is on and using light pressure, move your hand and fingers slowly around the edges
of the drape and the SensaT.R.A.C. Pad. The bar graph will lower and the audible tone (if
is on) will slow down when the leak is found.
4. Refer to the
provided with V.A.C. Dressings for information on using
excess V.A.C. Drape material to seal the leak area.
®
®
®
Seal
Audio
Application Instructions
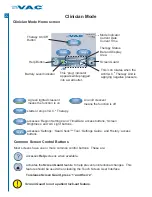
When finished with this screen, press ‘
’ to return to the Clinician Mode Home screen.
Exit
Therapy Start
About
Exit
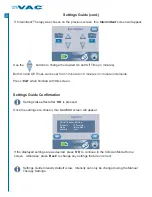
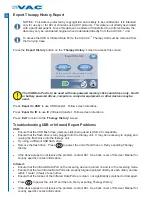
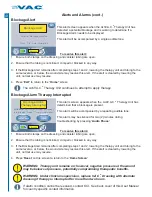
Leak Rate
Low
High
Seal Audio
Log
Orange bar graph
indicates a significant leak.
Green bar graph indicates
that the ActiV.A.C.
Therapy System is
operating normally.
®
Press to turn the Seal Audio
tone On or Off.
The
feature provides an audible tone and a bar graph to assist in finding leaks.
The frequency of the audible tone and the height of the bar graph will reflect the leak rate.
The audible tone slows down and the bar graph decreases in height as the leak is found.
Seal Check
™
·
·
During initial dressing draw down, the bar graph should turn orange and then return to a
green state if there are no significant leaks.
Seal Check™ Tool
Line on bar graph is the
transition point from green to
orange and vice-versa.
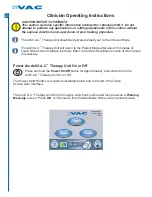
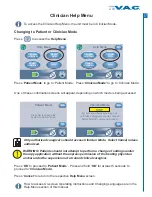
Pressing
located on the Clinician Mode Home screen will immediately display
this ‘
’ screen.
Therapy Start
On/Off
®
A
ctI
32


