– 6 –
(D)
(E)
(C)
(A)
(B)
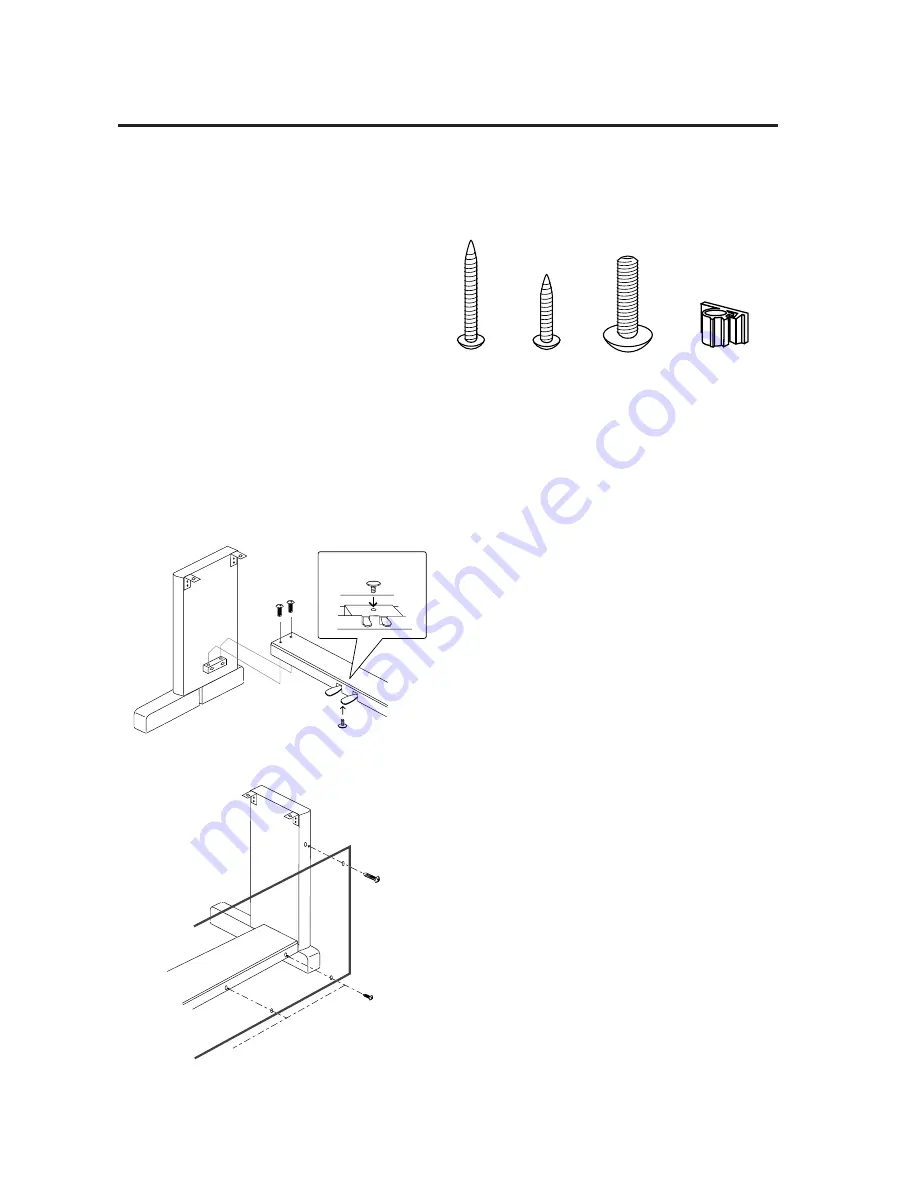
ASSEMBLING THE STAND
Be sure that all parts are included before starting to assemble your unit.
PARTS PROVIDED
Side Panel (A) . . . . . . . . 2 pcs.
Back Panel (B) . . . . . . . 1 pc.
Pedal Board (C) . . . . . . 1 pc.
Screw (D) . . . . . . . . . . . 2 pcs.
Screw (E) . . . . . . . . . . . 4 pcs.
Bolt (F) . . . . . . . . . . . . . 8 pcs.
Adjuster (G) . . . . . . . . . 1 pc.
Cord Clamp (H) . . . . . . 1 pc.
1. Insert the Adjuster (G) on the bottom of
Pedal Board (C). Fasten (A) and (C) with four
bolts (F).
2. Fasten Side Panel (A) and Back Panel (B)
with two screws (D). Then fix Back Panel
(B) to Pedal Board (C) with four screws (E).
(E)
(F)
(G)
(C)
(A)
Bottom View
(D)
(F)
(H)
Содержание CN290
Страница 1: ...DIGITAL PIANO CN290 OWNER S MANUAL...
Страница 24: ...CN290 Owner s Manual OM964E L0210 Printed in Japan...


