19
3.
Tap
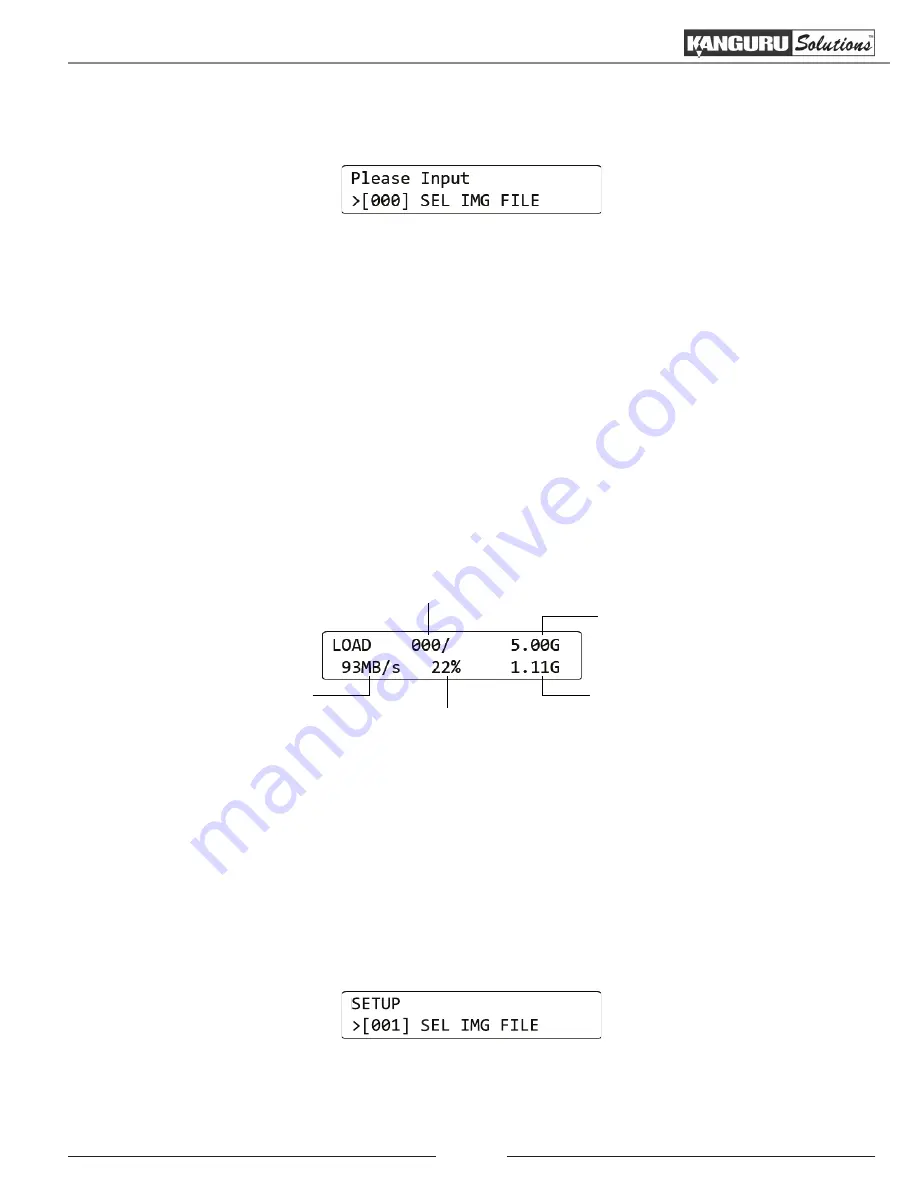
the ‘RUN’ button. The duplicator will initialize the disks and then ask you to input a name
for the image file. Up to 999 files can be stored in the Storage Center (depending on the capacity
of the hard drive).
a) The file name consists of three digits. The digit furthest to the right will be blinking, indicating
that it is currently selected.
Tap
the ‘RUN’ button to increase the digit by one.
b)
Tap
the ‘SET’ button to select the next digit to the left.
Tap
the ‘RUN’ button to increase the
digit by one. Repeat this step as necessary.
Note:
If your duplicator displays the error message, “TARGET NOT FORMATTED” then
the hard drive connected to the Source port has not been formatted as a Storage Center yet
(see section 5.2.1 Formatting a hard drive as a Storage Center on page 18).
4. When you have completed naming the image file,
hold
the ‘RUN’ button and the Load process
will begin.
Note:
If the image file name you enter already contains an image file previously loaded on the
Storage Center, the system will ask you to confirm overwriting the previously saved file.
Tap
the ‘RUN’ button to confirm or
tap
the ‘SET’ button to cancel.
Size of Source data
IMG file number
Percentage completed
Amount of data loaded
Data transfer rate
5. When the load process has completed you can remove the Master HDD.
5.2.3 Duplicating an image file stored on a Storage Center
Now that you have loaded an image file on the Storage Center, you can begin the copy process:
1. Make sure the Storage Center is connected to the Source port.
2. From the Main menu,
hold
the ‘SET’ button to enter the Setup menu.
3. From the Setup menu,
tap
the ‘SET’ button to navigate to the SEL IMG FILE option.
In the example above, file number 001 is currently selected.
(Continued on next page)
Duplicating From a Storage Center


